Before reading this article, you may want to read the general description of working with AJA cards with our playout applications.
About the differences between the cards models and firmwares
Depending on the card that you use, there will be some differences. but mainly in the naming of the outputs and inputs:
- The Kona 3G, Kona 4 and Io 4K when they have the 4K firmware loaded will show, in the "Video Output Device" playback popup menu, 4 different outputs available. They will be named from 1 to 4, corresponding to the 4 connectors of your card.
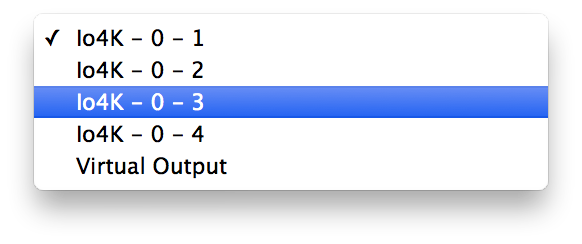
- The Kona 3G, Kona 4 and Io 4K when they have the Ufc firmware loaded as well as the Io XT will only show, in the "Video Output Device" playback popup menu, 2 different outputs available named from 1 to 2. Output number 1 will correspond to the connector number 3, and the output number 2 will correspond to connector number 4.
About connectors and outputs
In this article as there can be differences between cards and also for one card is a 4K or Ufc firmware is loaded, we won't talk about the name of the outputs, but rather about the physical connector on the card. The behaviour will be the same for those physical connectors whatever firmware is loaded.
Internal Key
As far as keying is concerned, the AJA card’s configuration is quite picky. Let's sum it up here.
Cabling the card
In all cases, you should cable your card like this for internal key:
- Connector n°1 = input of your first video signal on which you want to overlay graphics. The resulting video will be outputted on connector n°3
- Connector n°2 = input of your second video signal on which you want to overlay graphics. The resulting video will be outputted on connector n°4
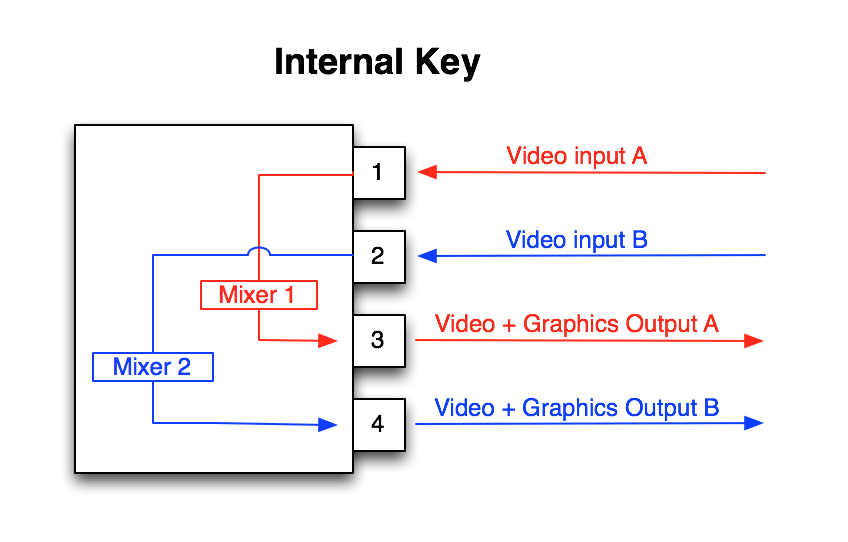
Configure the playback settings with the 4K firmware loaded :
If you want to use connector number 3 as output then
- Select the Output device “Io 4K - 0 - 3”. This corresponds to the connector n°3 on your AJA Io 4K card (the name will be different depending on the card you use).
- Pixel Format, choose “ARGB”
- Keying, choose “Internal”
- Click on “Apply"
- Then when you create a playlist, make sure that the button “KEY” on top right of the playlist is enabled.
Again, when using this connector number 3, we will overlay the graphics you play over the signal that gets in connector n°1.
If you want to use connector number 4 (together with input number 2), then select “Io 4K - 0 - 4” as your output device.
IMPORTANT NOTE!
The internal Keying mode will only be available if you select connectors number 3 or 4. If you select number 1 or 2, you will only have external key available.
Configure the playback setting with the Ufc firmware loaded or an Io XT :
The settings are roughly the same settings, except that connector number 3 will be now named “Io4KUfc - 0 - 1”, and connector number 4 is named “Io4KUfc - 0 - 1”. Here whatever output you select, you will always have the choice between External and Internal Key.
About the Audio Routing feature
In the Audio section you will see that there is an option called "Routing (Keying)" which will be enabled only if you select ARGB for the video pixel format and Keying to be "Internal":
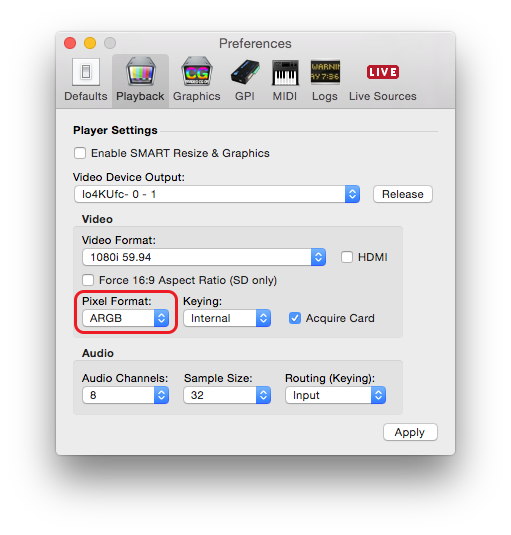
Once it's enabled, you will be able to set the Routing option to "Input" or "Player":
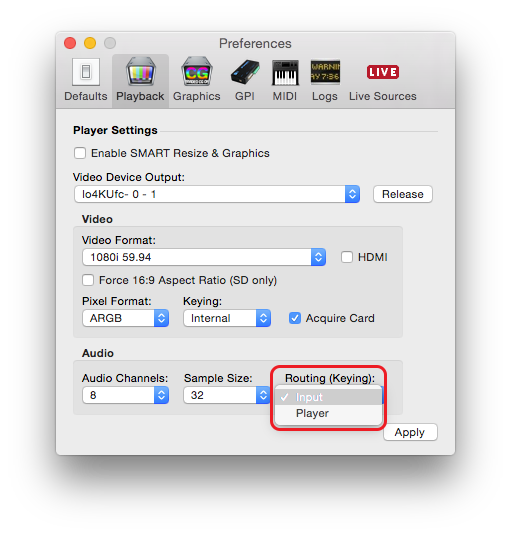
- Input = we will route the audio that comes in the video input associated with the output (see this article about internal keying), so you will hear the signal that gets in but won't hear the signal of the videos that you play
- player = you will hear the audio of the clips you play, but not the audio of the signal that gets in.
External Key
Cabling the card
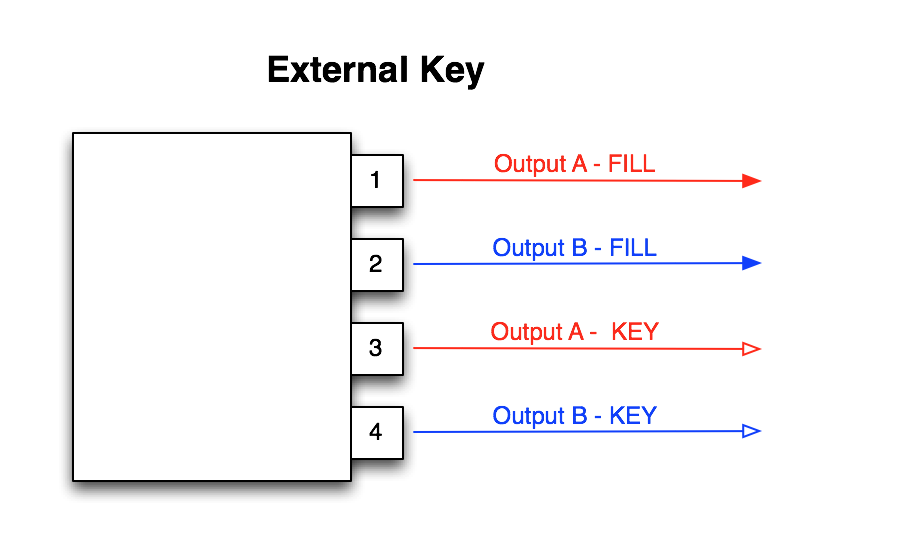
In all cases, you should cable your card like this for External key:
- Connector n°1 = Output of the "FILL" signal A
- Connector n°2 = Output of the "FILL" signal B
- Connector n°3 = Output of the "KEY" signal A
- Connector n°4 = Output of the "KEY" signal B
Configure the playback settings with the 4K firmware loaded :
If you want to use connectors number 1 as "fill" output, and connector number 3 as "key" output then
- Select the Output device "Io 4K - 0 - 1”. This corresponds to the connector n°1 on your AJA card.
- Pixel Format, choose “ARGB”
- Keying, choose “External”
- Click on “Apply"
- Then when you create a playlist, make sure that the button “KEY” on top right of the playlist is enabled.
If you want to use connector number 2 and 4 (as Fill & Key), then select “Io 4K - 0 - 2” as your output device.
IMPORTANT NOTE!
The External Keying mode will only be available if you select connectors number 1 or 2. If you select number 3 or 4, you will only have internal key available.
Configure the playback setting with the Ufc firmware loaded or an Io XT :
The settings are roughly the same settings, except that connector number 3 will be now named “Io4KUfc - 0 - 1”, and connector number 4 is named “Io4KUfc - 0 - 2”. Here whatever output you select, you will always have the choice between External and Internal Key, but of course you'll only be able to use one Fill & Key output.
Comments
0 comments
Please sign in to leave a comment.