In OnTheAir Node, there are 2 ways to have a failover redundant backup channel, so in case the main channel fails, you can broadcast from the other backup channel.
- in OnTheAir Manager only, send the same schedule to 2 different Nodes. This works only for OnTheAir Manager and not OnTheAir Live.
- setup one Node as the "Slave" of the other, "Master" Node. This will work for both OnTheAir Manager and OnTheAir Live.
The general idea is that you will have 2 computers with 2 Nodes playing at the same time the same signal. Then, either you:
- manually switch from one signal to the other
- use an automatic change over (such as the ones from Grassvalley or Evertz) to automatically switch from one signal to the other when it detects an issue.
Note that these setup will help you in case there are issues with:
- the computer
- the video device
- other hardware issue
- issue with the storage (provided you read the media from different storage on the 2 different Nodes)
But this won't be of any help in case you:
- read from the same shared storage and have an issue with the storage
- have an issue with one of the file that can not be played
For this reason, instead of having one Node playing back the exact same files, some users prefer to have the other Node playing something completely different, which may not be what was intended to be aired a that time, but at lease it won't be a black screen and you will have still time to send a new signal on air if needed.
If you want to read more about the possible setup, check this article.
Setup the Media Folders in OnTheAir Node
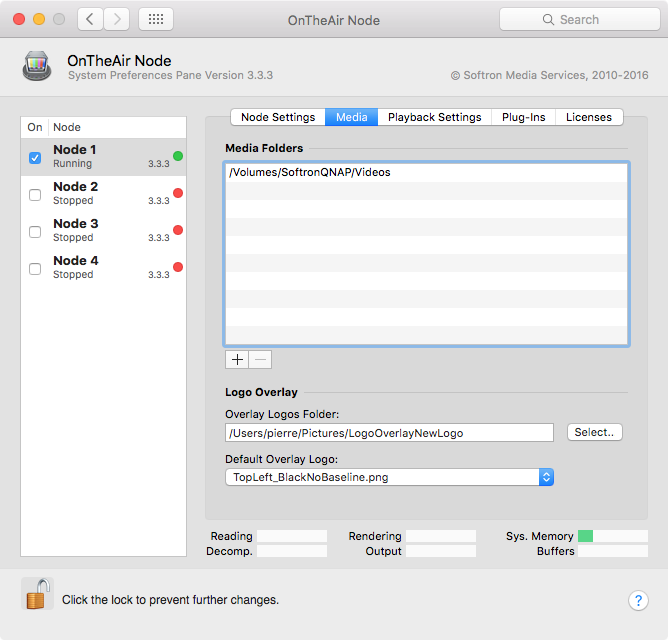
Whatever option you choose, you will need to setup the Media Folders in OnTheAir Node so each Node have access to the same media. It is best to use the same path. Even if each Node use its own storage, you should name the Volume the same way and use the same folder structure to organise your media.
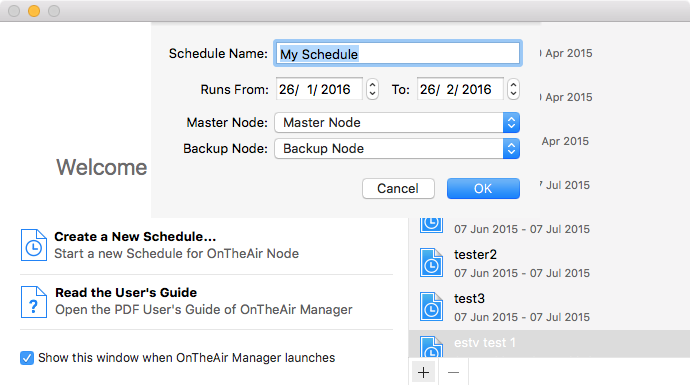
OnTheAir Manager : Send a schedule to 2 Nodes
For this setup, there is nothing specific to setup in OnTheAir Node, just make sure to have the 2 Nodes running and enabled in the preferences of OnTheAir Manager. Then when you create a new schedule, you will be able to select a Master Node and a Backup Node.
Once created you will be able to select either the Master Node or the Backup Node at the to right of the user interface.
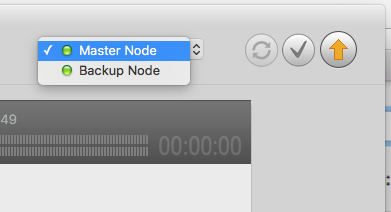
When you select a Node there, it has 2 implications:
- the status (online/offline or valid/invalid) of the clips in both the media browser and the playlists themselves is updated considering the selected Node. So when you click on the "Validate schedule" icon, you can ensure that all the files are online and valid on the 2 different Nodes. This is particularly important the Nodes read their files from different storage. It is less useful if they read from the same shared storage.
- when you click on the "Send Schedule" arrow to send the schedule to the Node, or any of the playback controls (pause, skip to next,...) it will only be sent to the selected Node.
The downside of this is that:
- you have to send the schedule twice (to the Master and to the Slave), every time you do a modification
- if you use one of the playback controls to pause, or skip to next, you will do that on one node at a time, which can thus create an offset between the 2 Nodes
Setup a "Slave" Node
With the "Slave" Node the advantages are that:
- this works also with OnTheAir Live
- in OnTheAir Manager, if you do a skip to next, a pause, or do a modification of your schedule, it only needs to be done once, and the slave Node will just mimic what the other Node is doing.
First, on the "Slave" Node, you need to configure the IP address and port number of the Master Node:
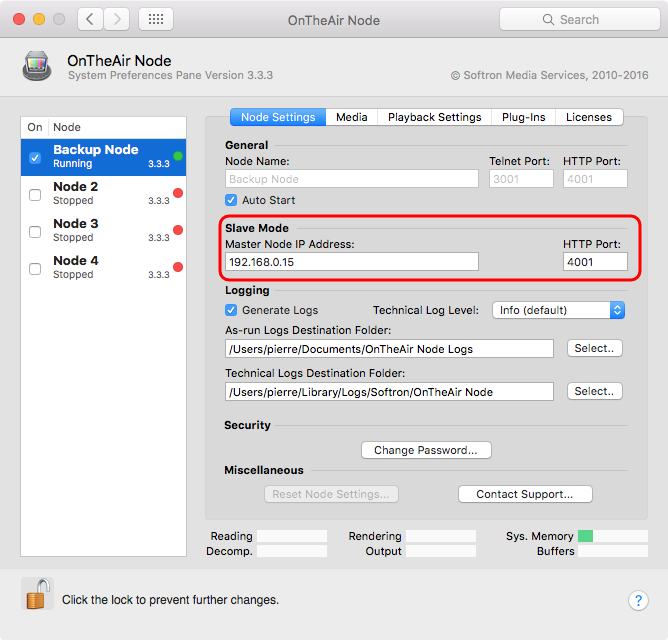
Note that:
- by default a Node 1 uses port 4001, Node 2 uses 4002, etc...
- it is the Slave node that we configure as it is the one who will connect to the Master Node to mimic what it will do. There is nothing to setup on the Master Node.
- Once the slave Node is configured you still have to enable the slave mode for that Node. There are a few ways to do that. Unfortunately there is no way to do it from OnTheAir Manager yet as this feature was mainly developed for OnTheAir Live.
Enable the slave mode with OnTheAir Live
This is the easiest way.
- Start OnTheAir Live
- Select the Slave Node from the popup menu at the top left of the playlist
- Unlock the Node by clicking on the "Unlock" icon
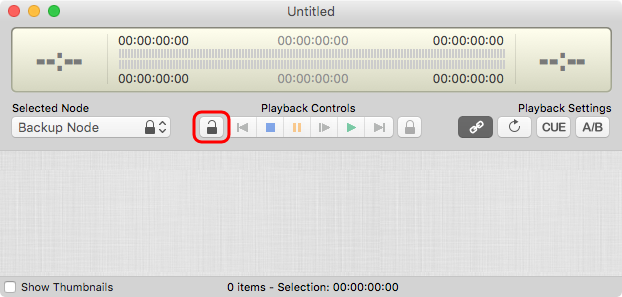
- Type the password for that Node to authenticate
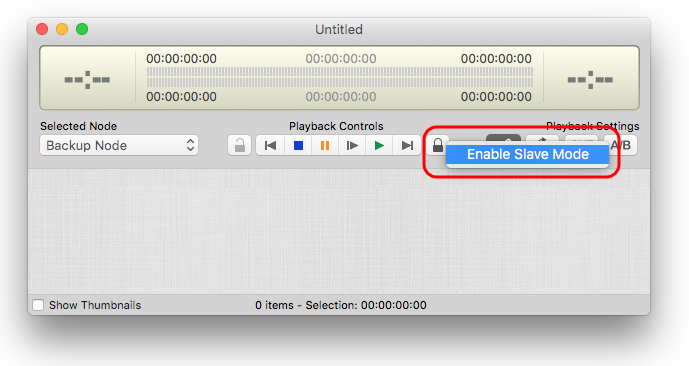
- Then "right-click" (or ctrl + click) on the "Lock" icon and select "Enable Slave Mode"
- Once the slave mode is enabled, you should see a "S" to the right of the Node name in the selected Node popup menu:
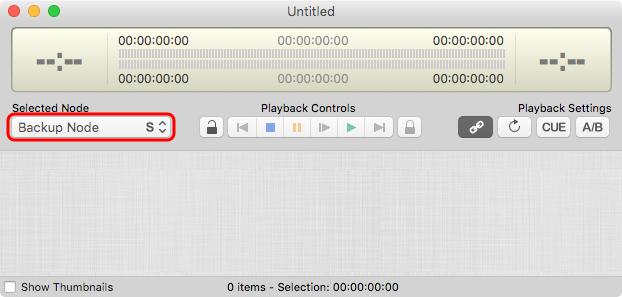
That's it the Node is now in slave mode.
IMPORTANT NOTE: The slave Node will only start playing when new playback controls are received by the Master node. You have to do an operation (play, stop, skip to next, send schedule...) on the Master Node for the slave node to receive the playlist or schedule and start playing.
Disable the slave Mode with OnTheAir Live
To disable the slave mode with OnTheAir Live, just click on the "unlock" icon.

As soon as you do that, you should see the following window:
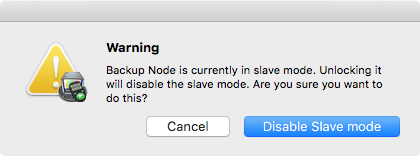
Just confirm that you want to disable it.
Enable/Disable the slave mode with the REST API or Telnet
It is also possible to enable/disable the slave mode using either the REST API or the Telnet protocol. This requires you to know how to sent REST requests or to use Terminal. Please send us an email or contact us on the support desk to know how to do that.
What happens when the "Master Node" fails?
If the "Master Node" fails, then the "Slave" Node will simply continue playing what it has to play. It won't receive anymore instructions from the "Master Node", but it still has either a playlist or schedule to play. So in OnTheAir Live or OnTheAir Manager, you will have to select the "Slave" Node and start interacting with it instead of with the Master Node, it will stop being a "Slave" Node at that moment.
When the "Master" Node will come back online, you will have to enable again the Slave mode on the Slave Node.
What could be the cause of an offset between the 2 Nodes
Even if you enable the slave mode, there could be cases where there is an offset between the 2 Nodes:
- if the 2 computers have a different clock (this may sometimes be set voluntarily by the user so for example one Node plays one hour ahead of time). You can increase accuracy by making sure to use the same NTP
- if the 2 video devices are not genlocked. Indeed, even if the 2 Mac Clocks use the same NTP, the Mac Clock is only used at the start of each event, but then what drives the timing is the rhythm at which the video devices output the video frames. If the devices are genlocked the 2 outputs should remain in sync afterwards. If the devices are not genlocked, then the 2 outputs may drift a little over time, until the next event starts.
- if the 2 Nodes are not in slave mode and
- you did a pause, skip to next, etc... on one Node but not the other
- you modified the schedule, but sent it only to one Node
- if you read from a different hard drive and one file is online on one Node but offline on the other, as the node will continue playing the next clip, there will be an offset.
Comments
0 comments
Please sign in to leave a comment.