One of the nice things with OnTheAir Node is that it is very easy to control OnTheAir CG Server to start and stop projects to overlay dynamic graphics on top of video.
Note that if you were using OnTheAir CG 1, the workflow is completely different and requires a different plugin.
Configure OnTheAir Node and OnTheAir CG outputs
First make sure that you have properly configured the playback settings of OnTheAir Node or OnTheAir CG. There are 2 ways of cabling the video outputs:
- Using 2 cards: one card to output video with OnTheAir Node and the other card that will overlay the graphics on top of video with OnTheAir CG. This later card must have the ability to key. You can either key on the card itself with Internal Key, or use external Key (if supported by the card). Some users prefer this configuration so the key is done externally and things are well separated.
- Using 1 card: in that configuration, you will setup OnTheAir Node to use a "Virtual Output", and OnTheAir CG will then be configured on the same Mac with the "Direct Link", the same way as explained in the video with MovieRecorder. This configuration is much simpler, as you only need one video card, and this card does not even need to have the ability to key. But it also means that everything happens on the same Mac.
These 2 type of configurations are explained in this article.
Start OnTheAir CG Server and add projects
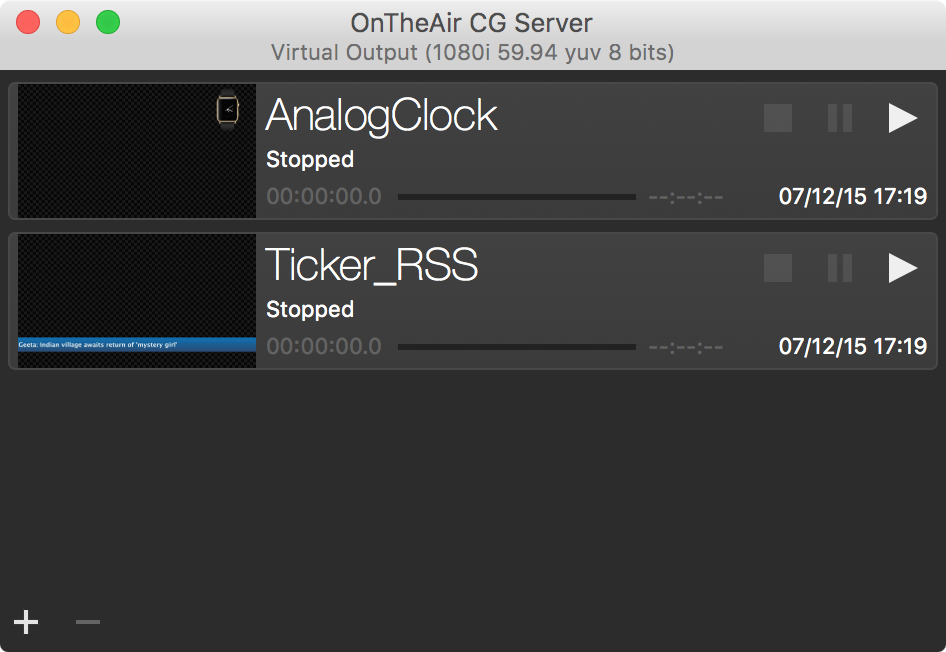
OnTheAir Node will communicate with OnTheAir CG Server and will list all the projects opened in OnTheAir CG Server. It won't be able to open projects, so you will need to make sure that all the required projects are opened in OnTheAir CG Server at all times. In the screenshot below, we have 2 projects opened in OnTheAir CG Server. Ready to be triggered by OnTheAir Node.
Check the preferences of OnTheAir CG Server
In the OnTheAir CG Server preferences, select the "General" tab:
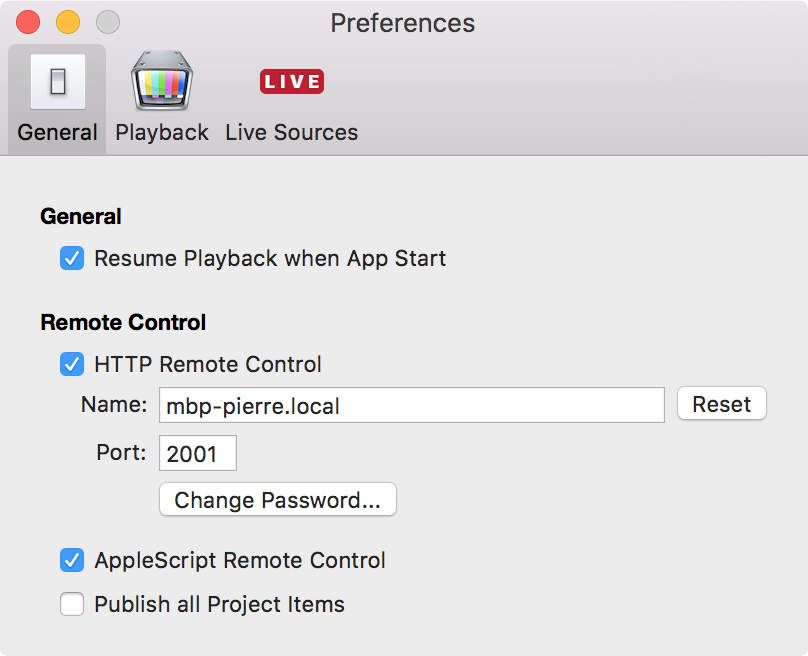
Then make sure to check the following options:
- Resume Playback when App Start: enable it so that in case the application quits, it will resume the project that were already playing. Note that you may also want to disabled that option as it is likely that the CG Server will start again at a different time, while other projects are supposed to be running. Note that OnTheAir Node will only control CG Server at each change of clip.
- HTTP Remote Control: if it is disabled, the OnTheAir Node CG3 Plugin will not be able to communicate with OnTheAir CG Server
- Port: Set the port number you want to communicate on. Leave it to the default 2001 if you do not know what to set here
- Change Password: the default password is 1234
Configure the OnTheAir Node CG3 Plugin
Now you will have to go to the "System Preference > OnTheAir Node > Plugins", and select OnTheAir CG 3:
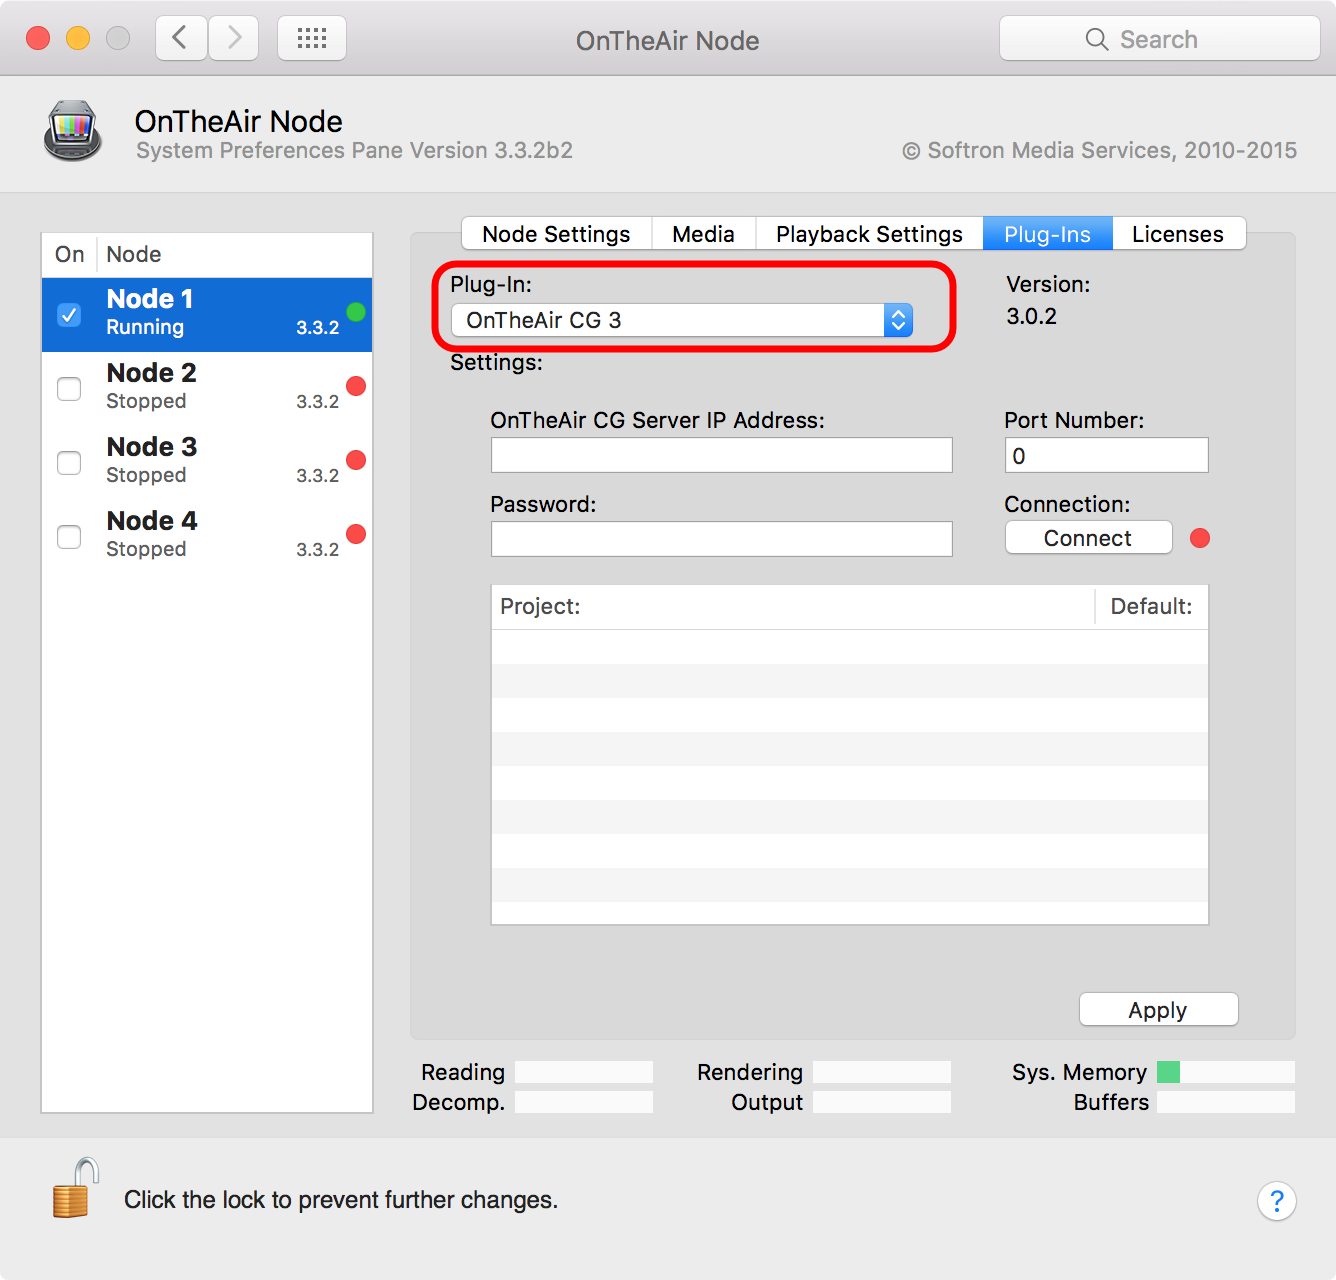
Once it is selected, just configure the following fields:
- OnTheAir CG Server IP Address: the IP address of the computer where OnTheAir CG Server is running. If it's on the same computer, you can use the local IP address 127.0.0.1
- Port Number: the port number that has been configured in the OnTheAir CG Server preferences (see above)
- Password: the password that has also been configured in the OnTheAir CG Server preferences.
Once configured, click on "Connect" and then "Apply". If everything has been entered correctly, you should see in the list below the list of projects that were opened in OnTheAir CG Server.
Define the default status of the project
In the list of projects, you can enable or disable a checkbox to define wether the project is either:
- running by default (checkbox enabled)
- NOT running by default (checkbox disabled)
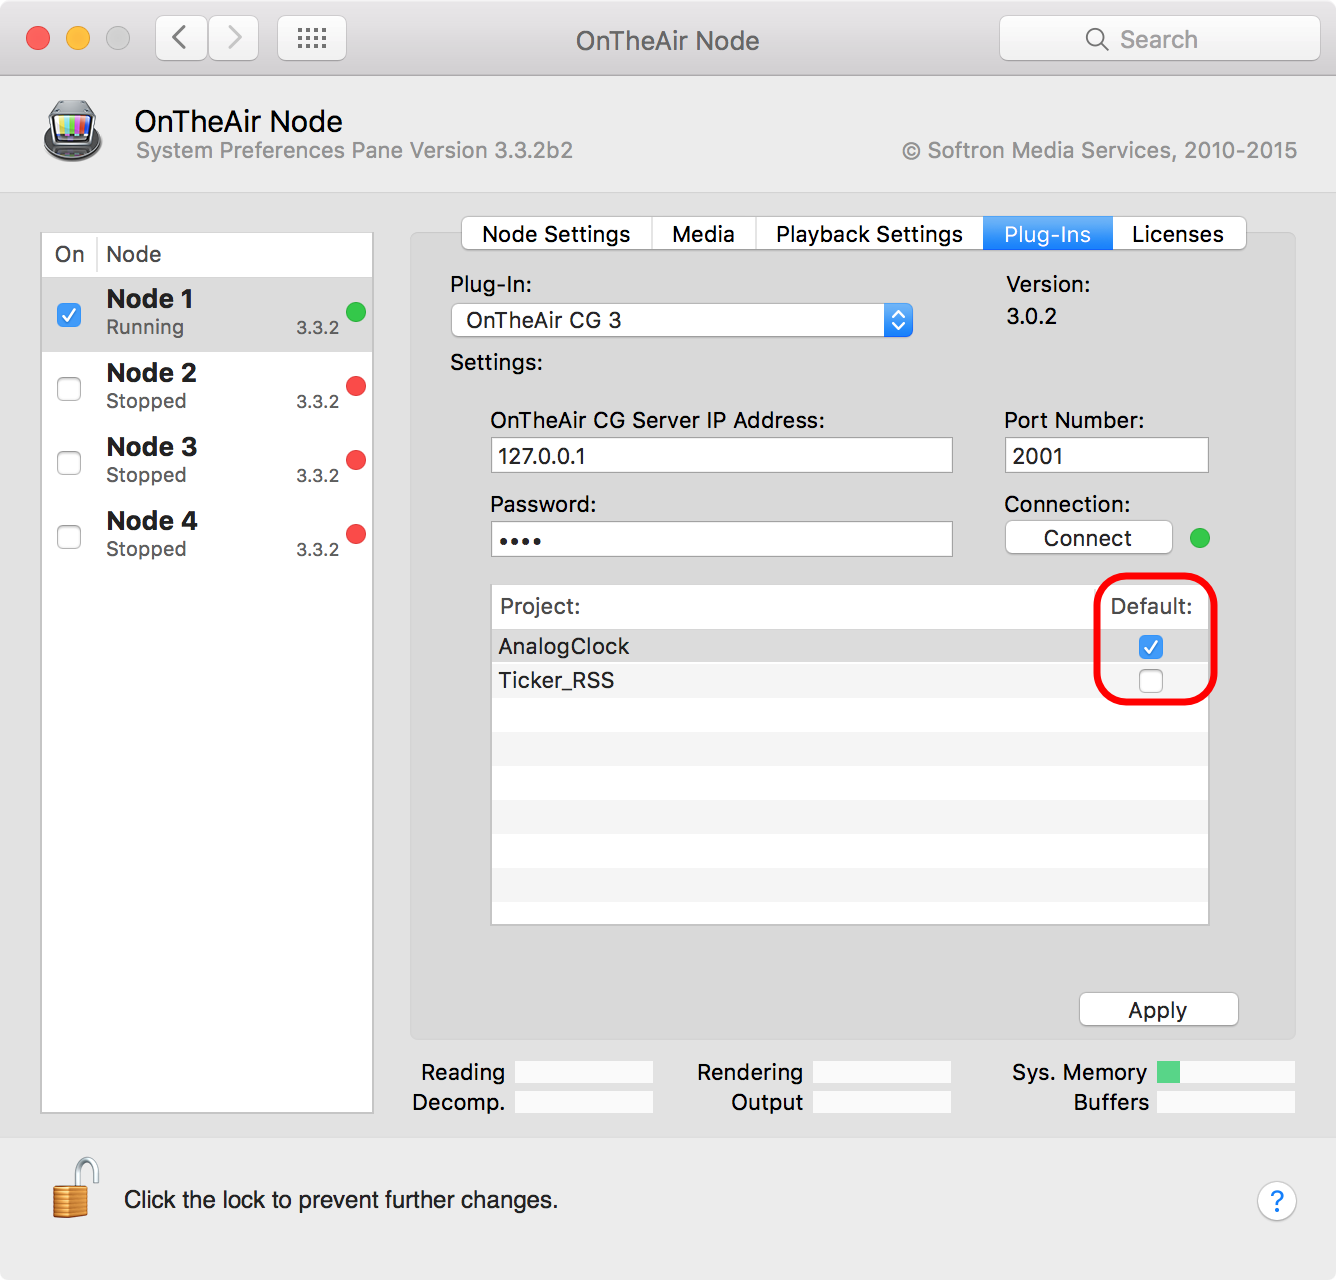
This is quite important. In the example above, we may want to have the Analog clock running by default because it will be running most of the times. So I will only have to disabled it on the specific clips where it won't run.
But for my Ticker_RSS project, I want it to run only on specific clips, so by default it will be stopped.
Modify the attributes in OnTheAir Live or OnTheAir Manager
Now if you select a clip in either OnTheAir Live or OnTheAir Manager, open the "Inspector > Attributes", you will see the 2 projects with the default status of each.
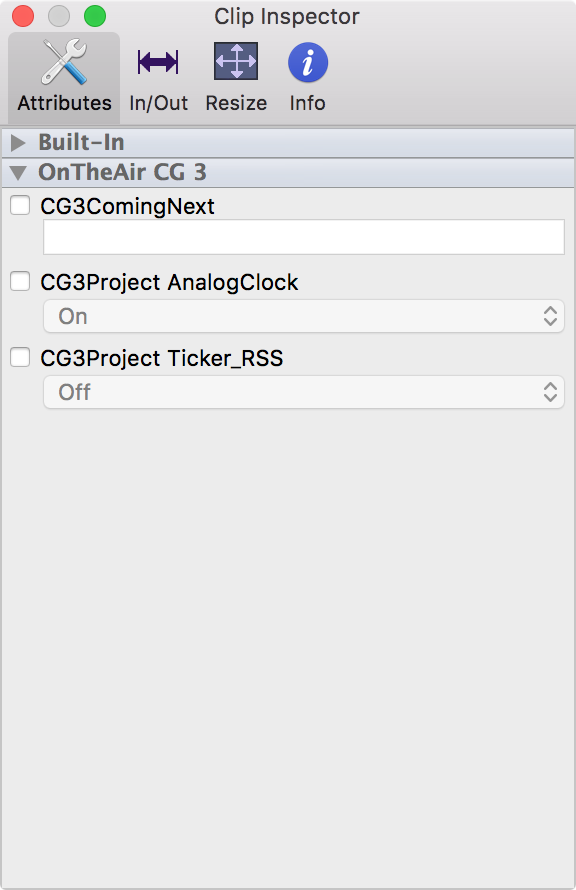
You can then enable the checkbox to start or stop the project for the whole length of the clip.
Note that you can see here an additional attribute called "CG3ComingNext". This is explained in a separate article regarding coming next.
Working with Text variables
Until now, we have seen how to start and stop projects using Attributes in OnTheAir Live or OnTheAir Manager. But sometimes, you may want to create just one project, and depending on the use "just" edit some text in that project.
For that, when you create your project in OnTheAir CG Designer, and add a "Text" item, you will want to turn on the "Publish" option:
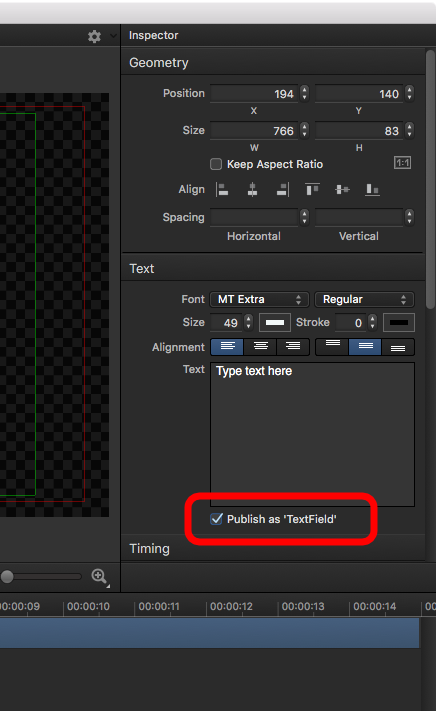
Note that it says "Publish as "TextField'. This corresponds to the name of the item created and this is what you will see in the OnTheAir Live or OnTheAir Manager attributes. You can change that name simply by clicking in the Timeline:
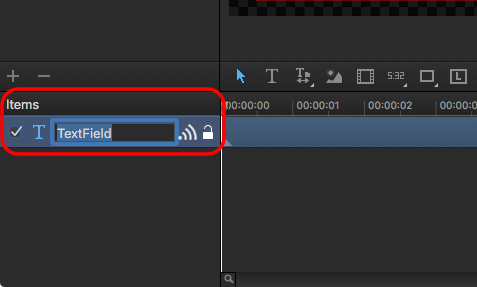
Now you can save this project. I'll call it "Text_Project", and then open it in OnTheAir CG Server.
As soon as it is opened in OnTheAir CG Server (and that OnTheAir Node is connected to OnTheAir CG Server), it will show up in the Attributes list of OnTheAir Live or OnTheAir Manager:
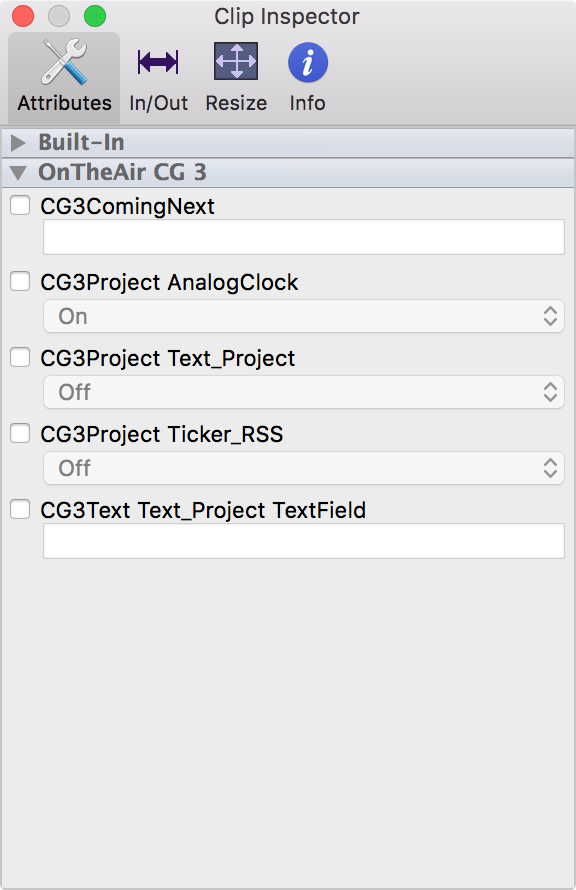
You can see that there are 2 more Attributes:
- the project in itself "Text_Project"
- and the "TextField" that I have published
You can now enter text to be updated when OnTheAir CG Server will play the project.
Publish & Unpublish projects
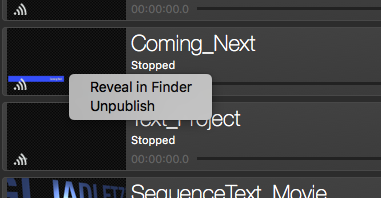
As you may have understood, all the projects that you place in OnTheAir CG Server are then controlled by OnTheAir Node. So every time a clip starts, it will set the project either in the default mode (on/off), or in the mode set in an attribute. But sometimes, you may want to have projects that the Node won't try to control and stop and start them every time a clip starts. For that we have added the ability to "unpublish" projects. In OnTheAir CG Server, right-click on a project and select "Unpublish".
Comments
0 comments
Please sign in to leave a comment.