OnTheAir Node can control most video routers. There are 2 main ways to do that:
- directly through a plugin in OnTheAir Node. This will be the case with the AJA Kumo and Blackmagic Videohub.
- if you use a different router, the control will be done through the application OnTheAir Switch (license required)
This article explains how to control the Videohub or AJA Kumo, for other routers controls, check here.
About the Kumo and Videohub plugins
In OnTheAir Node, there are "plugins" that allow you to control external devices such as GPICommander or OnTheAir CG, or video routers. The plugin for the AJA Kumo and Blackmagic Videohub are bundled in the installer of OnTheAir Node. You do not need to install anything else, nor to purchase an option.
OnTheAir Node should be able to control all models of Kumo or Videohub that are connected to a local computer in USB or in Ethernet. But it is worth checking with a demo version of OnTheAir Node to make sure that your specific model and configuration will work.
Configure OnTheAir Node
Note: in the example below, we are showing the configuration for the Blackmagic Videohub. The behaviour and setup will be the same with the AJA KUMO.
Once installed, you need to configure the plugin for each Node in the "Plug-Ins" tab. This means that each output Node can have its own settings.
Select the Blackmagic Videohub plugin
- Open the OnTheAir Node system preference pane,
- Select the Node you want to configure
- Click on the "Unlock" icon at the bottom, to allow the modification of settings, and enter a computer admin password
- Click on the "Plug-Ins" tab
- In the Plug-In drop down list, select "Blackmagic Videohub"
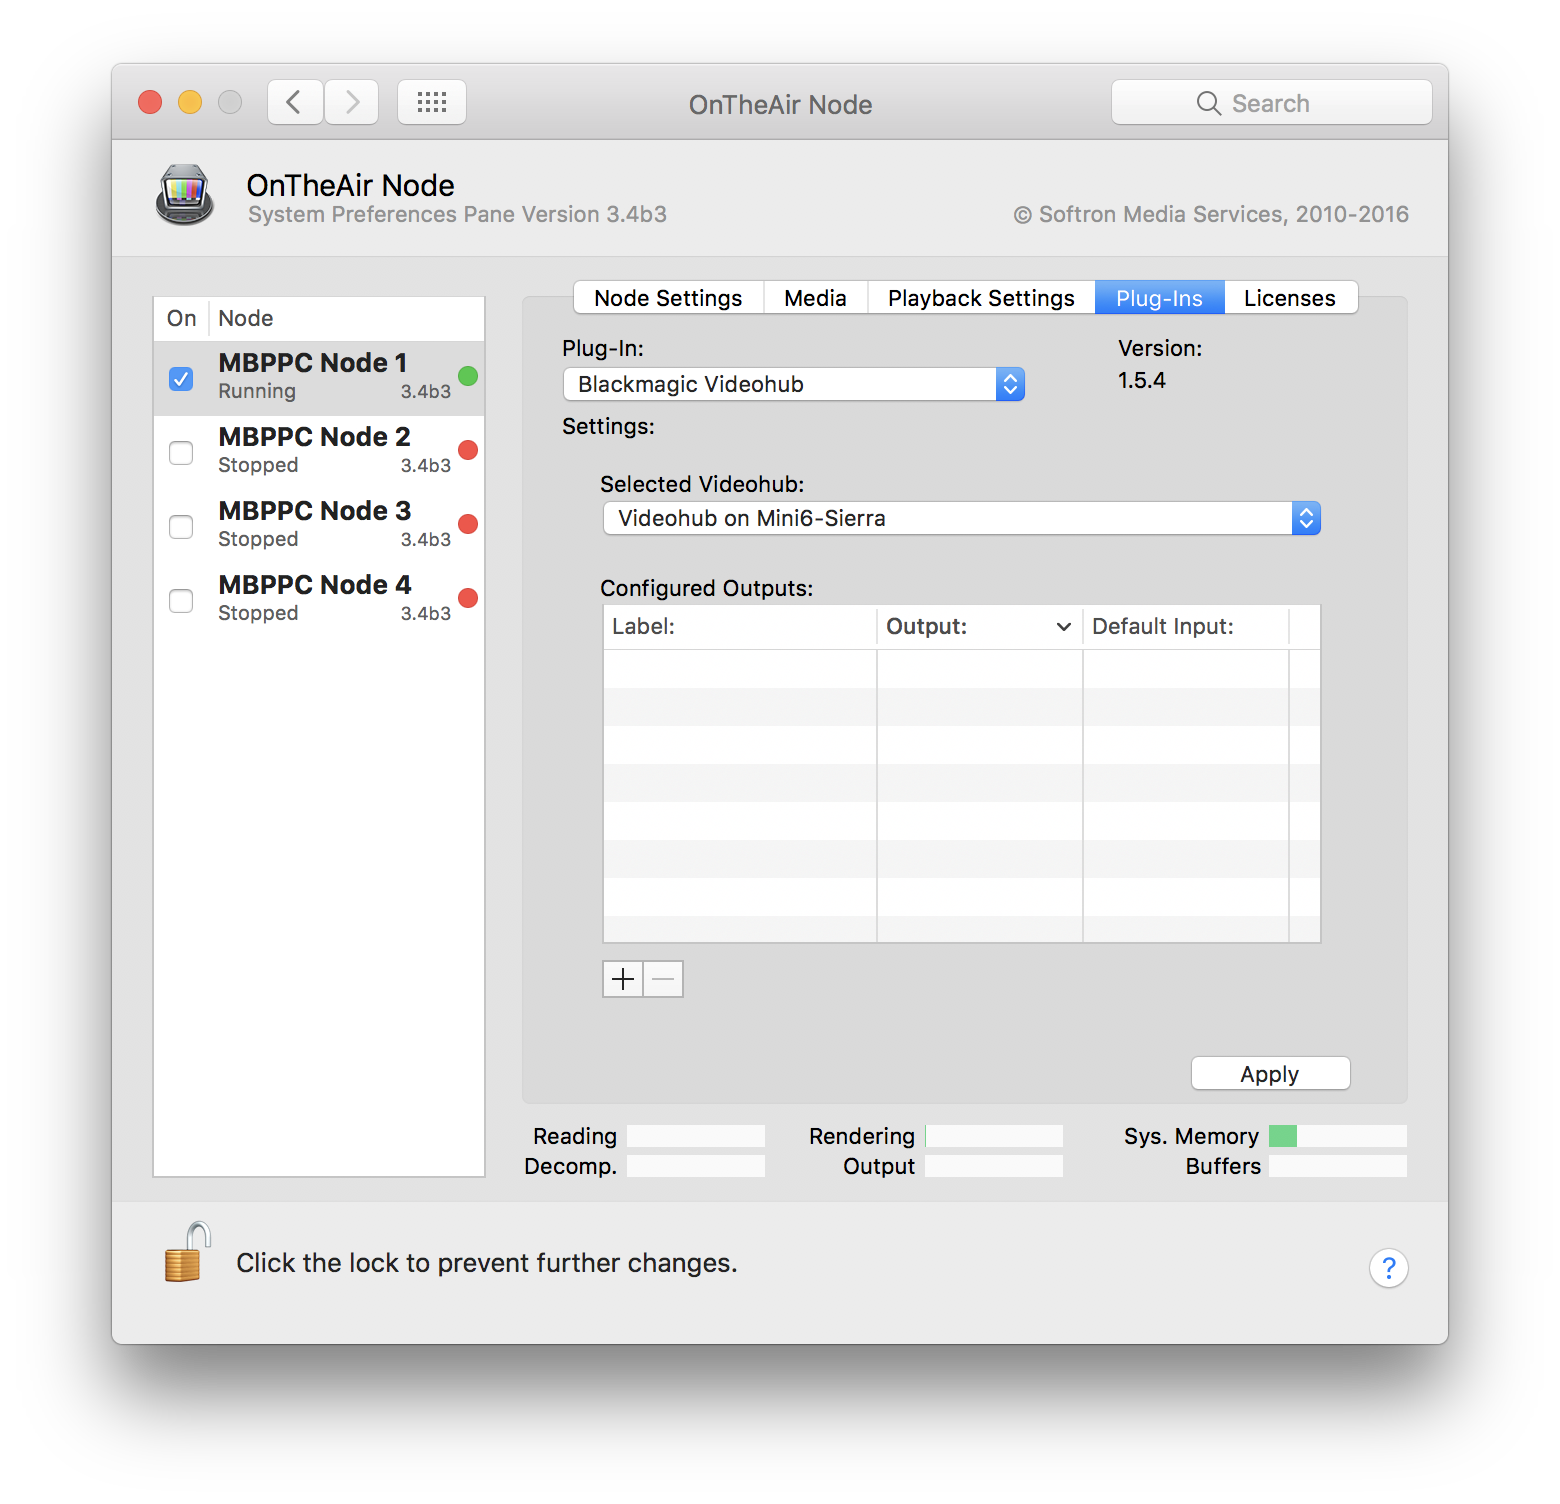
Select the Videohub you want to control
If you have a Videohub available in the local network, you'll be able to select it from the "Selected Videohub" drop-down menu.
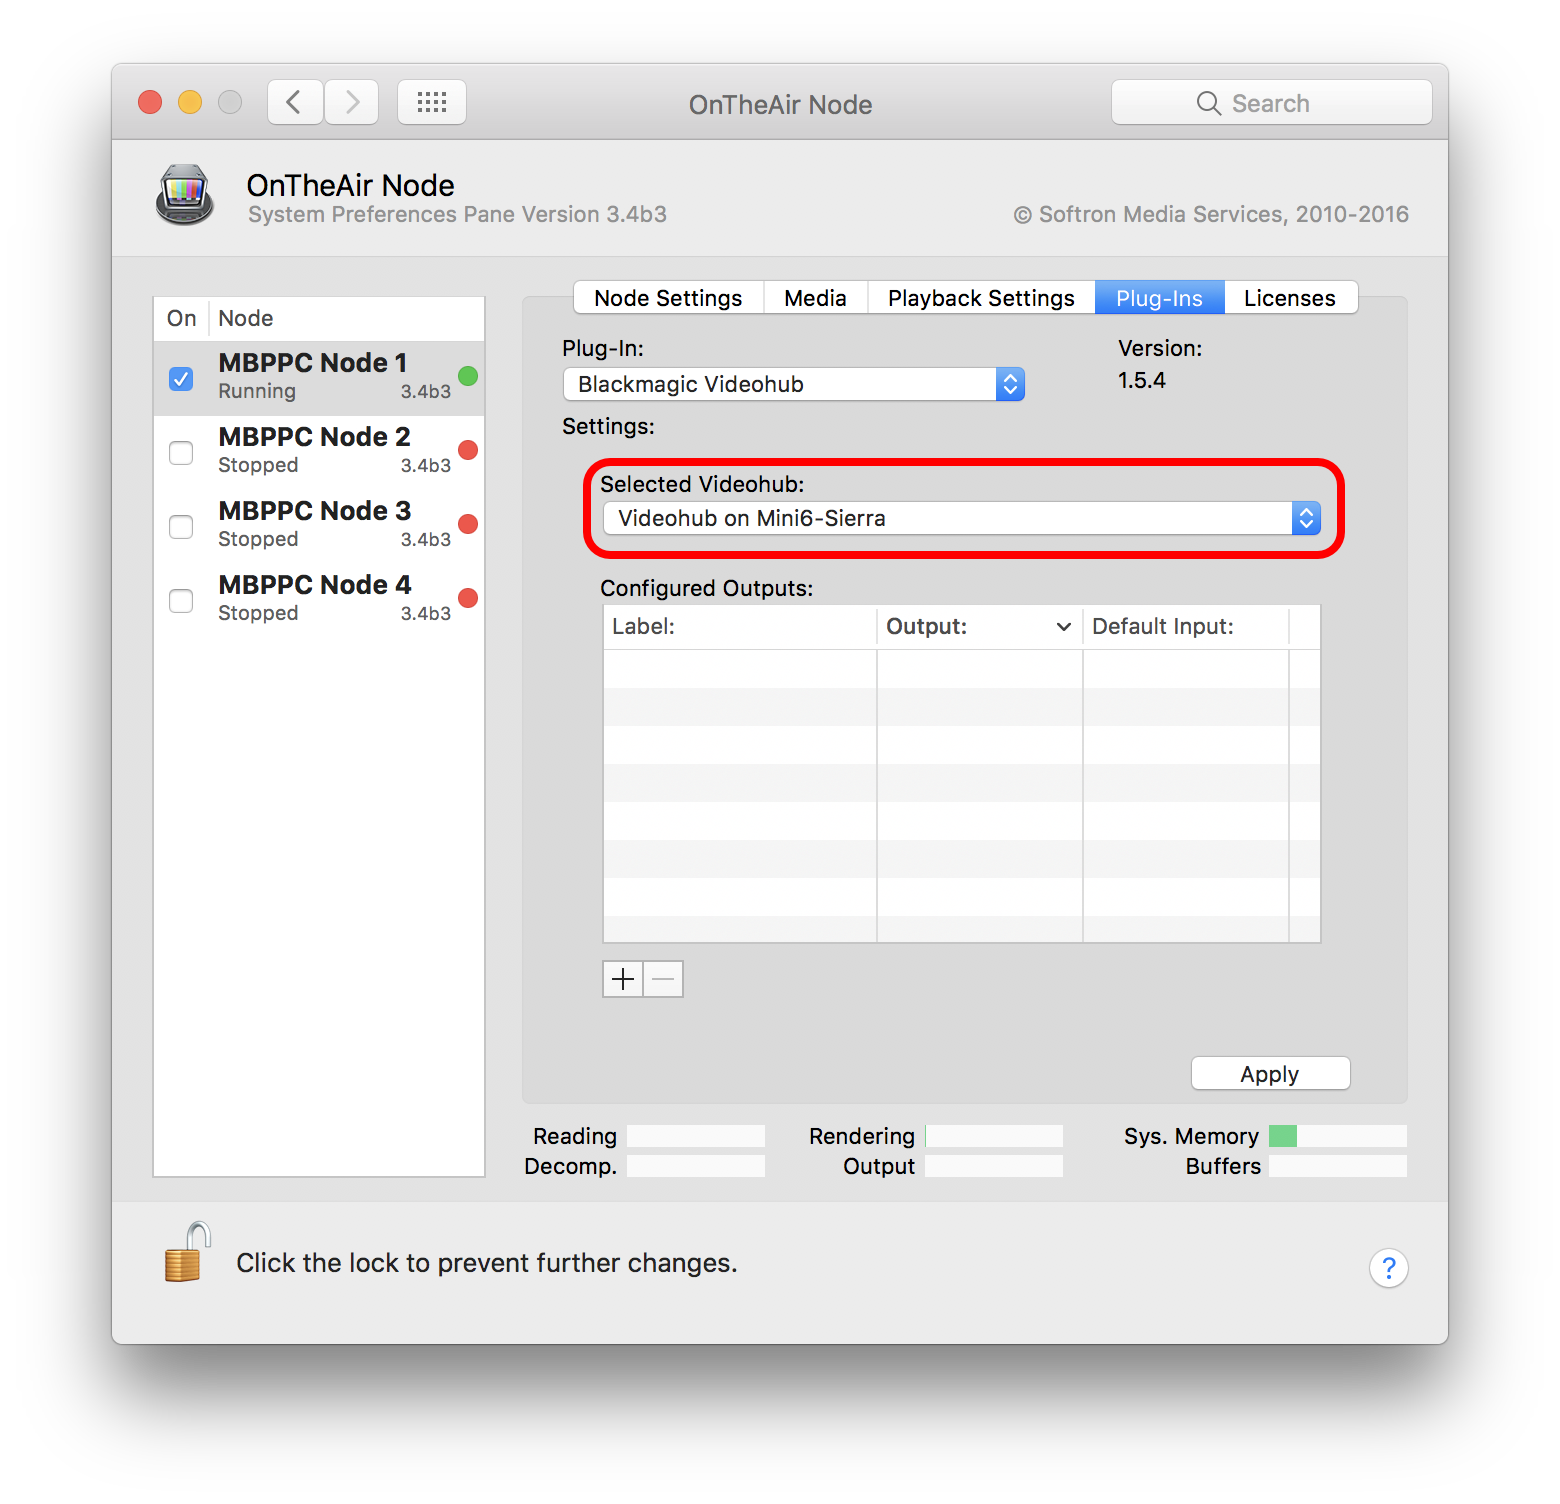
If you do not see your Blackmagic Videohub in the list:
- Check that your computer is in the same local network (Subnet) as the Videohub. OnTheAir Node finds any available Videohub through "Bonjour". And Bonjour only works in the same subnet. To check if your Videohub is listed in the Bonjour services, you can download a small utility application called "Bonjour Browser". When you start it, leave it a few seconds to scan your network and the videohub should show up in the list as shown in the screenshot below:
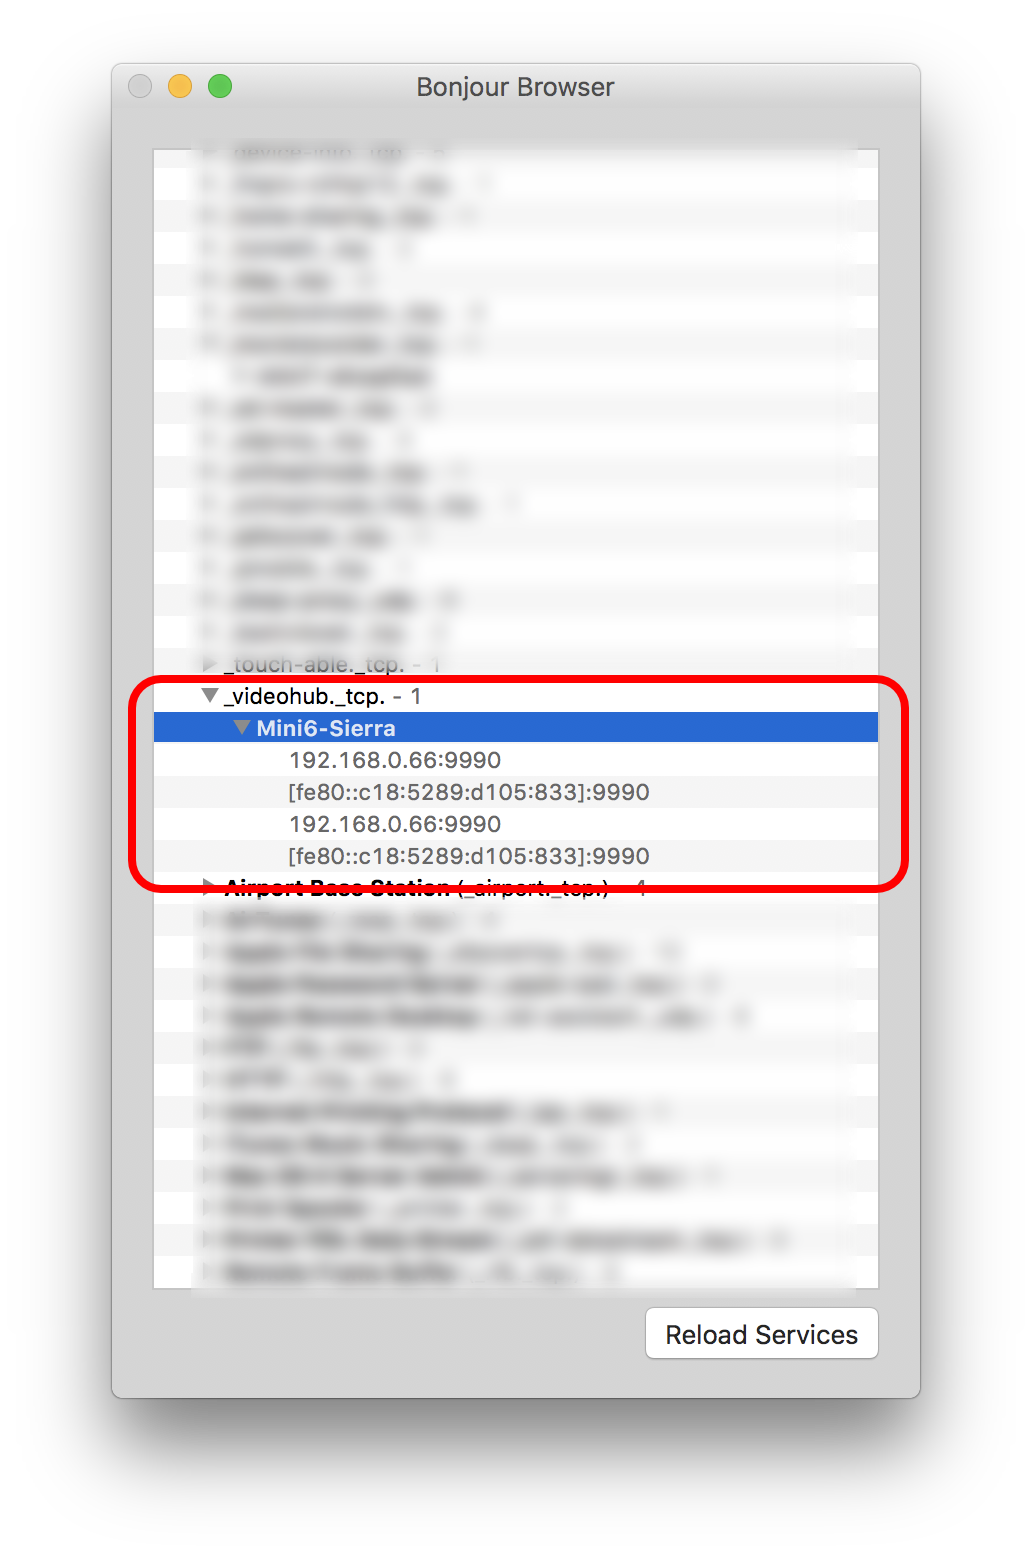
- If the Videohub does not show up in the Bonjour devices, you can try to reboot your Videohub as we have seen that from time to time, the Bonjour Service of the Videohub does not work anymore and a simple reboot fixes the issue. If you still can not see it, contact your system administrator or your Blackmagic-Design representative.
Configure the different outputs and inputs.
Then you will have to add each output you want to control (so users can only modify the ones they need).
- Click on the + icon at the bottom of the list to add an output. By default, the first output is added, with the first input as source.
- Set the Label : This is the name that will be shown either in OnTheAir Live or OnTheAir Node. Set it to something that will mean something for the user. Such as "Main Output" for your broadcast out, or "MovieRecorder Source" if this sets what signal is sent to a MovieRecorder.
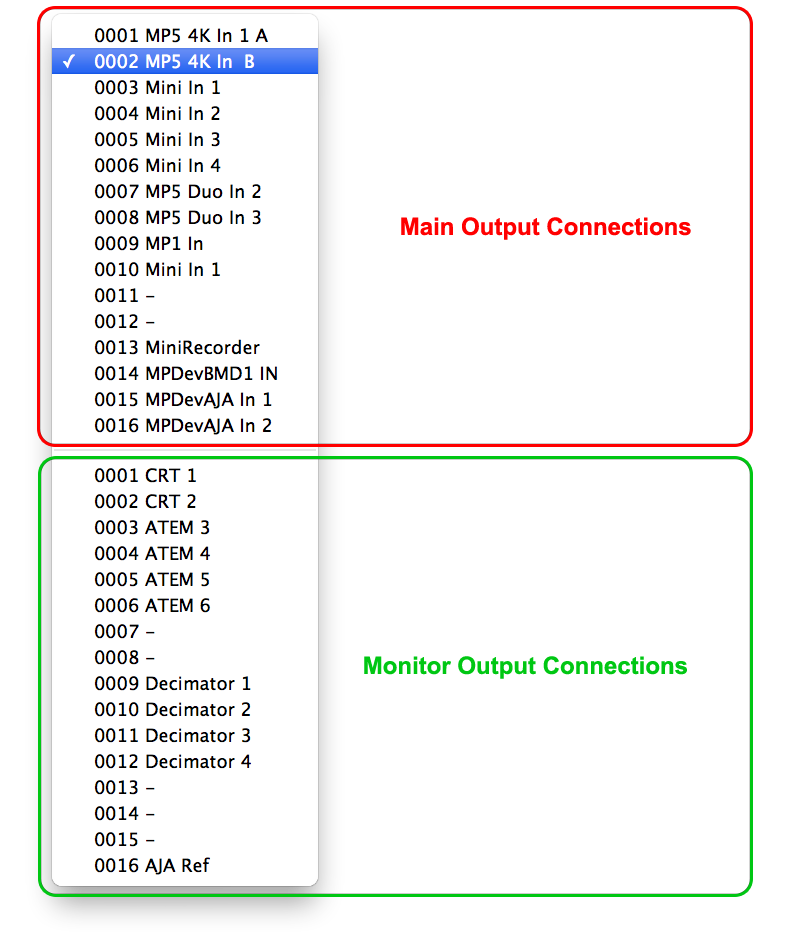
- Set the Output you want to control. Select which output you want to control on your Videohub. WARNING: only select the Outputs you want to control as OnTheAir Node will switch to the default input each time it starts playing a clip. Note that you can select both the "Main Output Connections" and the "Monitor Output Connection". There is a line in between the 2 different types of outputs. On top are the main outputs and at the bottom the Monitor outputs as shown in the screenshot below (note that you will have as many outputs as your Videohub has):
- And finally set the "Default Input". Every time OnTheAir Node starts playing a clip, it will set this video output to the Default Input, unless you have set it otherwise in OnTheAir Live or OnTheAir Manager attribute. For more info on Attributes, read this article.
IMPORTANT: Once you have set each output you want to use (and only the ones you want to use), remember to click on the "Apply" button. If you fail to do so, and click on another tab or select another plugin, you will loose all your changes, and there will be no warning.
Once configured, it will look something like this:
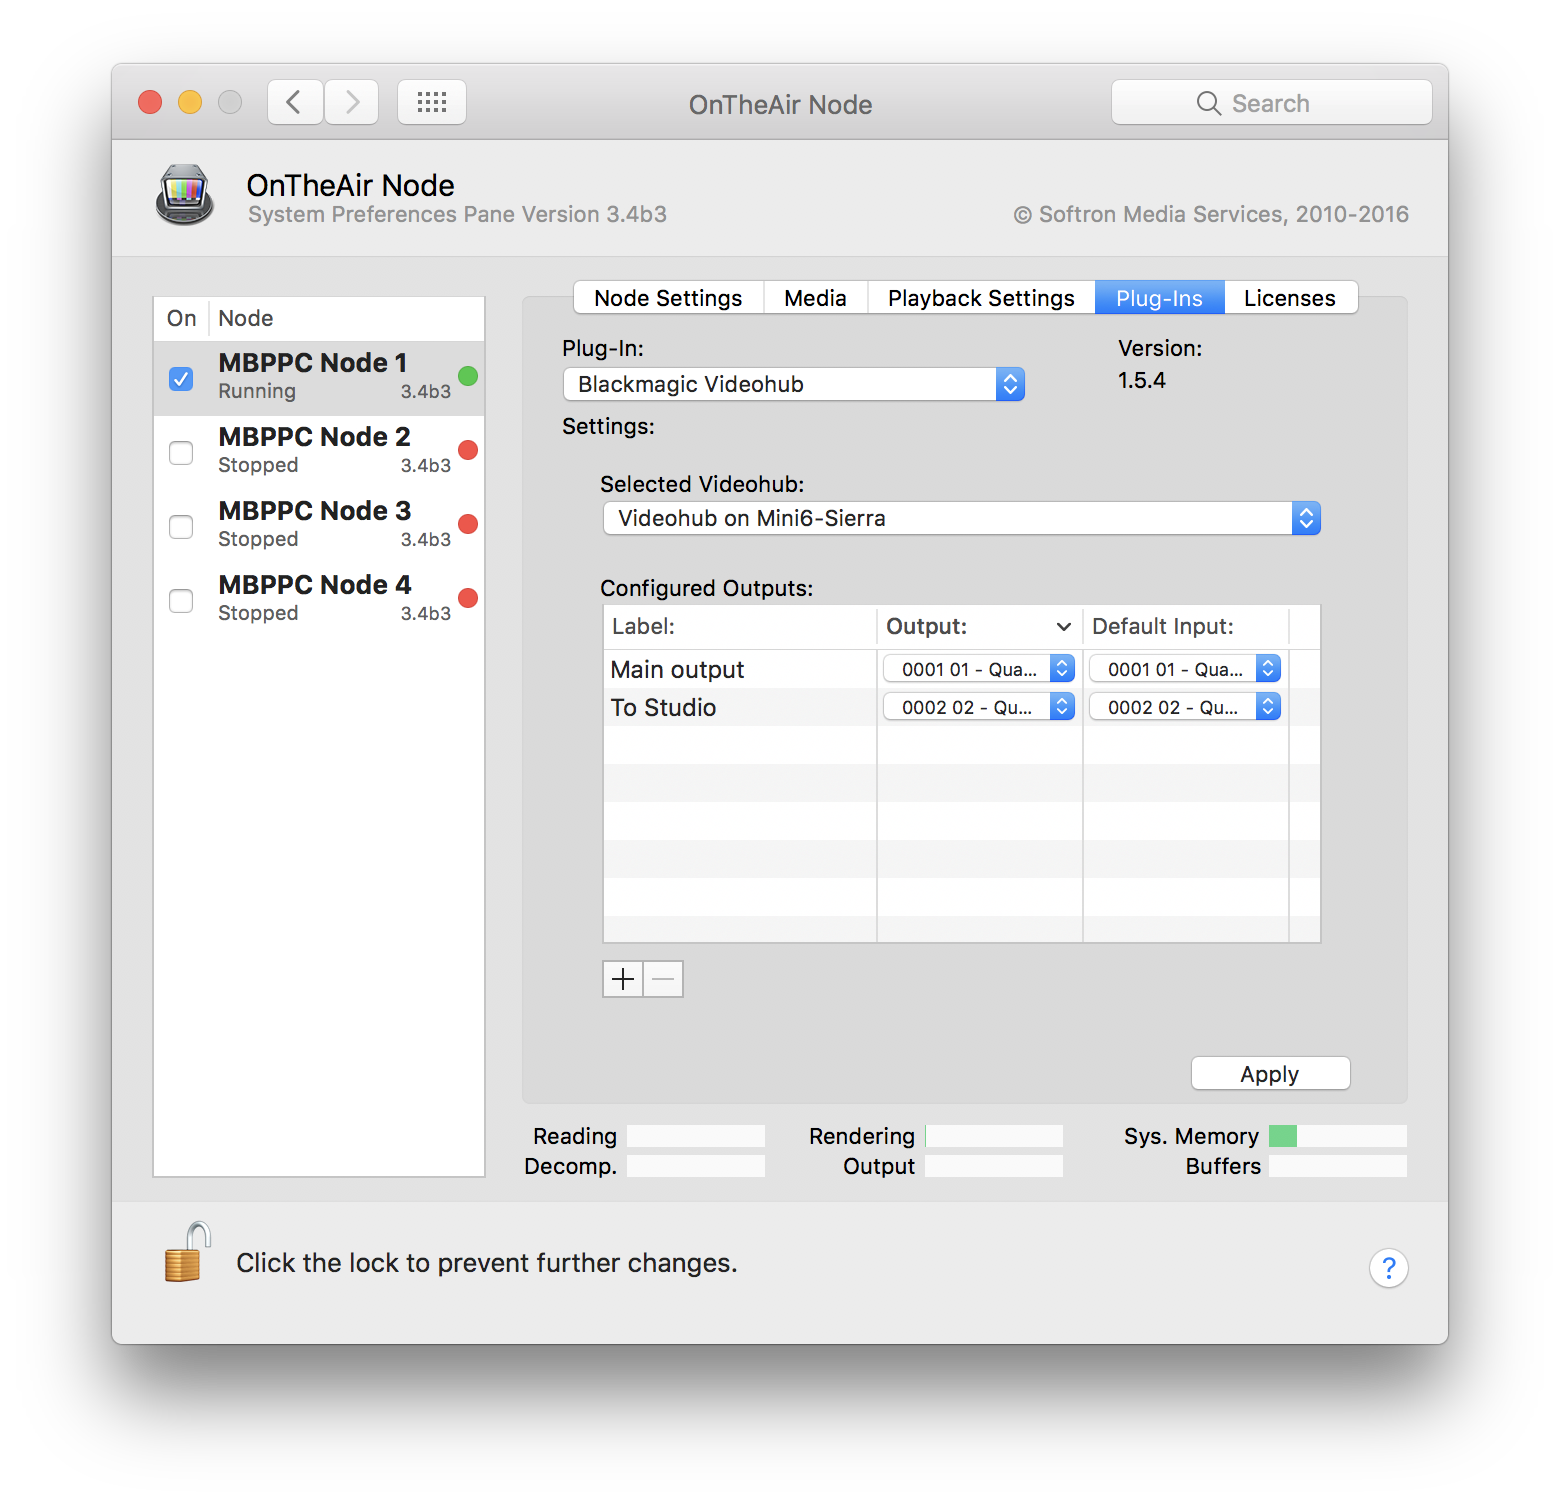
As you can see you can control multiple outputs simultaneously, but you can control only one Videohub at a time.
Use it in OnTheAir Live or OnTheAir Manager
Now that you have configured your OnTheAir Node, you can use control your Videohub through the Attributes. For more info on Attributes, read this article.
Below, you will find already some explanations.
In your client application (OnTheAir Live or OnTheAir Manager), click on a clip, playlist or schedule (playlists and schedules are only for OnTheAir Manager), then open the inspector (cmd+i) and select the "Attributes" tab. You should see something like this:
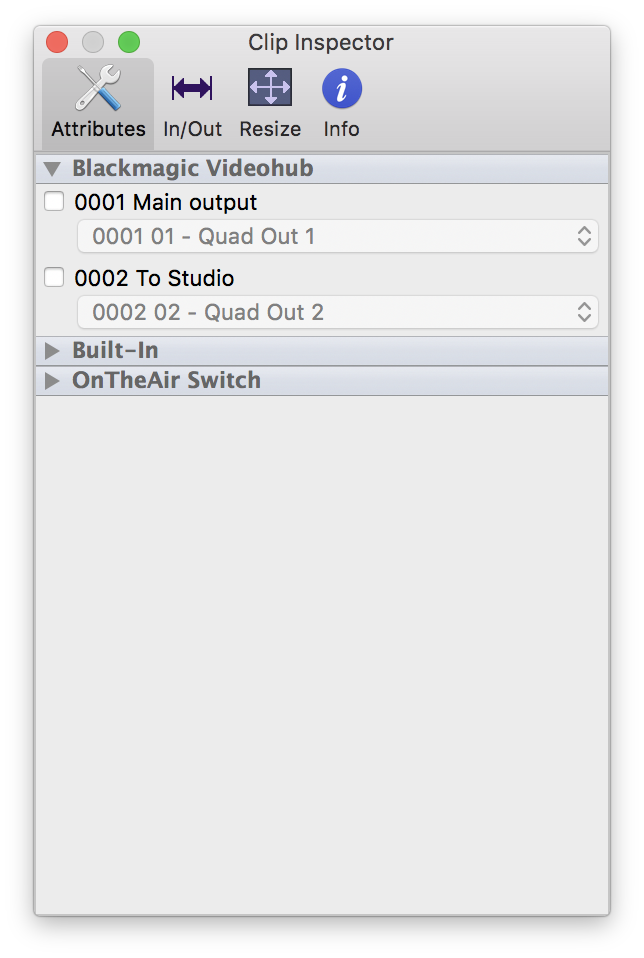
You can see that you have the 2 input we have configured (as in the example configuration above). You can notice that the menu is greyed out. This is when the default value is used.
NOTE: if the popup menu is empty, go back in OnTheAir Node system preferences, and make sure that you can communicate with the Videohub.
If you click on the checkbox and select another input, you will see that it is now in bold, with a different value. This is when the value is not the default one, or one inherited from the playlist, event, category or Media Browser:
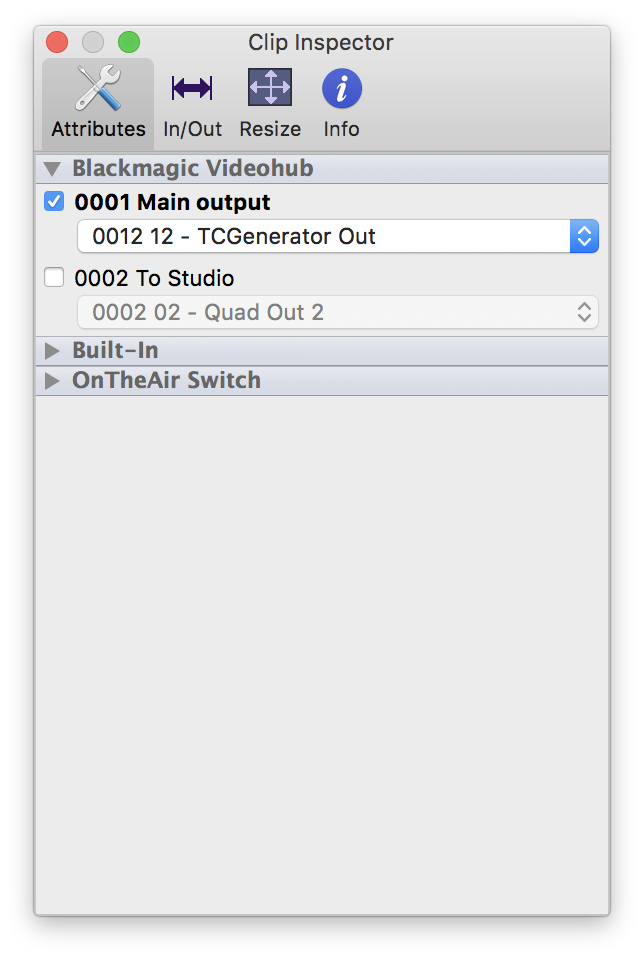
You can change the value for both attributes, so they will both be switched.
Now if you uncheck the checkbox, it will switch back to the default or inherited value.
Comments
0 comments
Please sign in to leave a comment.