Wowza or RTMP?
With the Softron Streaming pack, you can stream to YouTube or Facebook. While these services are very convenient to use, you may want to have more control over your streams. That's when you choose to stream to either:
- Wowza, which has 2 different kind of services:
- Wowza Streaming Cloud: the easiest as you don't need to have a computer, nor purchase anything. You just "pay a monthly subscription" for the service from Wowza. In that case you just need to make sure that you have enough network bandwidth to upload to Wowza, and that's it.
- Wowza Streaming Engine: you download a software that you install on a computer (runs on Mac) and pay for the use of the software. Either you pay a one time single use license, or a monthly fee. If you are streaming from your location, it means that you will have to get enough bandwidth to accommodate the number of viewers that will watch your streams simultaneously.
- Your own RTMP Server: there are different solutions for this, but very few on the Mac.
Note that we will only explain here the setup of Wowza, but a Wowza server will behave just as any RTMP server (it supports other protocols too). So if you use your own RTMP server, just skip the steps explaining how to setup a RTMP server, and go to the creation of the Streaming Preset and using them in MovieRecorder section.
We are also giving basic information on these services, but for more advanced guidance on Wowza, you should check their manual and/or support.
Setting up Wowza Streaming Engine
Download
First you will need to download the Wowza Streaming Engine on your Mac from the Wowza website. If you want to test, you can start a 30 days free trial.
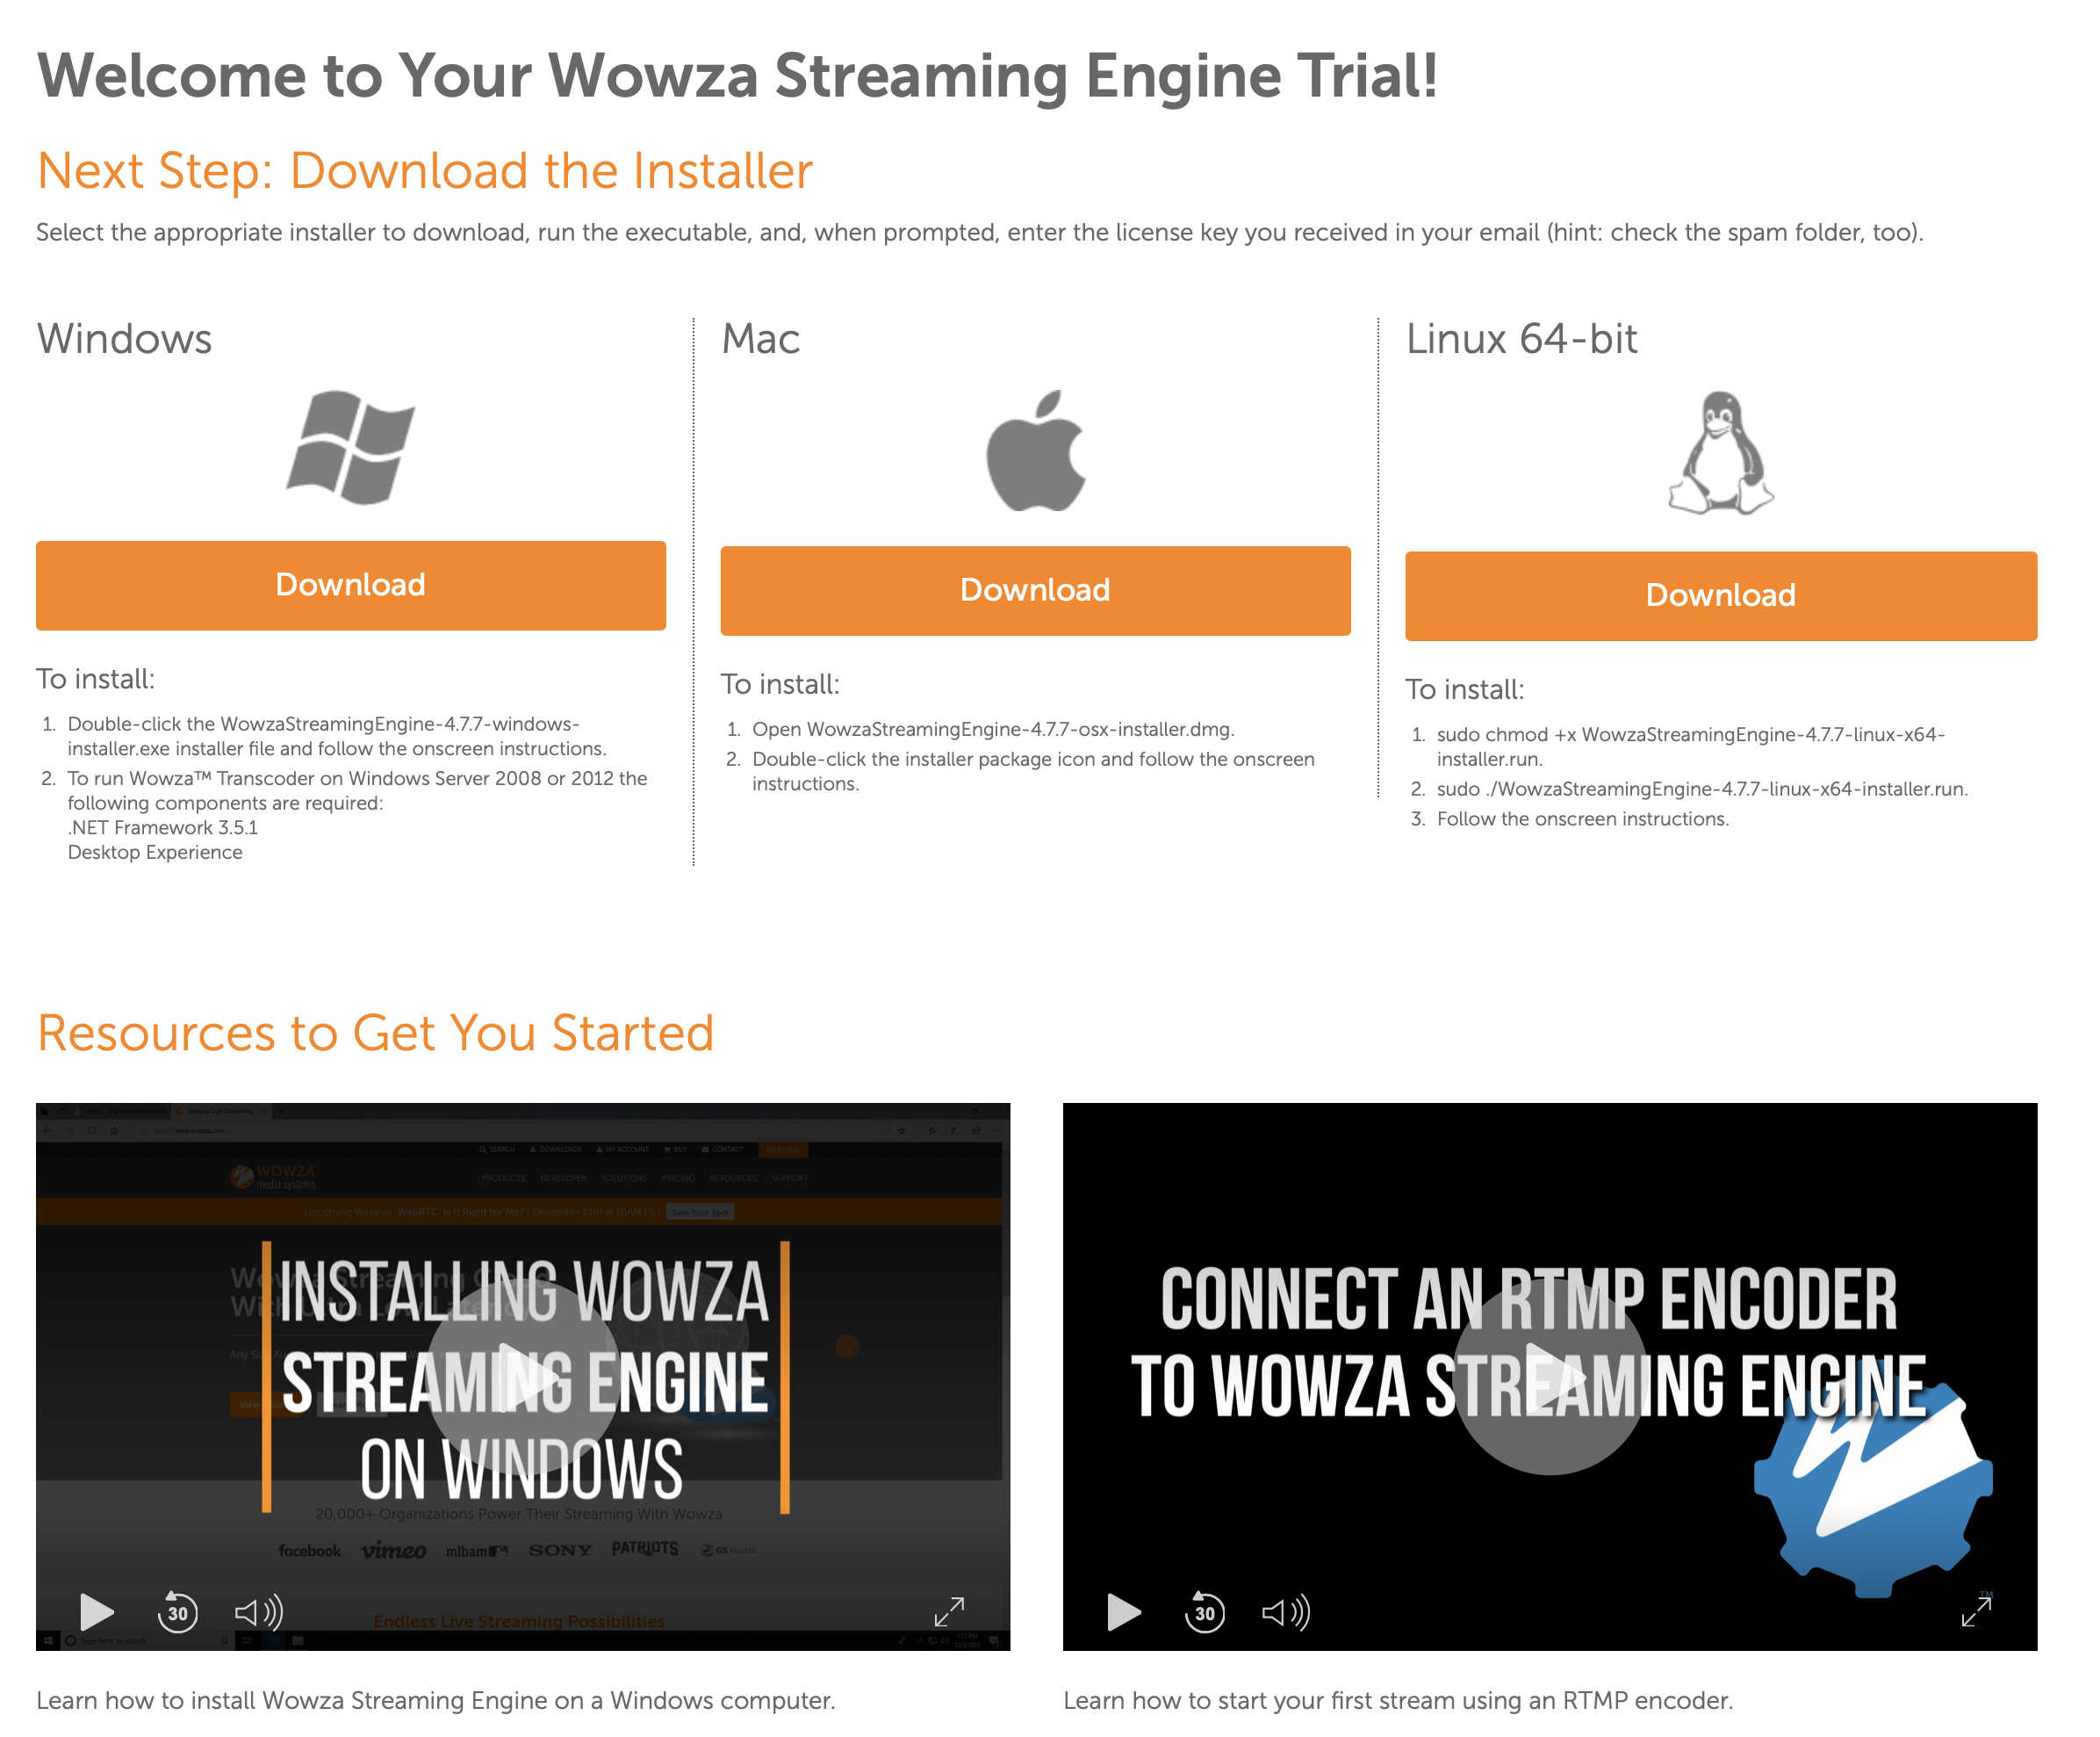
On that page, there are also resources on how to install it.
Install
Once downloaded, you just open the dmg, double-click on the installer and follow on screen instructions.
License Key
During the install process, you will be asked for a license key.
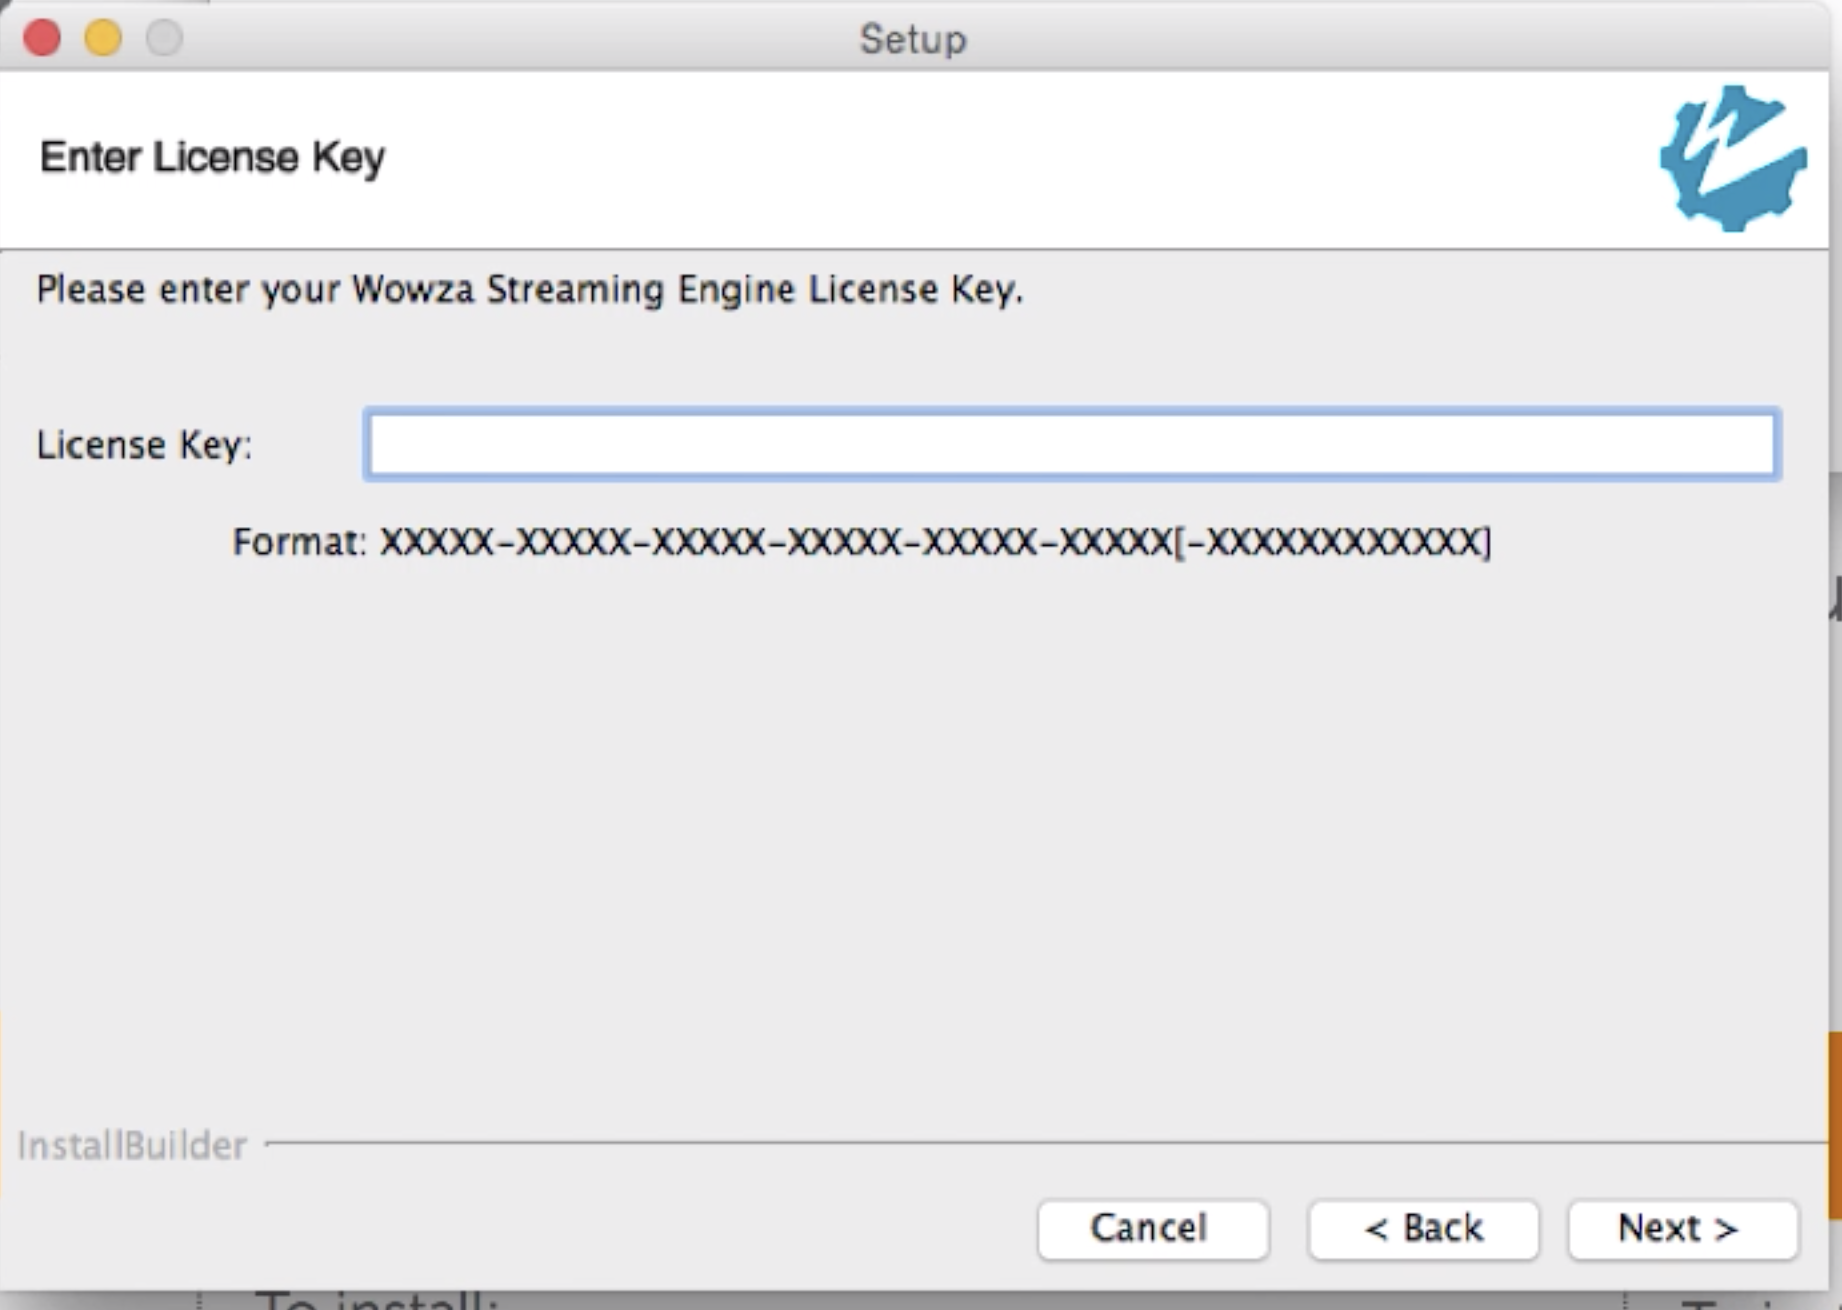
If you are using a free trial, check your email for the trial license key so you can enter it when asked during the install process.
Admin account
During the install process you will also be asked to create an admin account:
Set a user name and password. These will be used to administer your server, so make sure to write this down somewhere... or remember it.
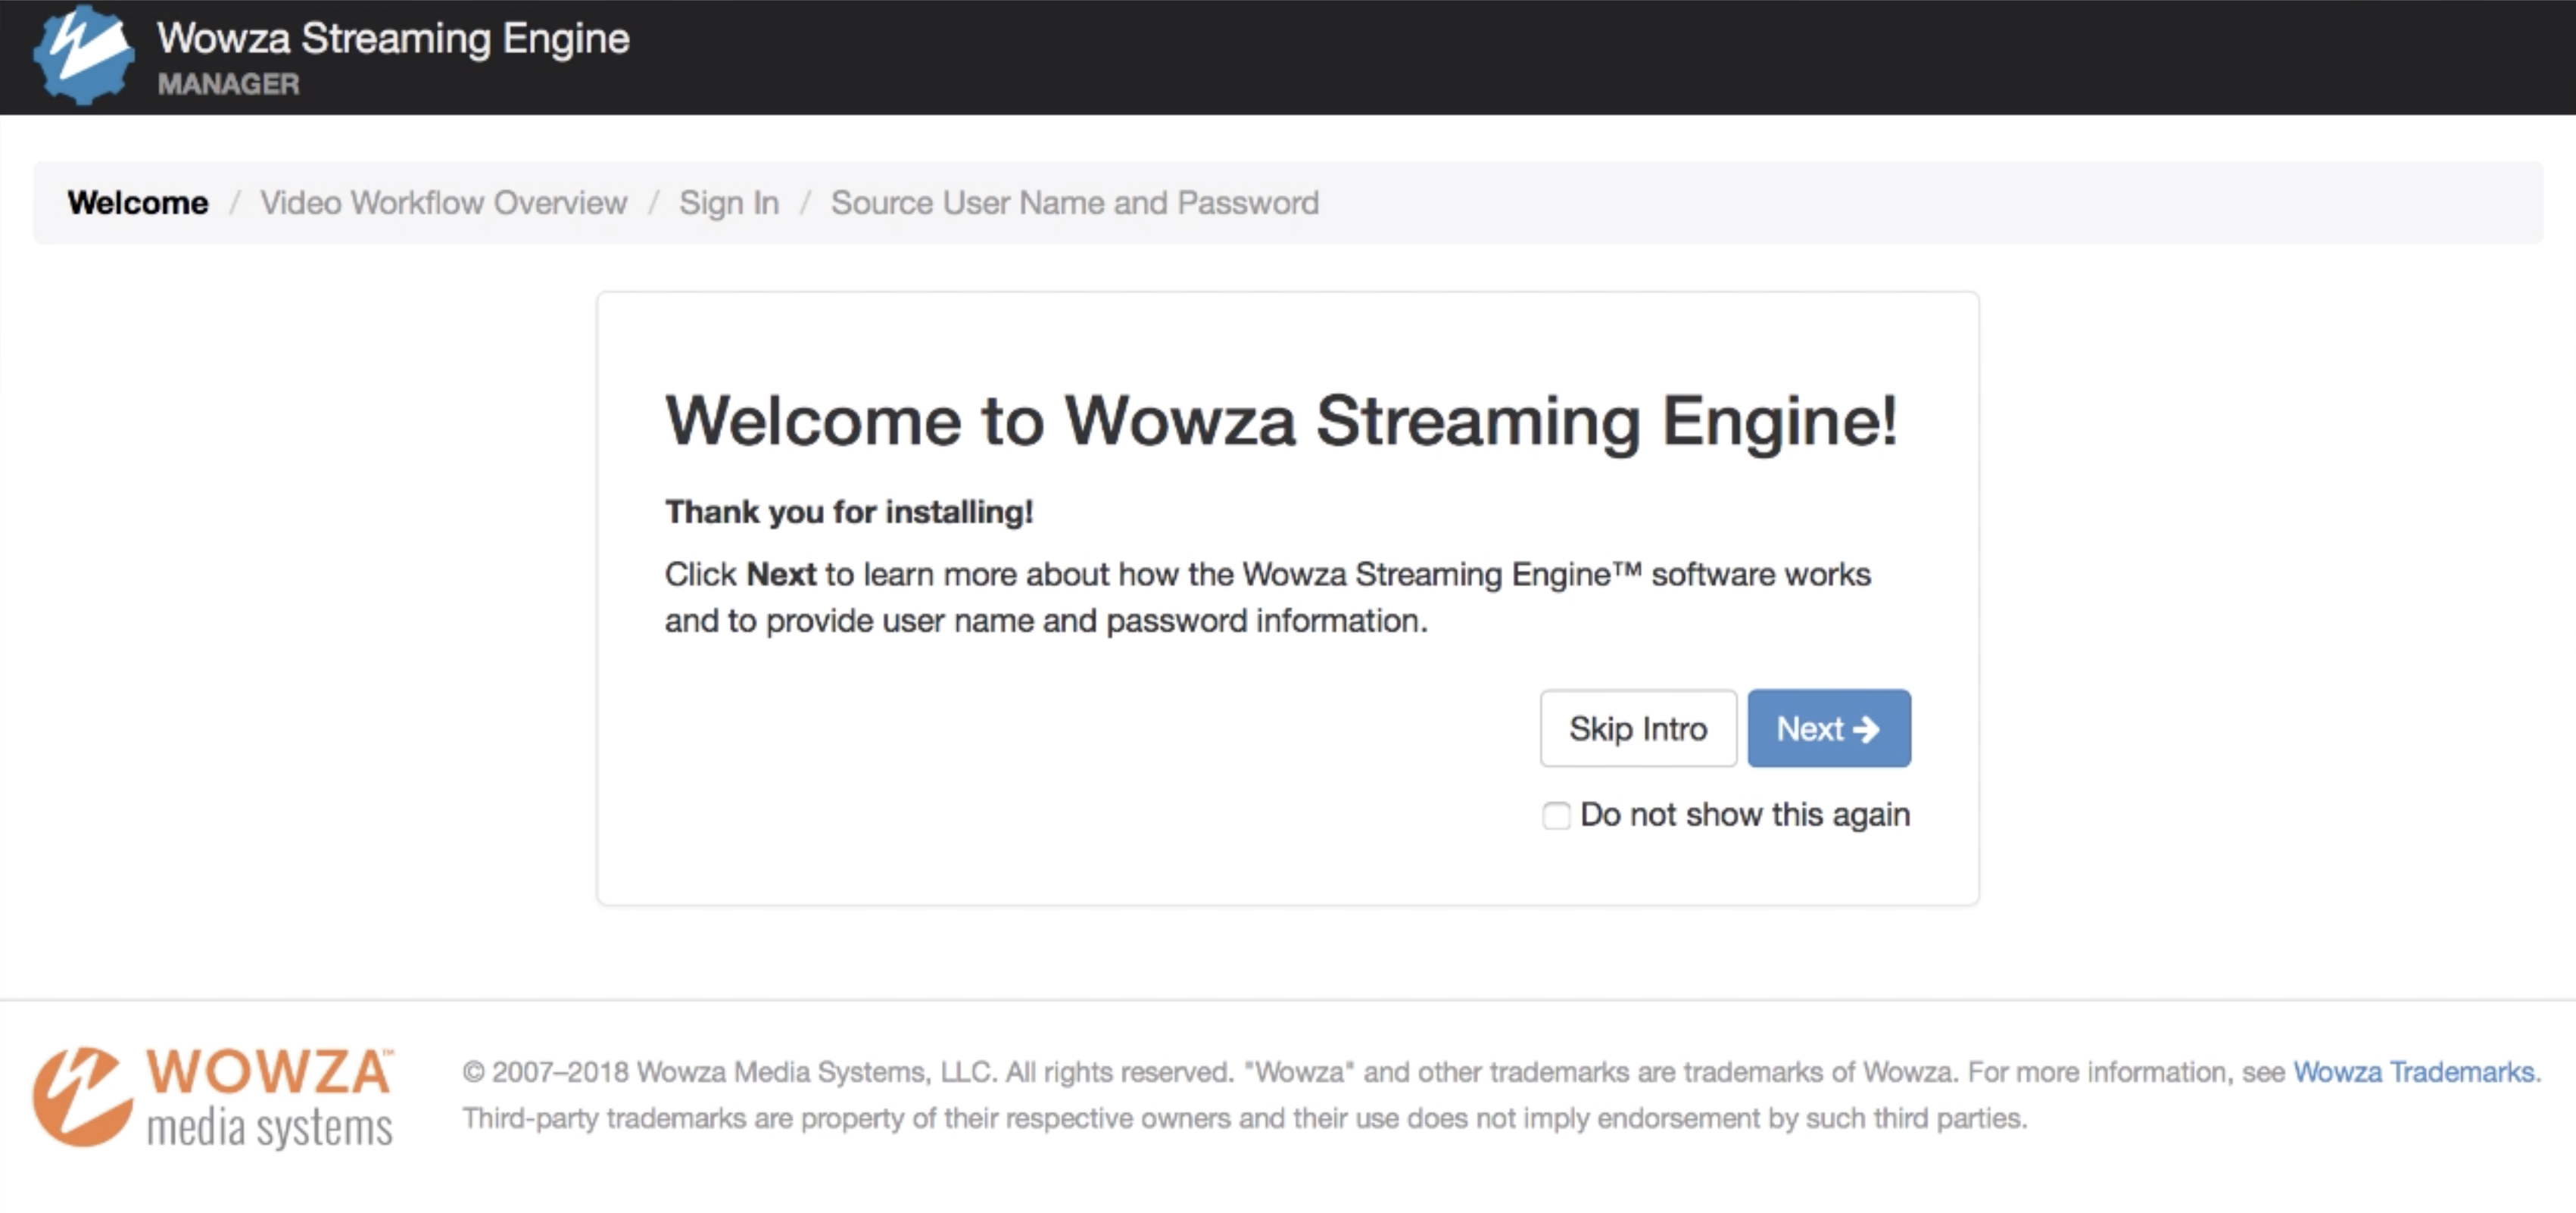
As soon as the install is done, go to the new installed folder under Application/Wowza Streaming Engine/ and launch "Start Standalone Mode".
Administrating the Wowza Server
Administration port number
The administration is done through a web browser by typing the IP address followed by port number 8088. So, for example, you can type (if done on the same computer): 127.0.0.1:8088/enginemanager
Admin login
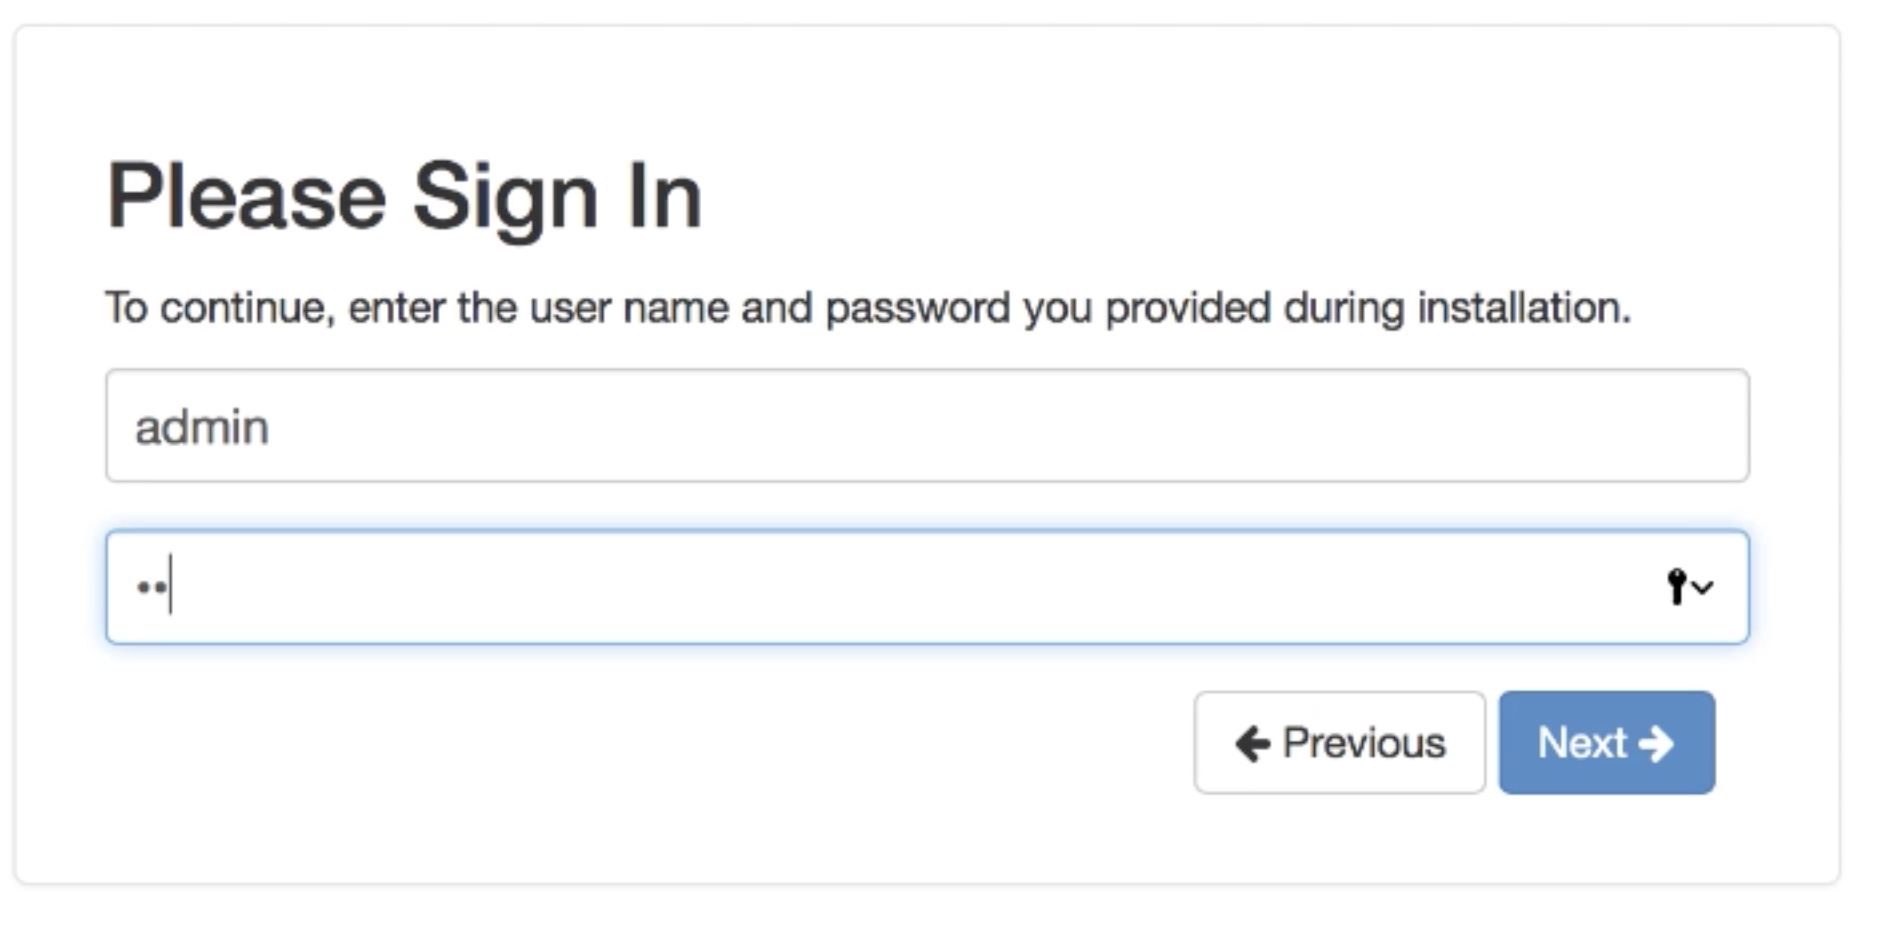
After the welcome screen you will be asked to login using the admin account that you have created during the installation:
Create a source user name and password
Then set a Source User Name and Password:
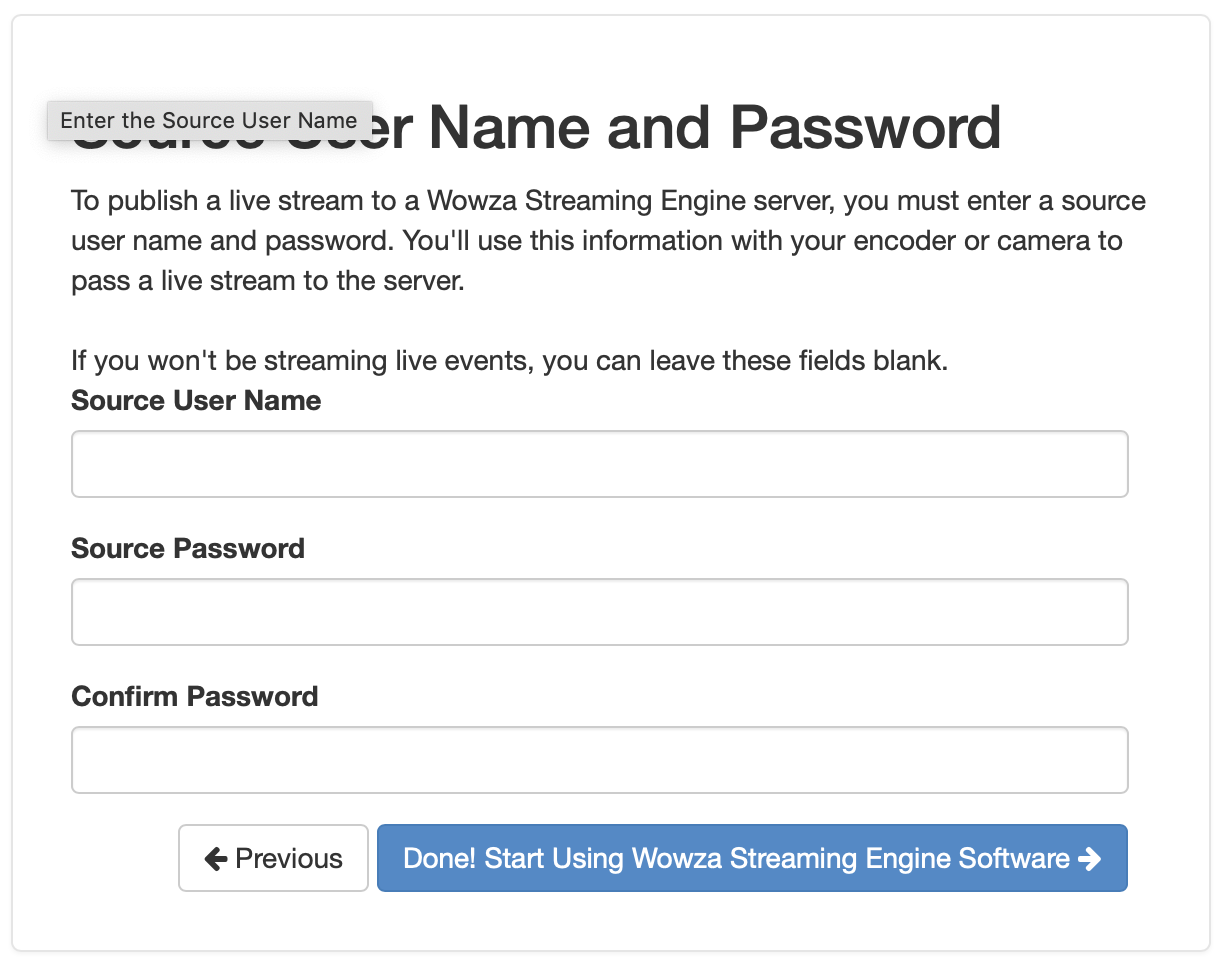
These will be needed when you create your Streaming Preset in the Softron Streaming Center Application, as these are the credentials used when streaming to the server. So write them down and make sure they are different from your admin login and password for better security.
Now you are on the "Home" page. On the left hand side, you should see the Host Server and Host Port:
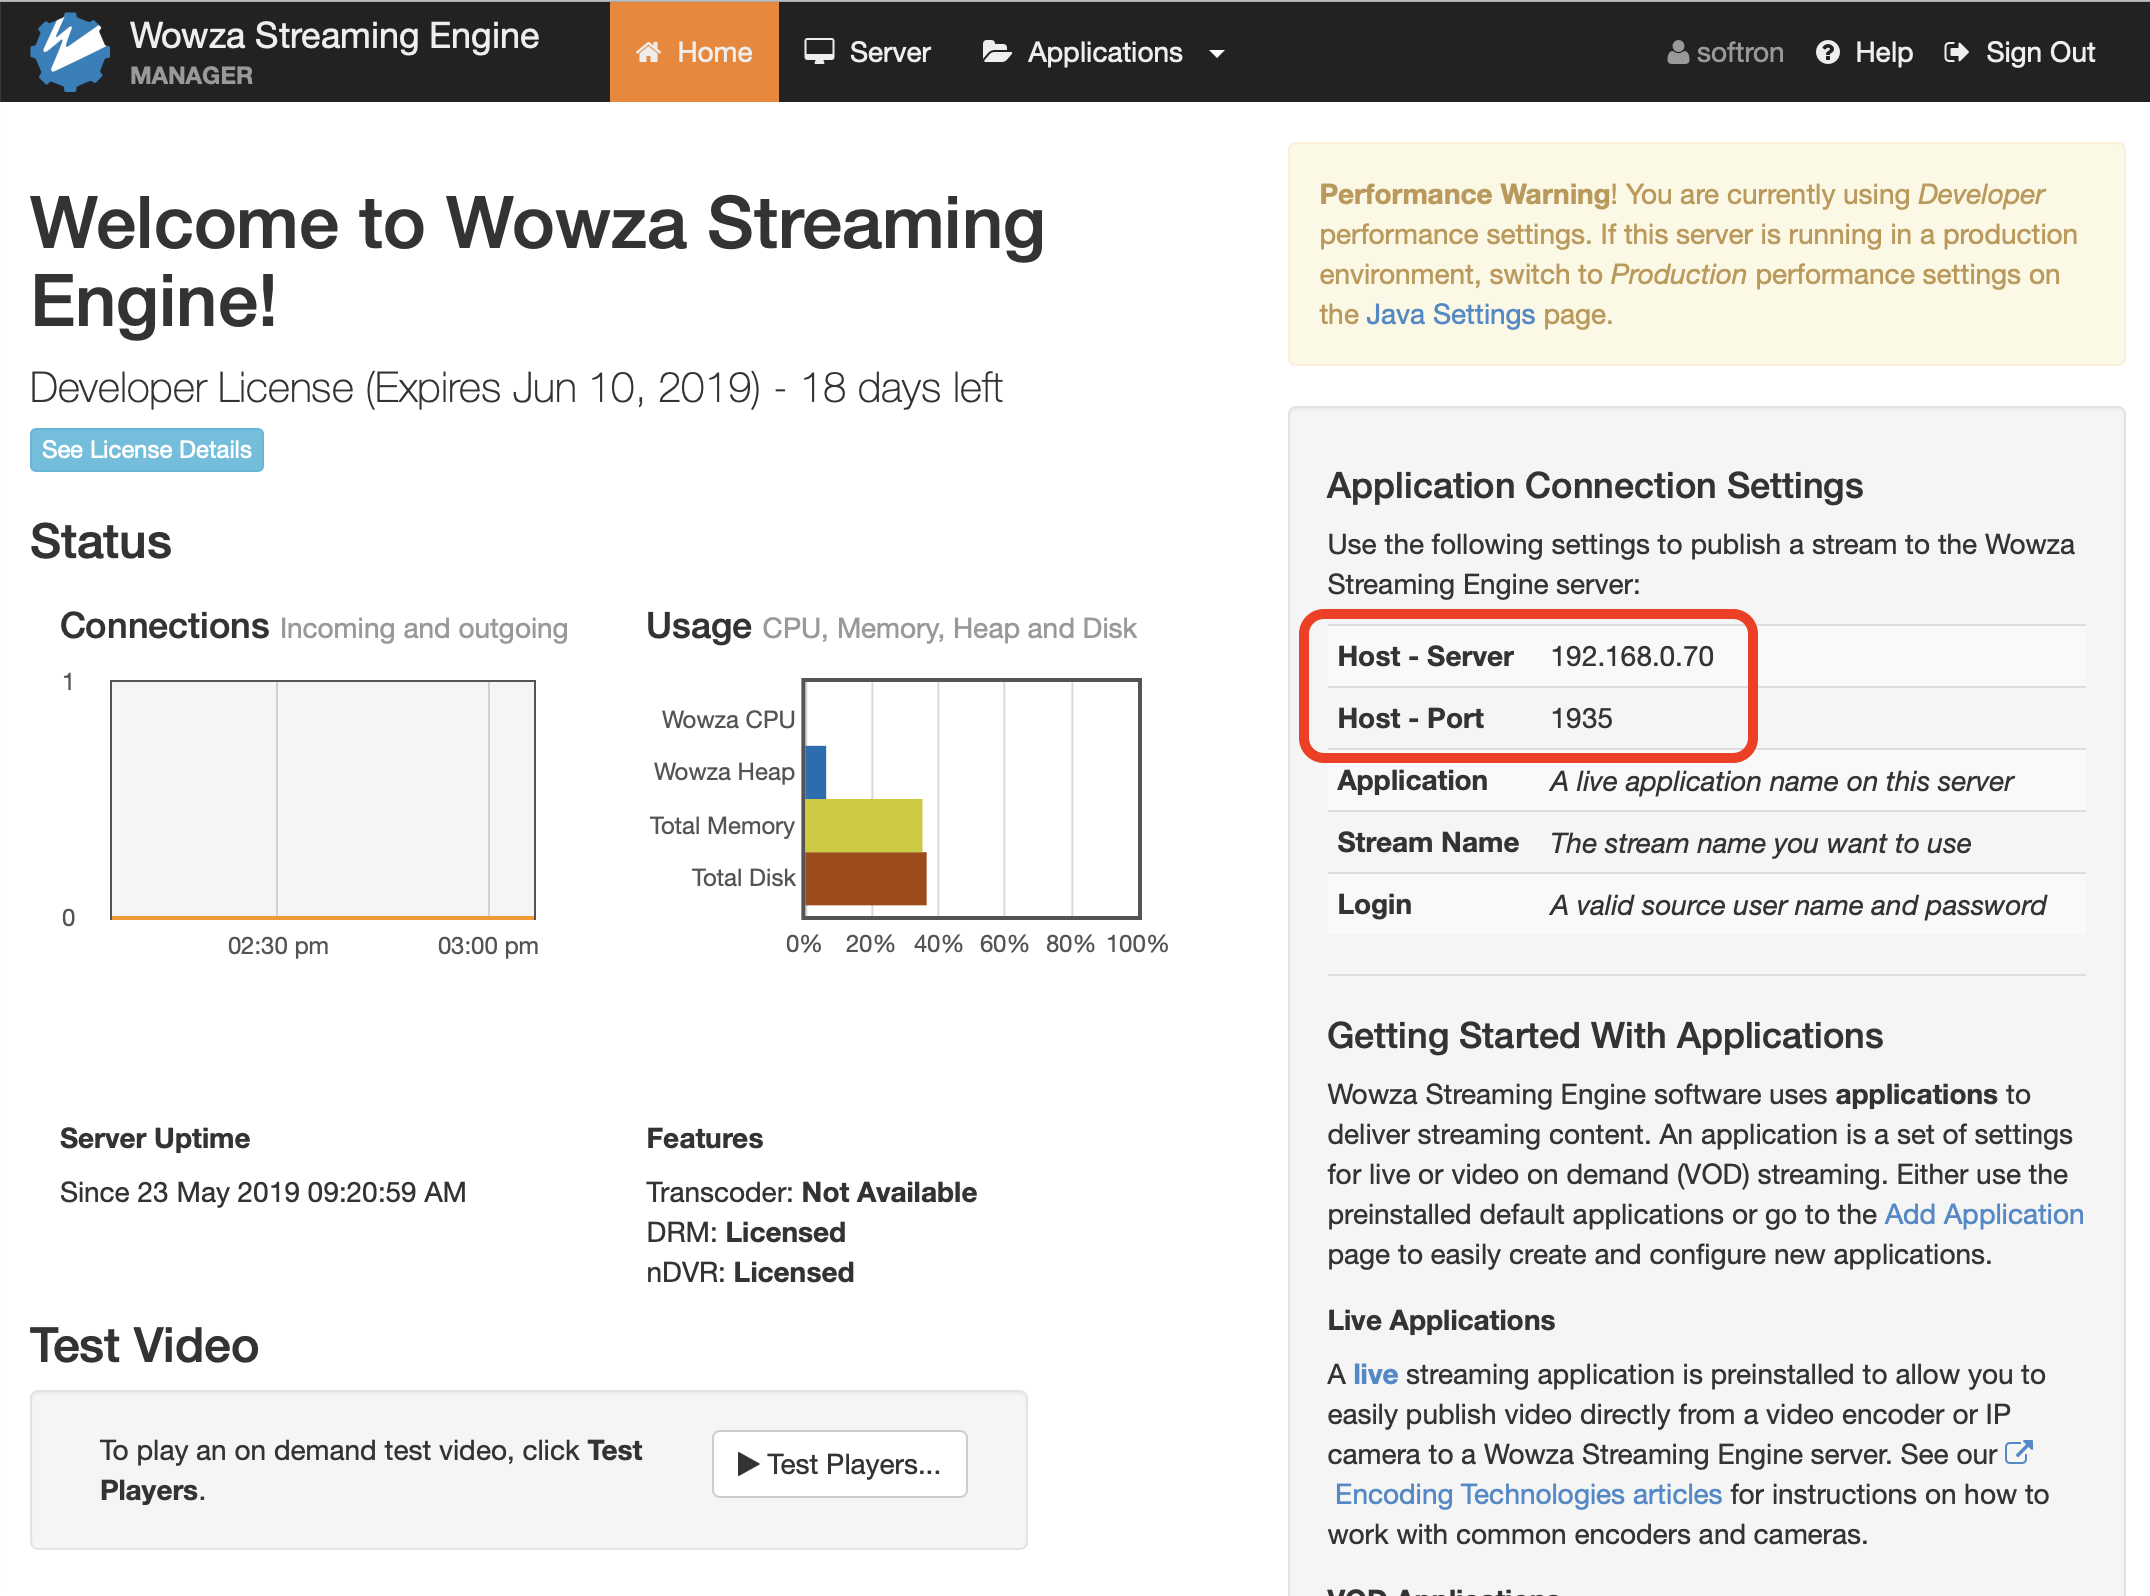
Write these down as you'll need them to create your Streaming Preset.
That's basically it. There are multiple settings and things to modify, and we suggest that you check the Wowza manual if you want to fine tune things, but it can work as described here without setting up anything else.
Setting up Wowza Streaming Cloud
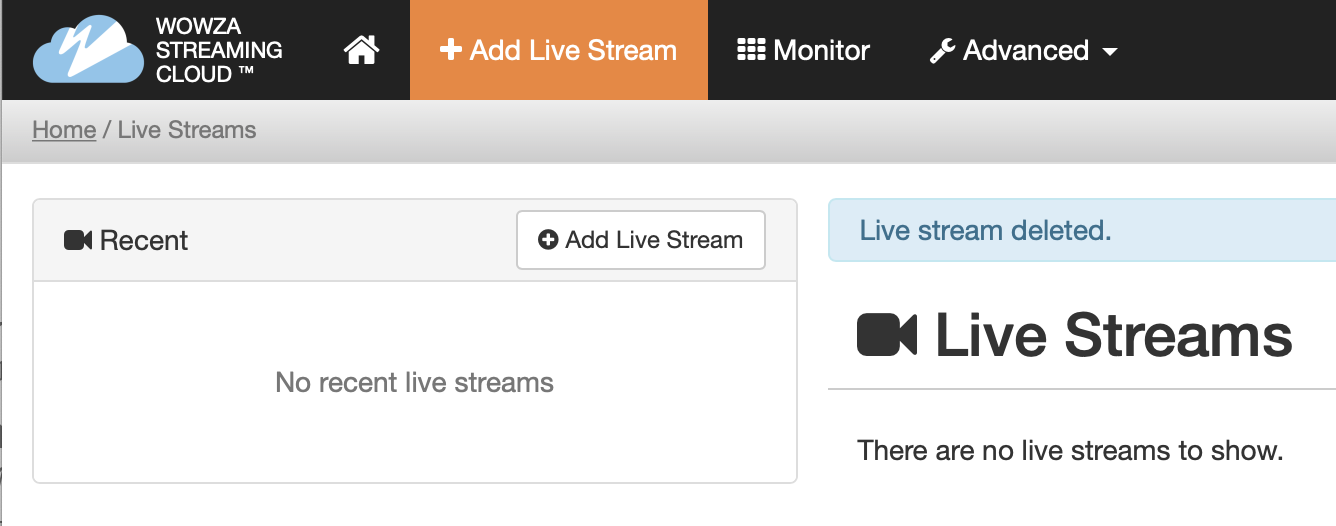
If you have signed up for Wowza Streaming Cloud, click on "Add Live Stream" at the top left:
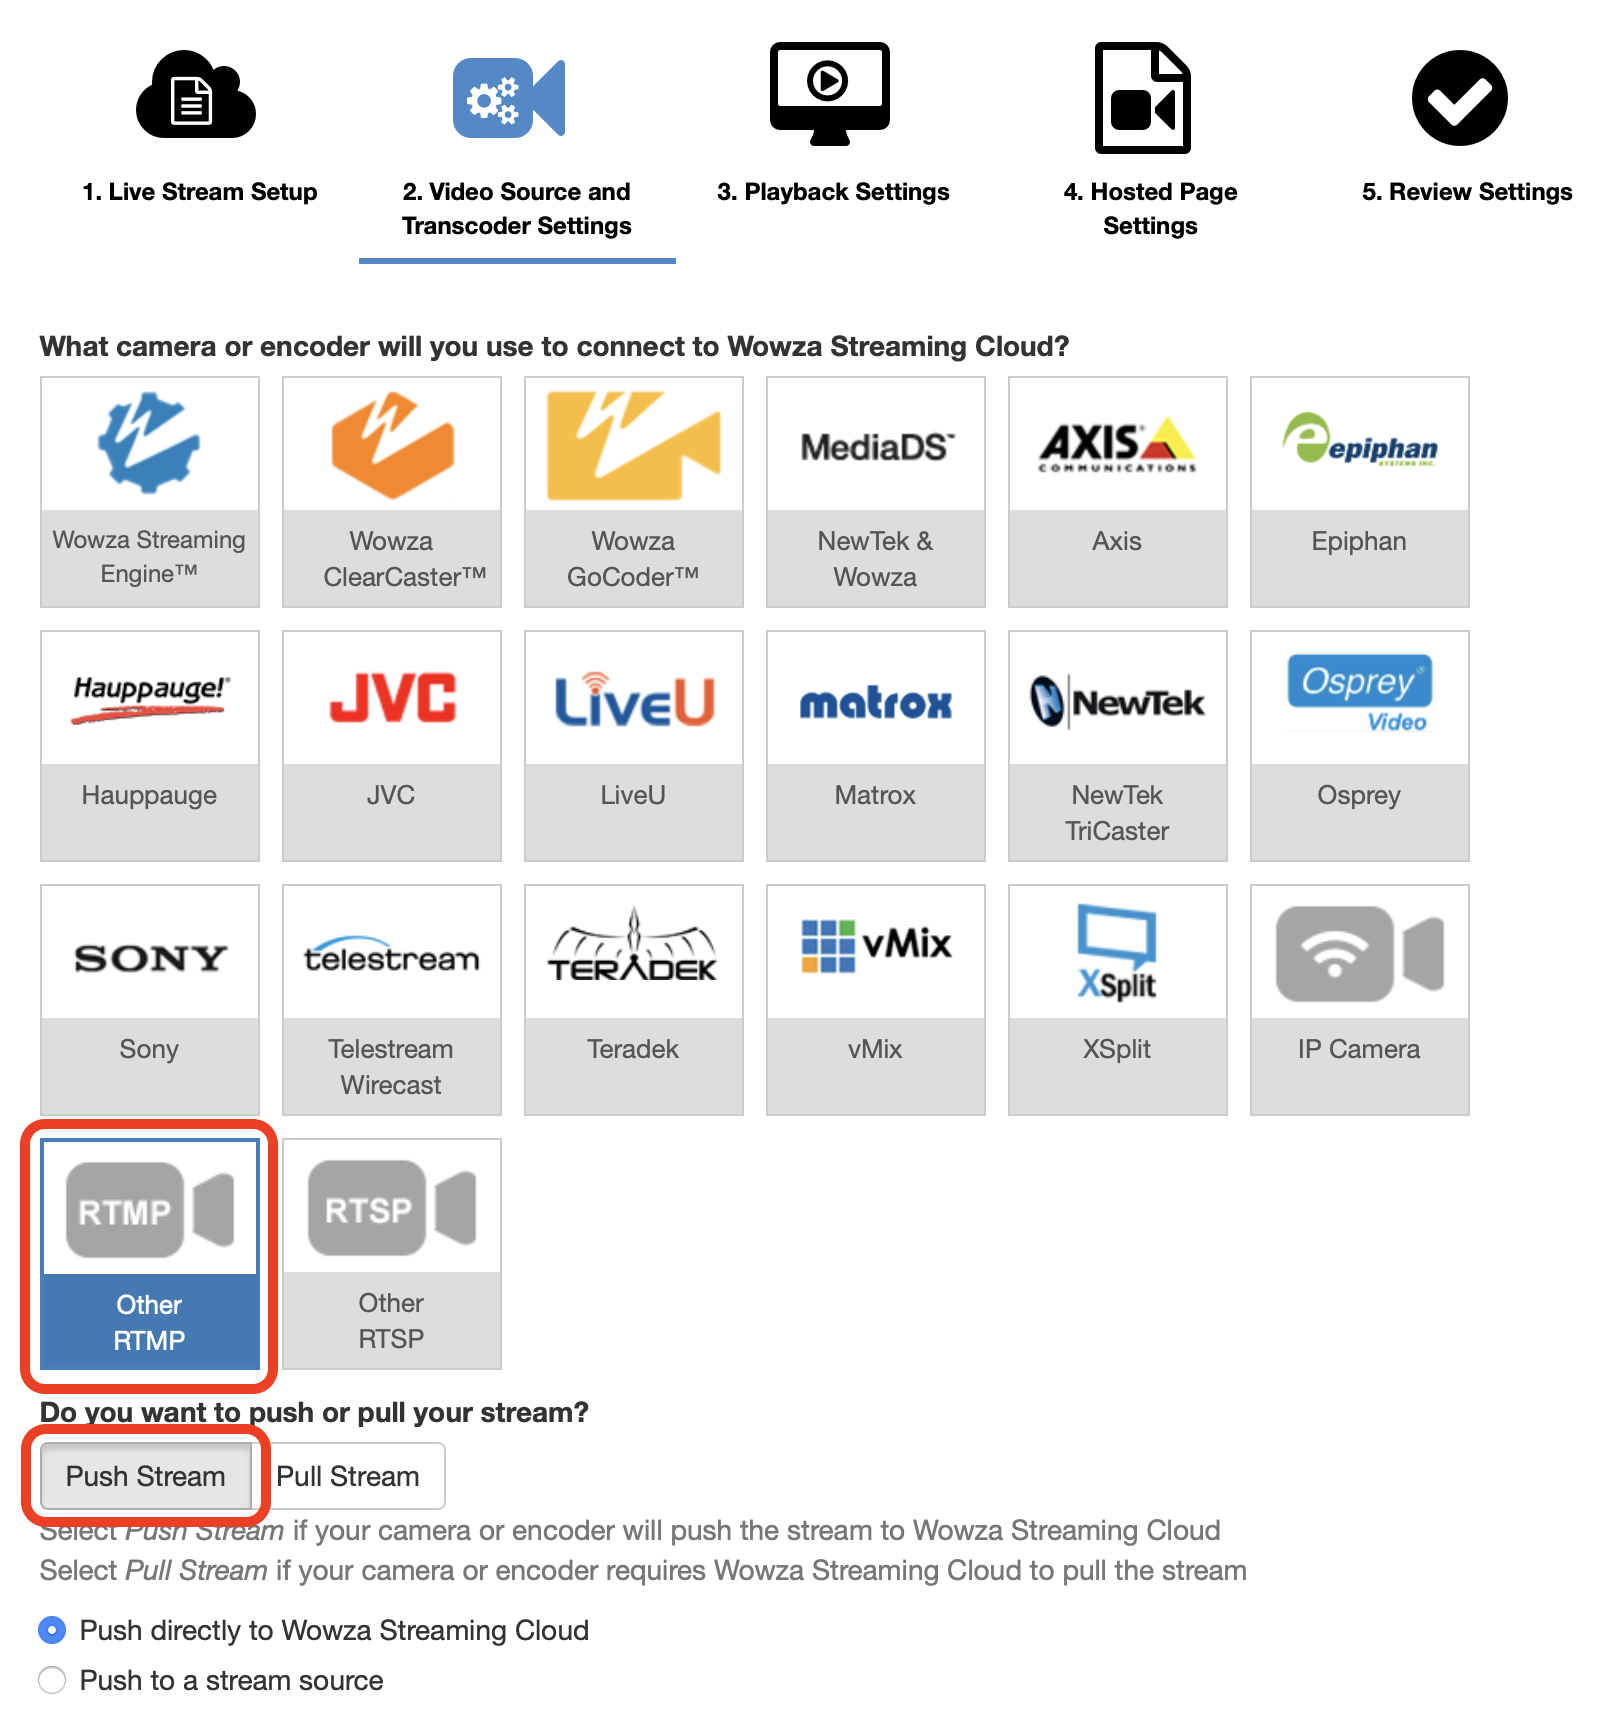
Then choose a Name and nearest location, and click on "Next". On the next page, select "Other RTMP" and "Push Stream > Push directly to Wowza Streaming Cloud":
On the next pages you can leave the default settings, or change any of these (check the Wowza Streaming Cloud manual for more explanations).
Create your preset in Streaming Center
Now you can create a streaming preset in Streaming Center. Select "Wowza" and here is how it should look:
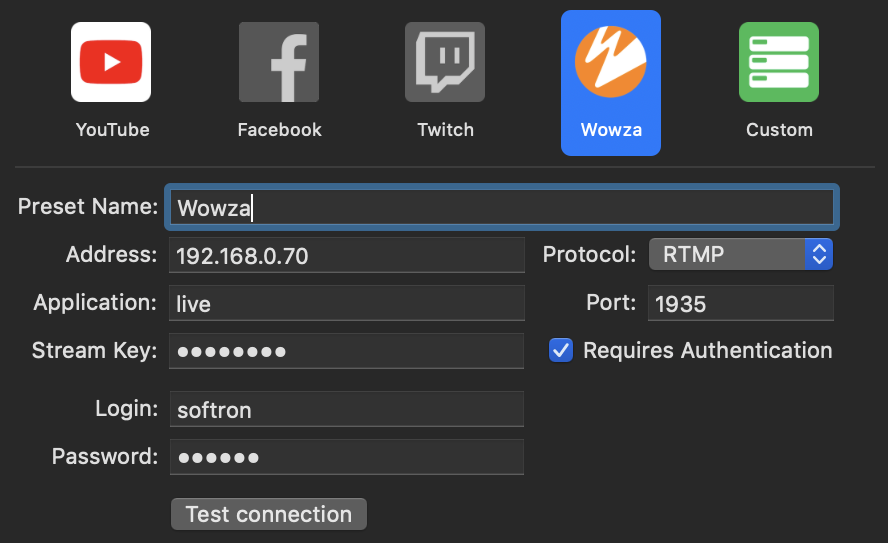
And here is an explanation about each field:
- Address: Indicate there the "Host-Server" IP address of your Wowza Streaming Engine server, which you wrote down earlier (see above)
- Protocol: Leave it on "RTMP"
- Application: Set it to "live"
- Stream Key: This can be anything, and will be part of the url that will be used to view the stream. The default value is "softron_streaming". The key is hidden because it can be a sensitive information (when used to stream to Facebook or YouTube, there is no need of a login and password, so anyone with that info can stream to your page). This Stream Key is stored in the Keychain. You can retrieve it from there if you need.
- Enable the Requires Authentication checkbox so you can set a login and password
- Login and Password: These are the "Source User Name and Password" that you have set when starting your Wowza Streaming Engine. Note that it is not the admin account. The password is stored in the Keychain as well.
As for the video and audio settings, you can leave them as they are, or change them according to your needs. See below.
Settings for Wowza Streaming Cloud
If you are using Wowza Streaming Cloud, here is where you should use each of the settings:
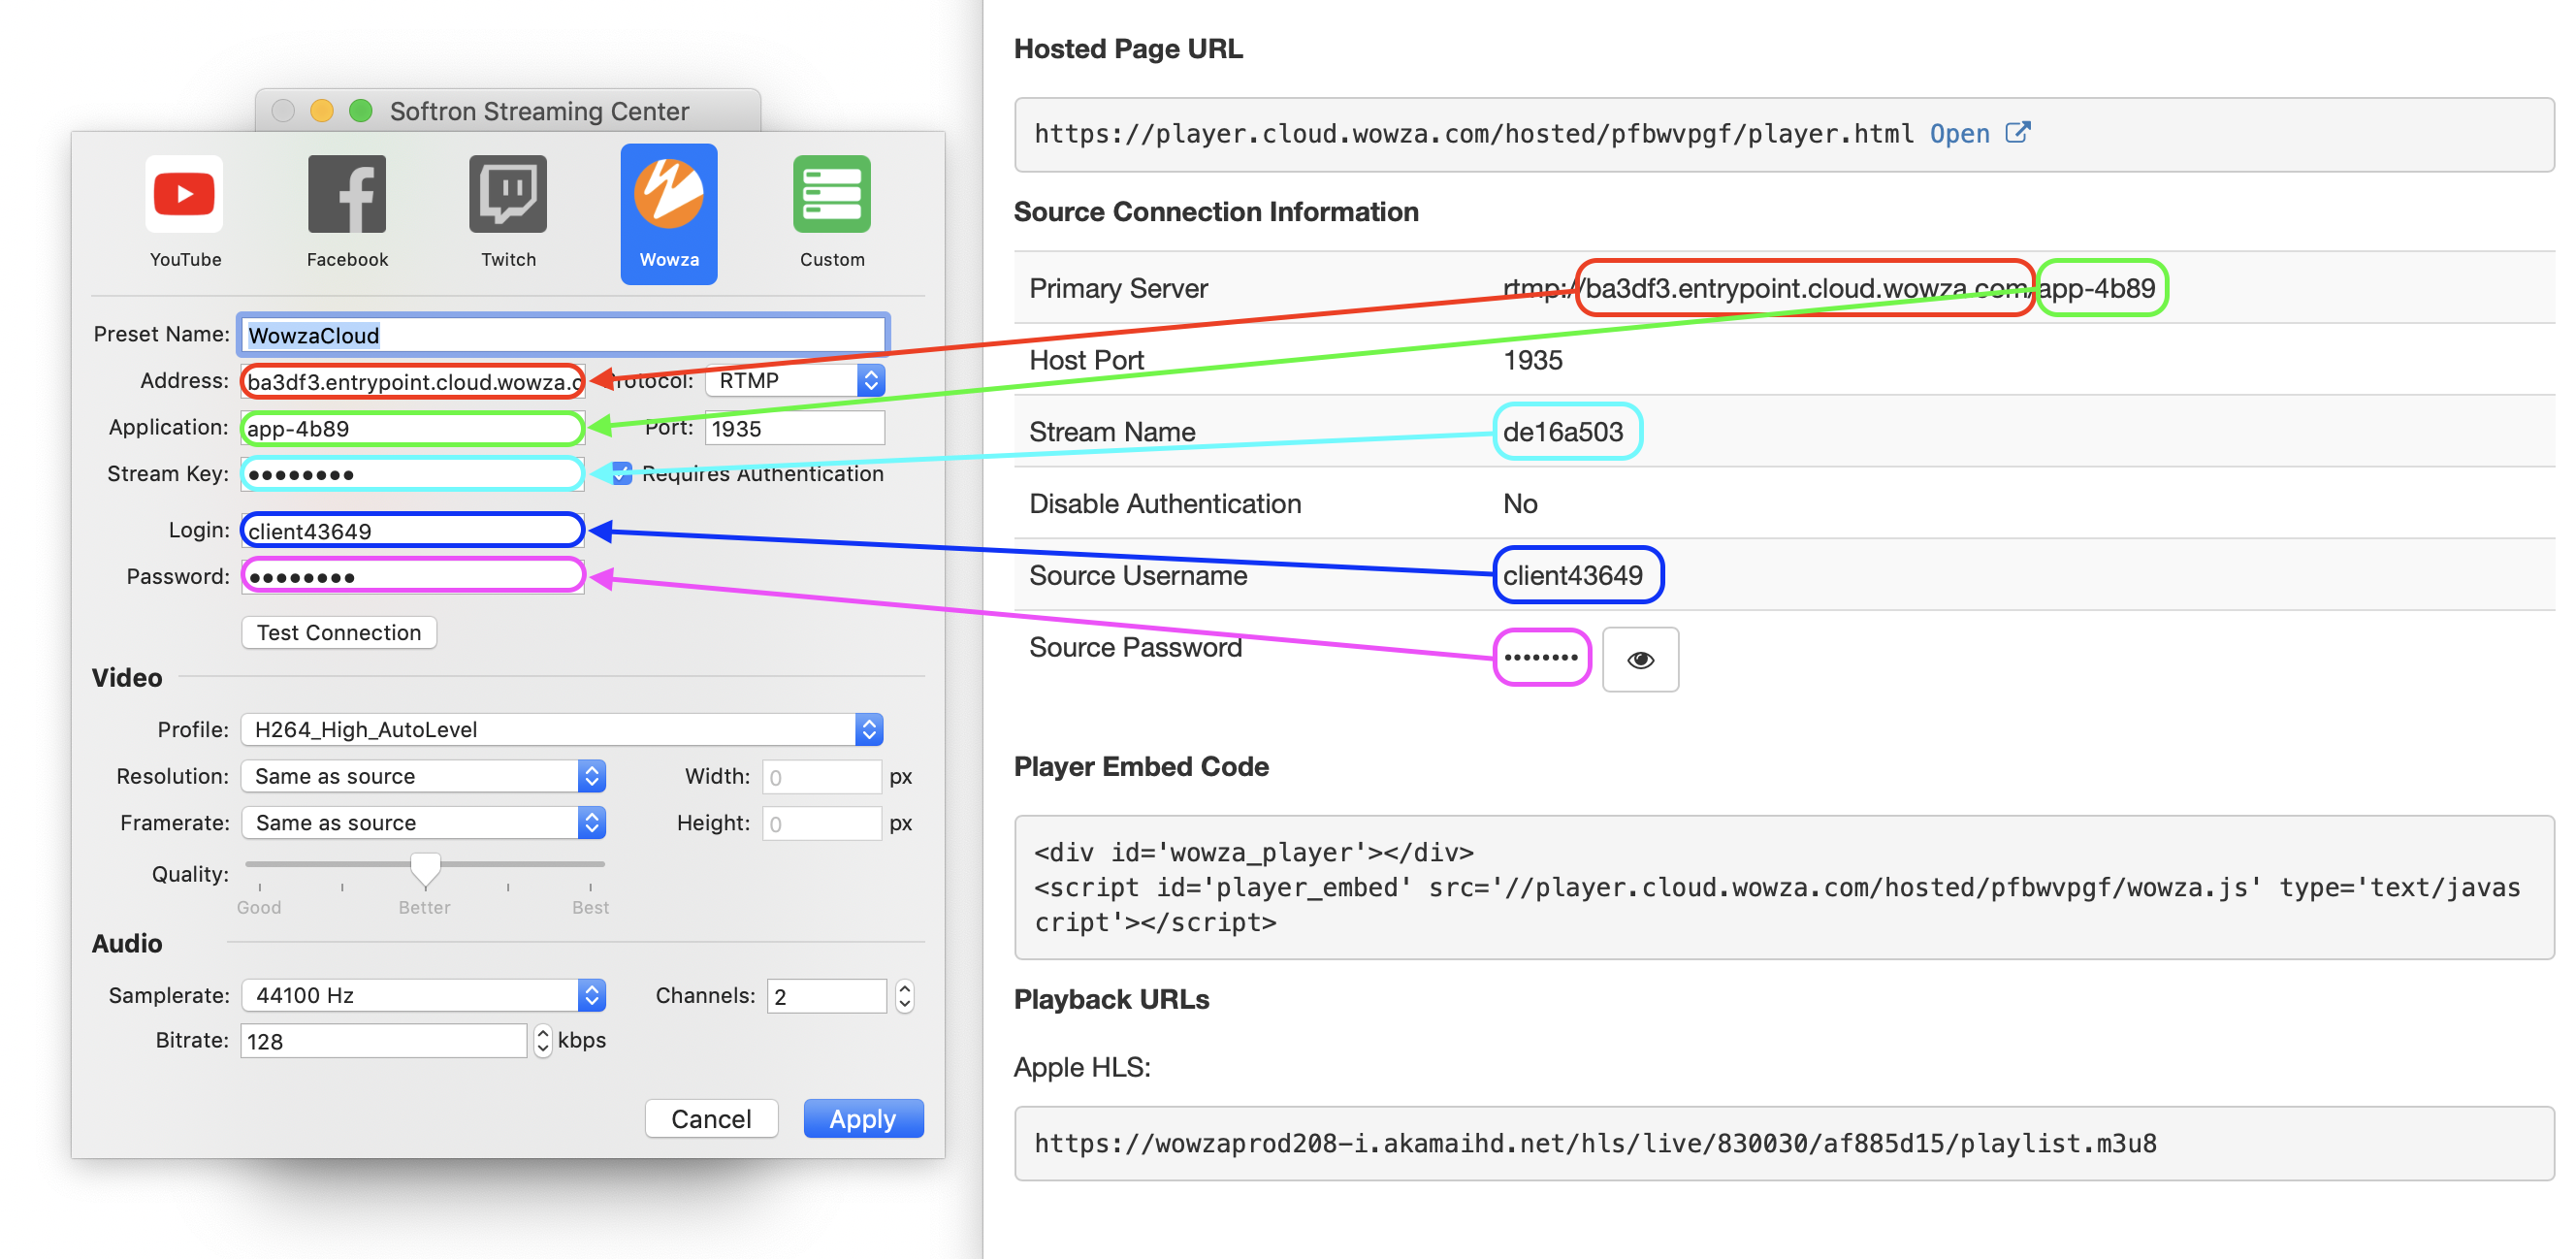
Once you have used the settings, if you want to start streaming from a Softron application, make sure to "Start your Live Stream" in Wowza Streaming Cloud":
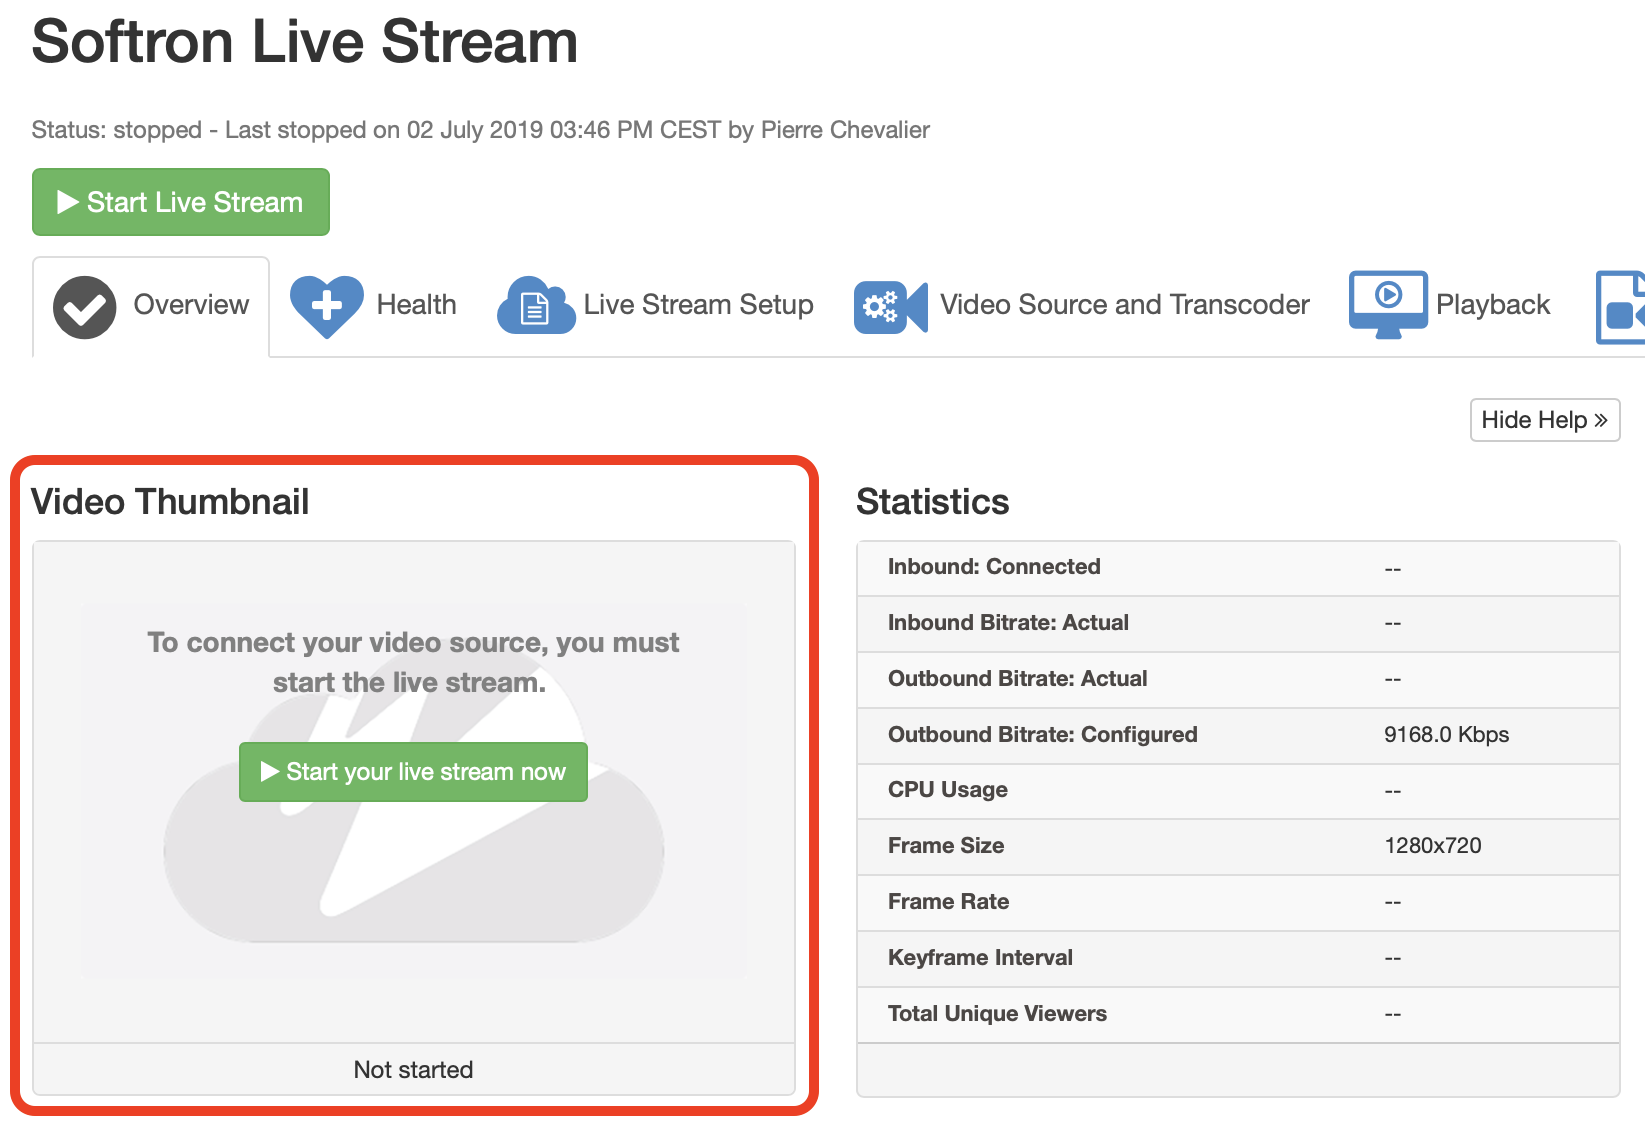
Note that the "Test connection" will fail if you did not start your live stream.
Test your connection in Streaming Center
Test Connection
Once you have entered all the info above, you can click on the button "Test Connection". When the test is running, you should see the following icon:
![]()
Then a result should show up telling you if the connection was successfull:
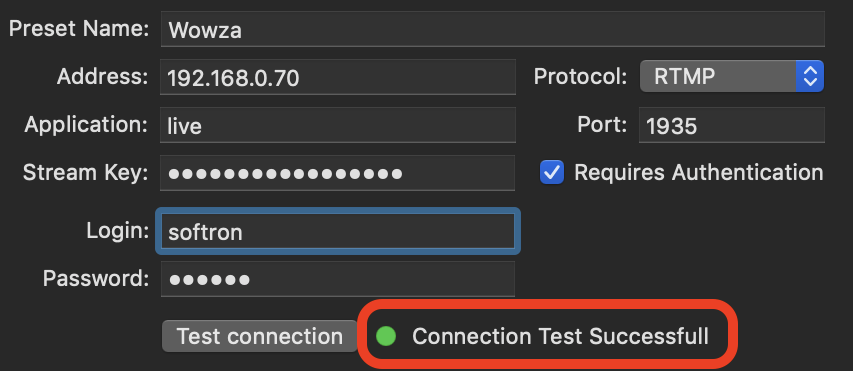
There are different results. Below is an explanation about all of these.
Connection Test Successfull
This tells that we could connect and authenticate on the server, so your connection settings seems to be correct. Ideally you should also do a quick test in the Softron application that you will be using. Indeed for the streaming to be successful, the Audio and Video settings should also be compatible with your server, and these are not tested here, only the connection to the server.
Server reached but could not connect
This means that we could find the server using the IP address that you have indicated. But we were not able to authenticate. You should check that:
- the port number is correct
- the login and password are correct
- in Wowza Streaming Cloud, you must have started your stream for the connection to be successful
Could not reach server
This means that we could not find the server on the network using the specified IP address.If this shows up, it means that
- either you have entered the wrong IP address,
- or the server is not running,
- or some other network setup prevent you to ping it.
Check the IP address of the server you have indicated. If you are sure about the IP address, try to "ping" it using the application "Terminal" (found in "Applications > Utilities"). It's very easy. In the window, type this (modify with your IP address:
ping 192.168.0.70
Then follow by a carriage return. If you have this kind of results:

This means that you were able to reach the server. If you are sure it's the same address than the one used in your streaming preset, and that you run this on the same computer, then it's something else than the IP address, and check other settings like the port number.
But if you have this kind of results:
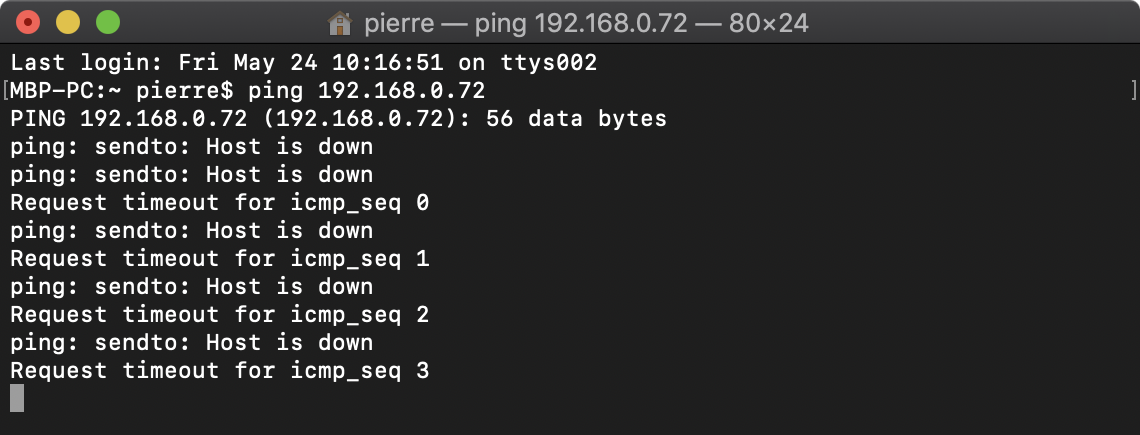
This means that you were not able to connect to that IP address, so we won't either, and you should check your network connection, that the server is running, or check with your network administrator.
Edit Video and Audio settings
You can change the video and audio settings if you need.
Video settings
By default the Video formats are set to "Same as source", which means that the format will be the same as the one that is set; for example, to the MovieRecorder source. Note that if the MovieRecorder source is set to "auto-detect" the incoming format, it may change during the stream, which is not advised.
So make sure to either set the incoming format in MovieRecorder or choose a format and fps in your Streaming preset; when streaming, we will then resize the source format to match these settings.
Quality
By default the Quality is set to the highest bitrate possible for the selected format. If the format and/or fps are set to "Same as source", you won't be able to see the bitrate used, but if you manually select a format and bitrate, you will see what bitrate will be used here:

Note that these are variable bitrates.
Audio settings
You can set the Sample rate, Bitrate and number of audio channels:

Use your preset in MovieRecorder
That's it, you are now ready to stream! In MovieRecorder, create a new "Streaming Destination":
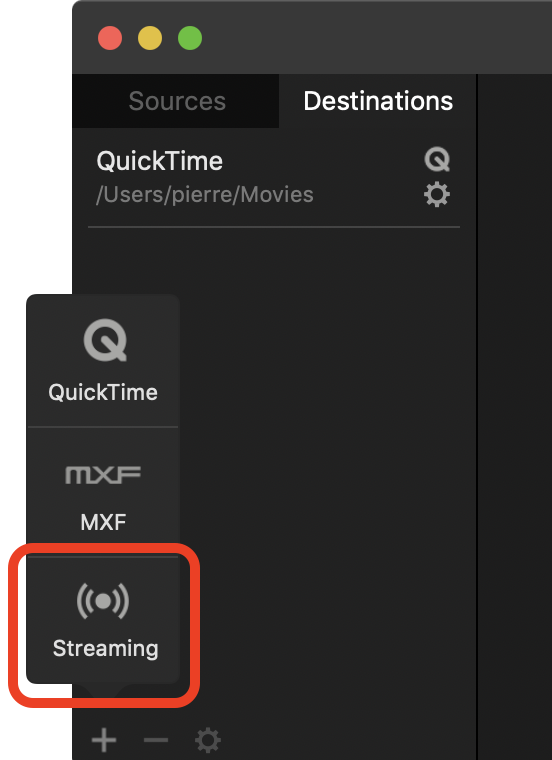
Then click on the "Setup wheel" and select the Streaming Preset that you have just created:
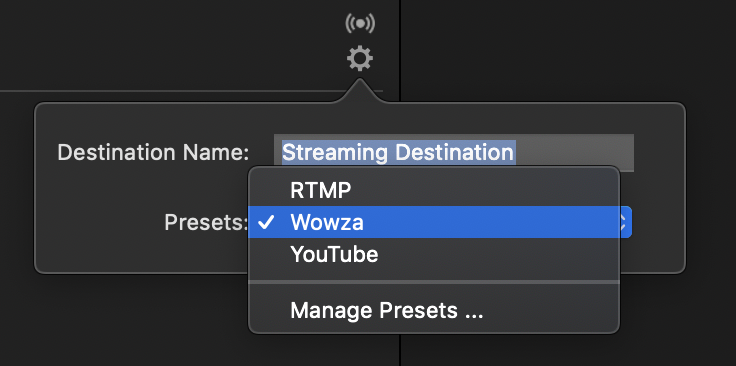
You can also change the name of the destination so it describes a bit better where you are streaming to. Now you are ready to use it as you would any other destination in MovieRecorder!
Viewing your stream - Sending public URL to viewers
With Wowza Streaming Cloud
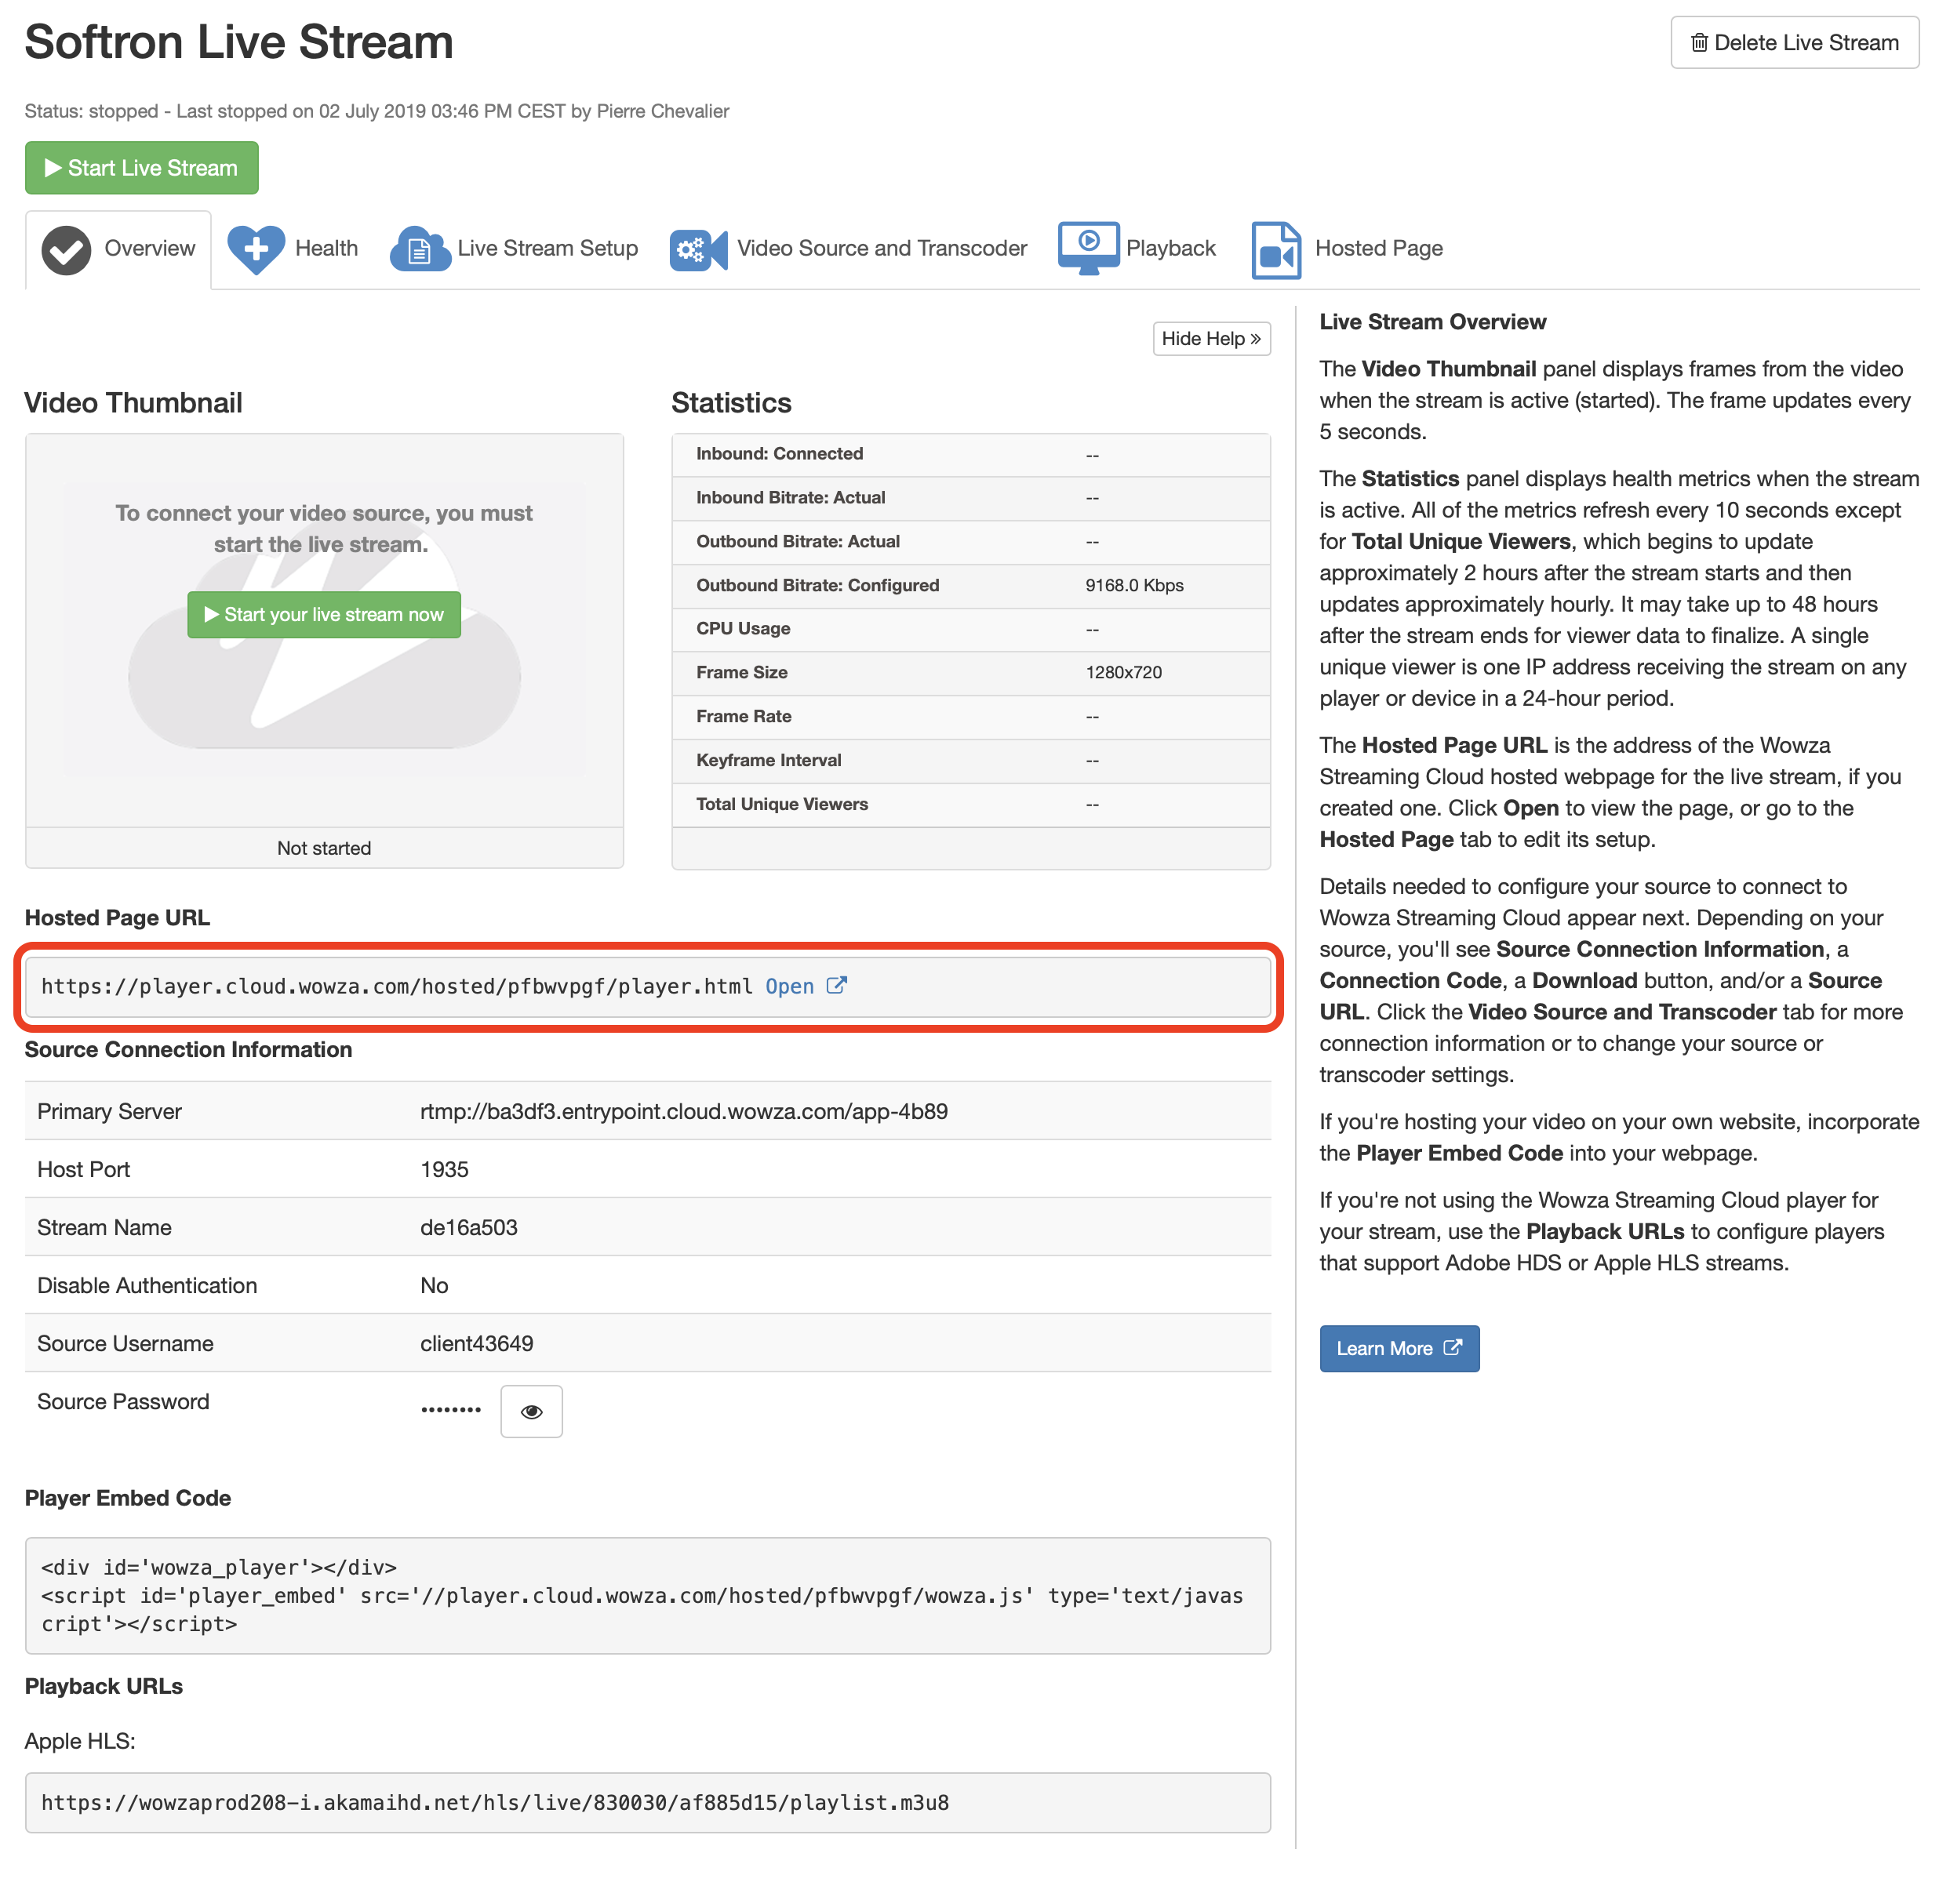
When you created your Live Stream in Wowza Streaming Could, the 4th page allowed you to create a host page:
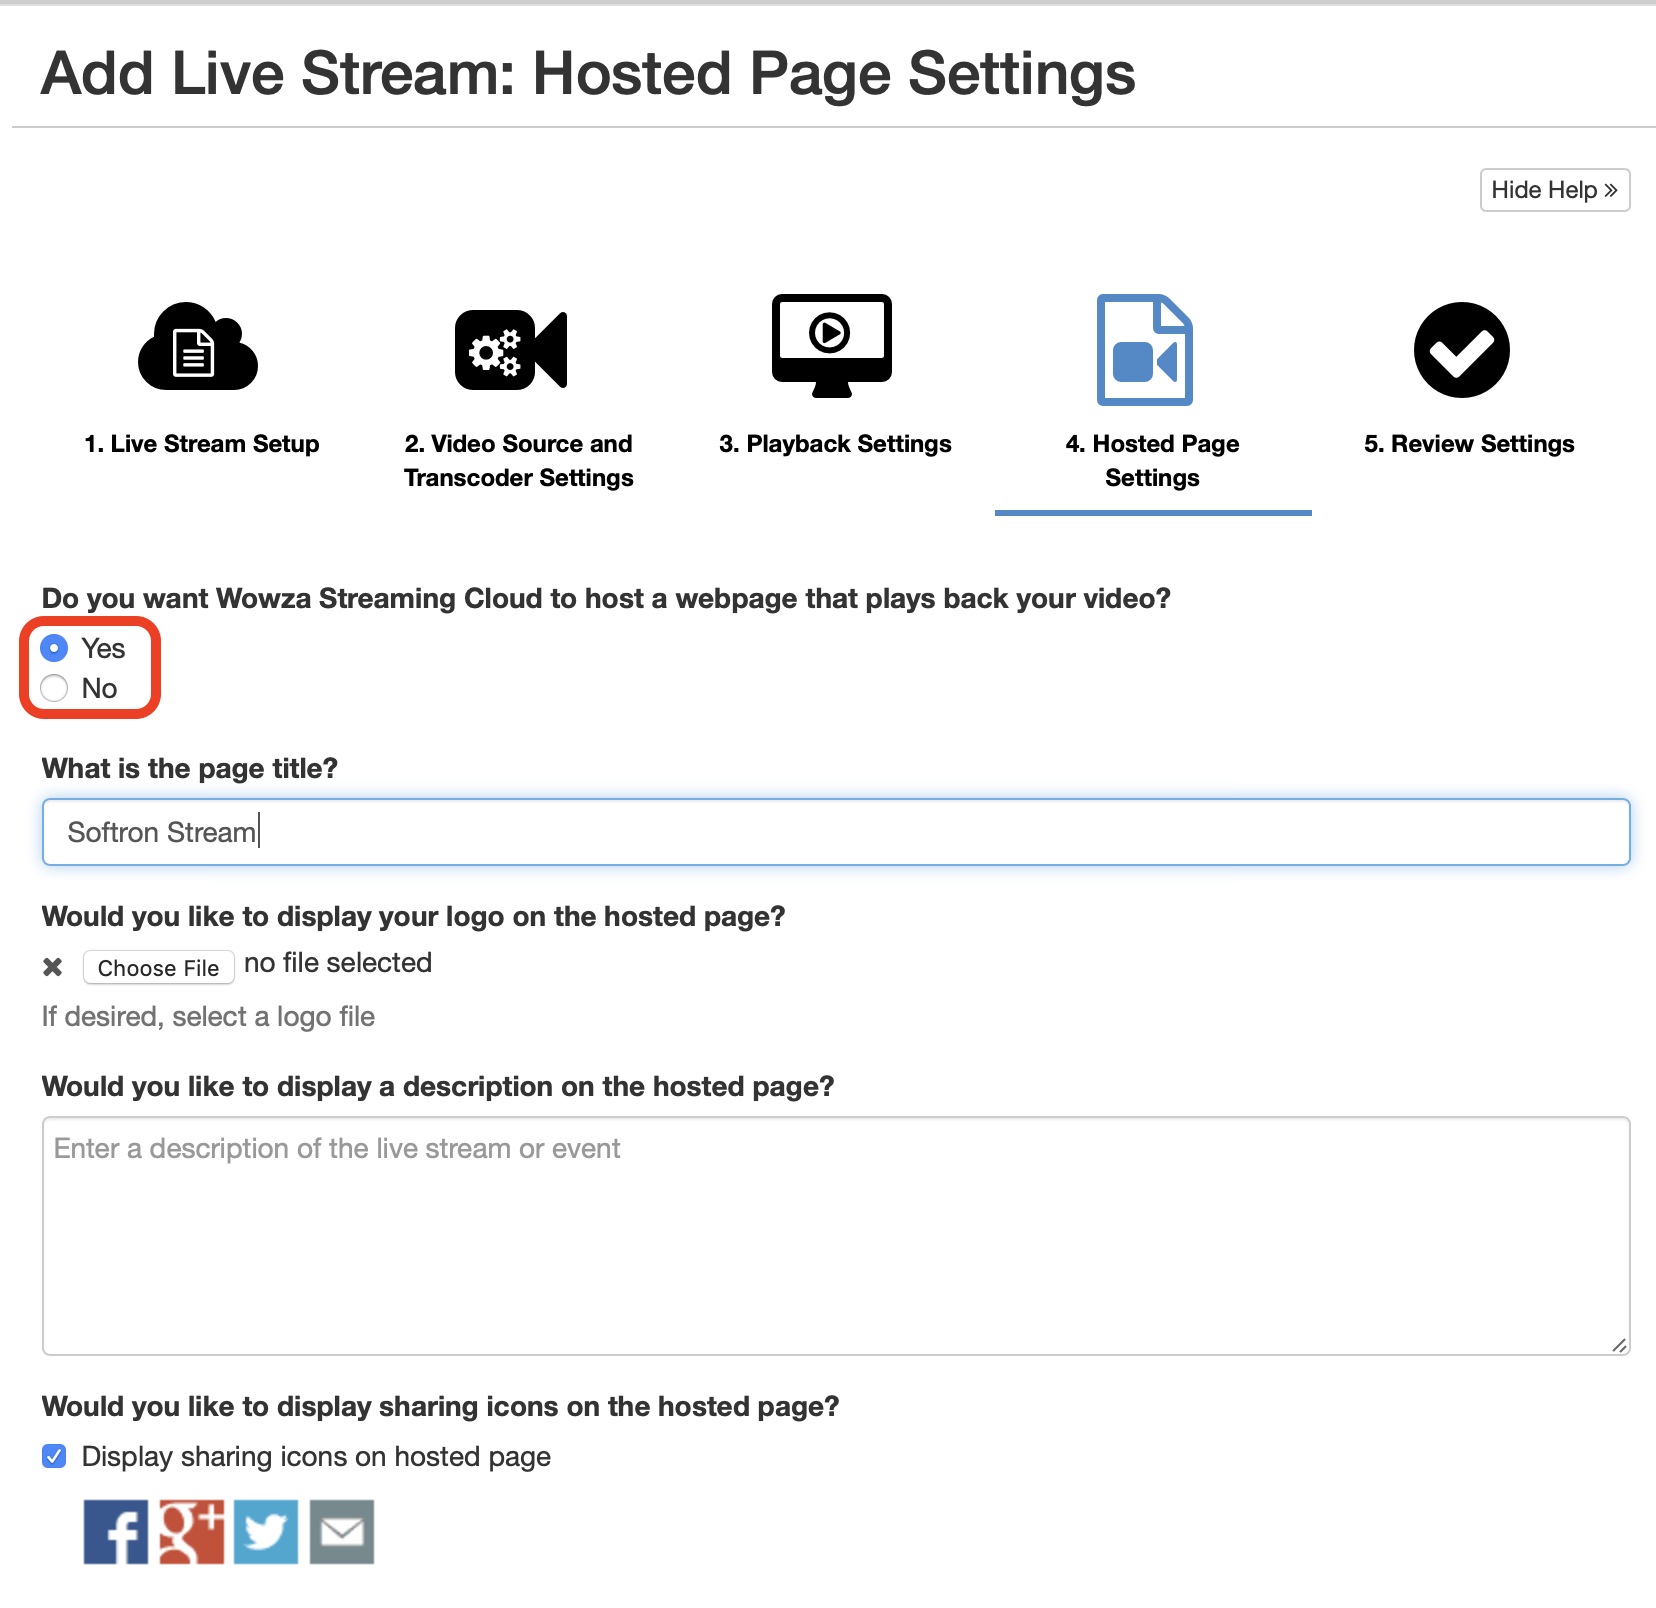
If you selected to create that host page, you should see a url in your Live Stream. you can copy and paste this in any browser:
With a Wowza or RTMP server
You cannot view directly in a web browser the stream that you are sending to the server. You need to create a web page on a server. Check with your web developer on how to get this done.
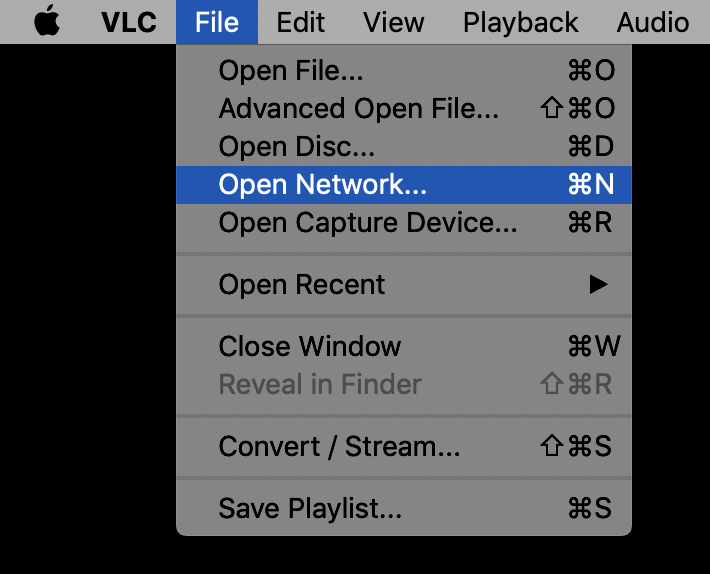
But you can view the stream locally with an application like VLC. Go to the menu "File > Open Network":
In the window that opens, enter this kind of URL:
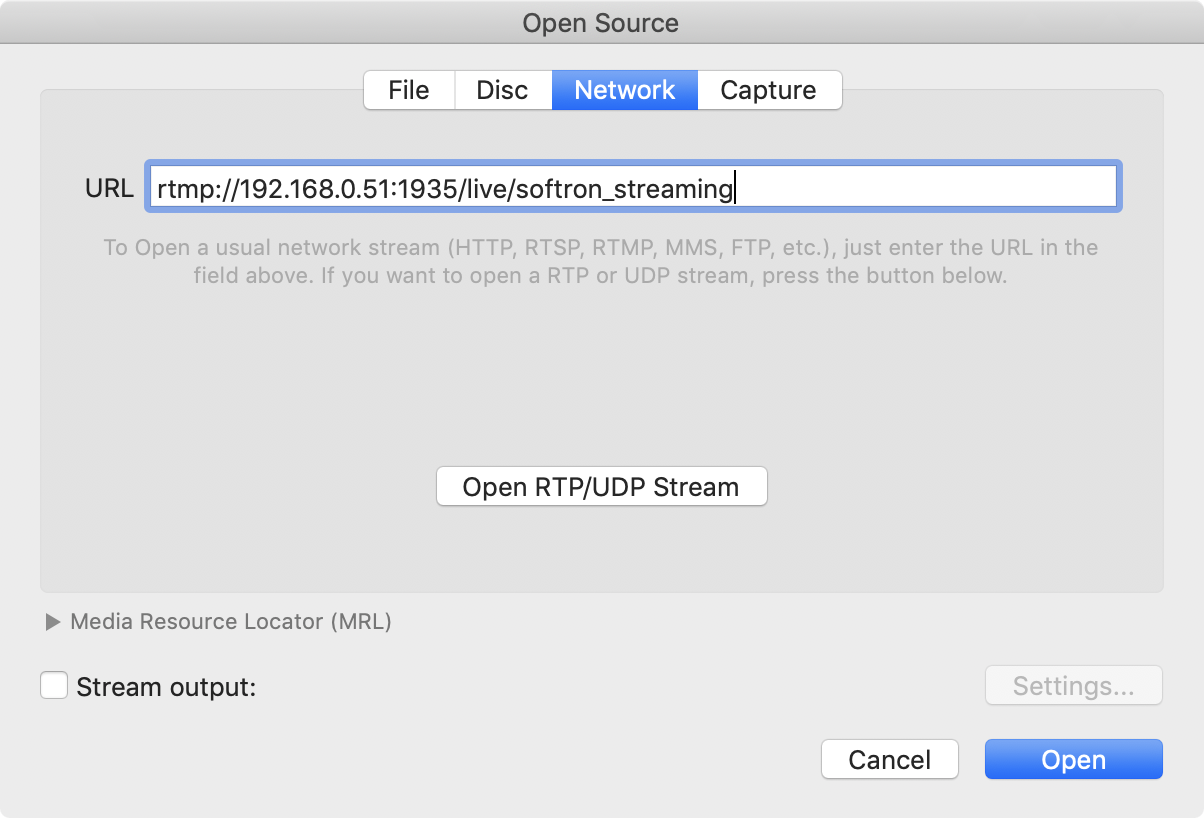
Note that you can use your streaming preset to know what to enter, as in the screenshot above:
- 192.168.0.51: is the Address of the server you have indicated
- 1935: is the port number
- live: is the "Application"
- softron_streaming: is the Stream Key (this is the default value of a Wowza or custom RTMP streaming preset)
Comments
0 comments
Please sign in to leave a comment.