Important note: Streaming Center 1.1 and MovieRecorder 4.3.7 or later are required to be able to stream to Facebook.
Create your Live in your Facebook account
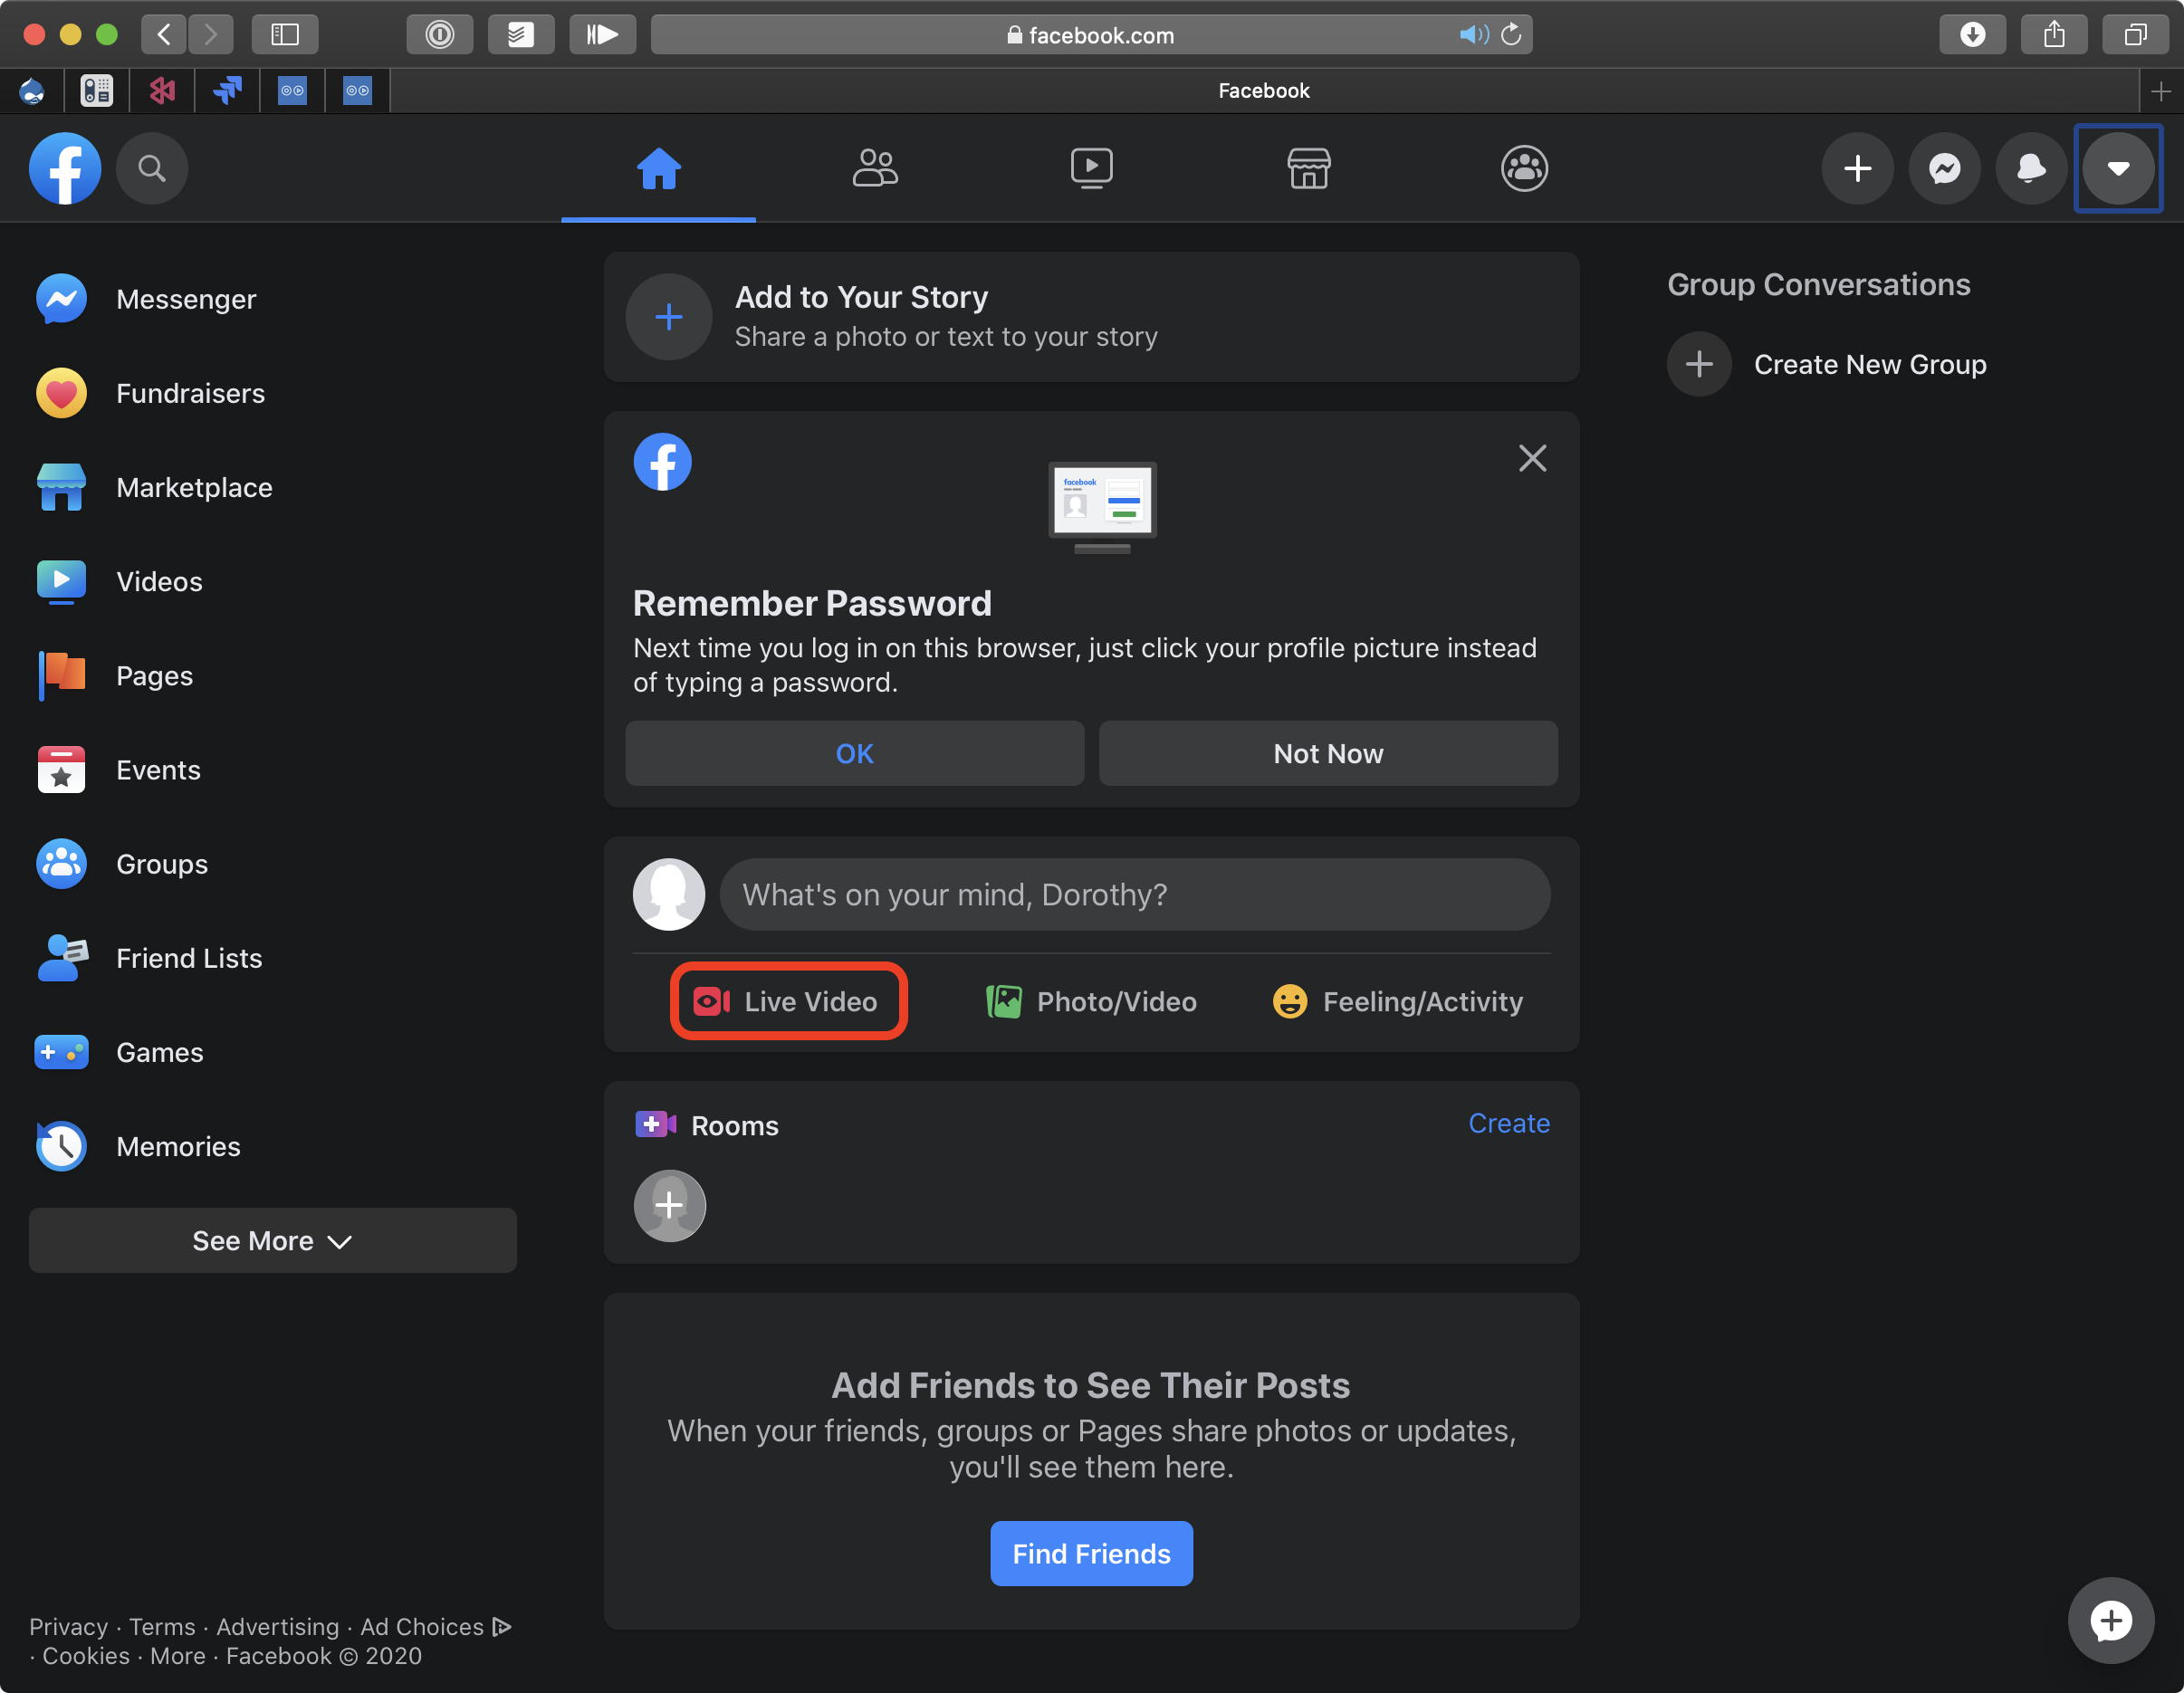
The first thing to do is to make sure that you have a valid Facebook account. When logged-in, go to your home page, where you would write a new post, and click on the "Live Video" button:
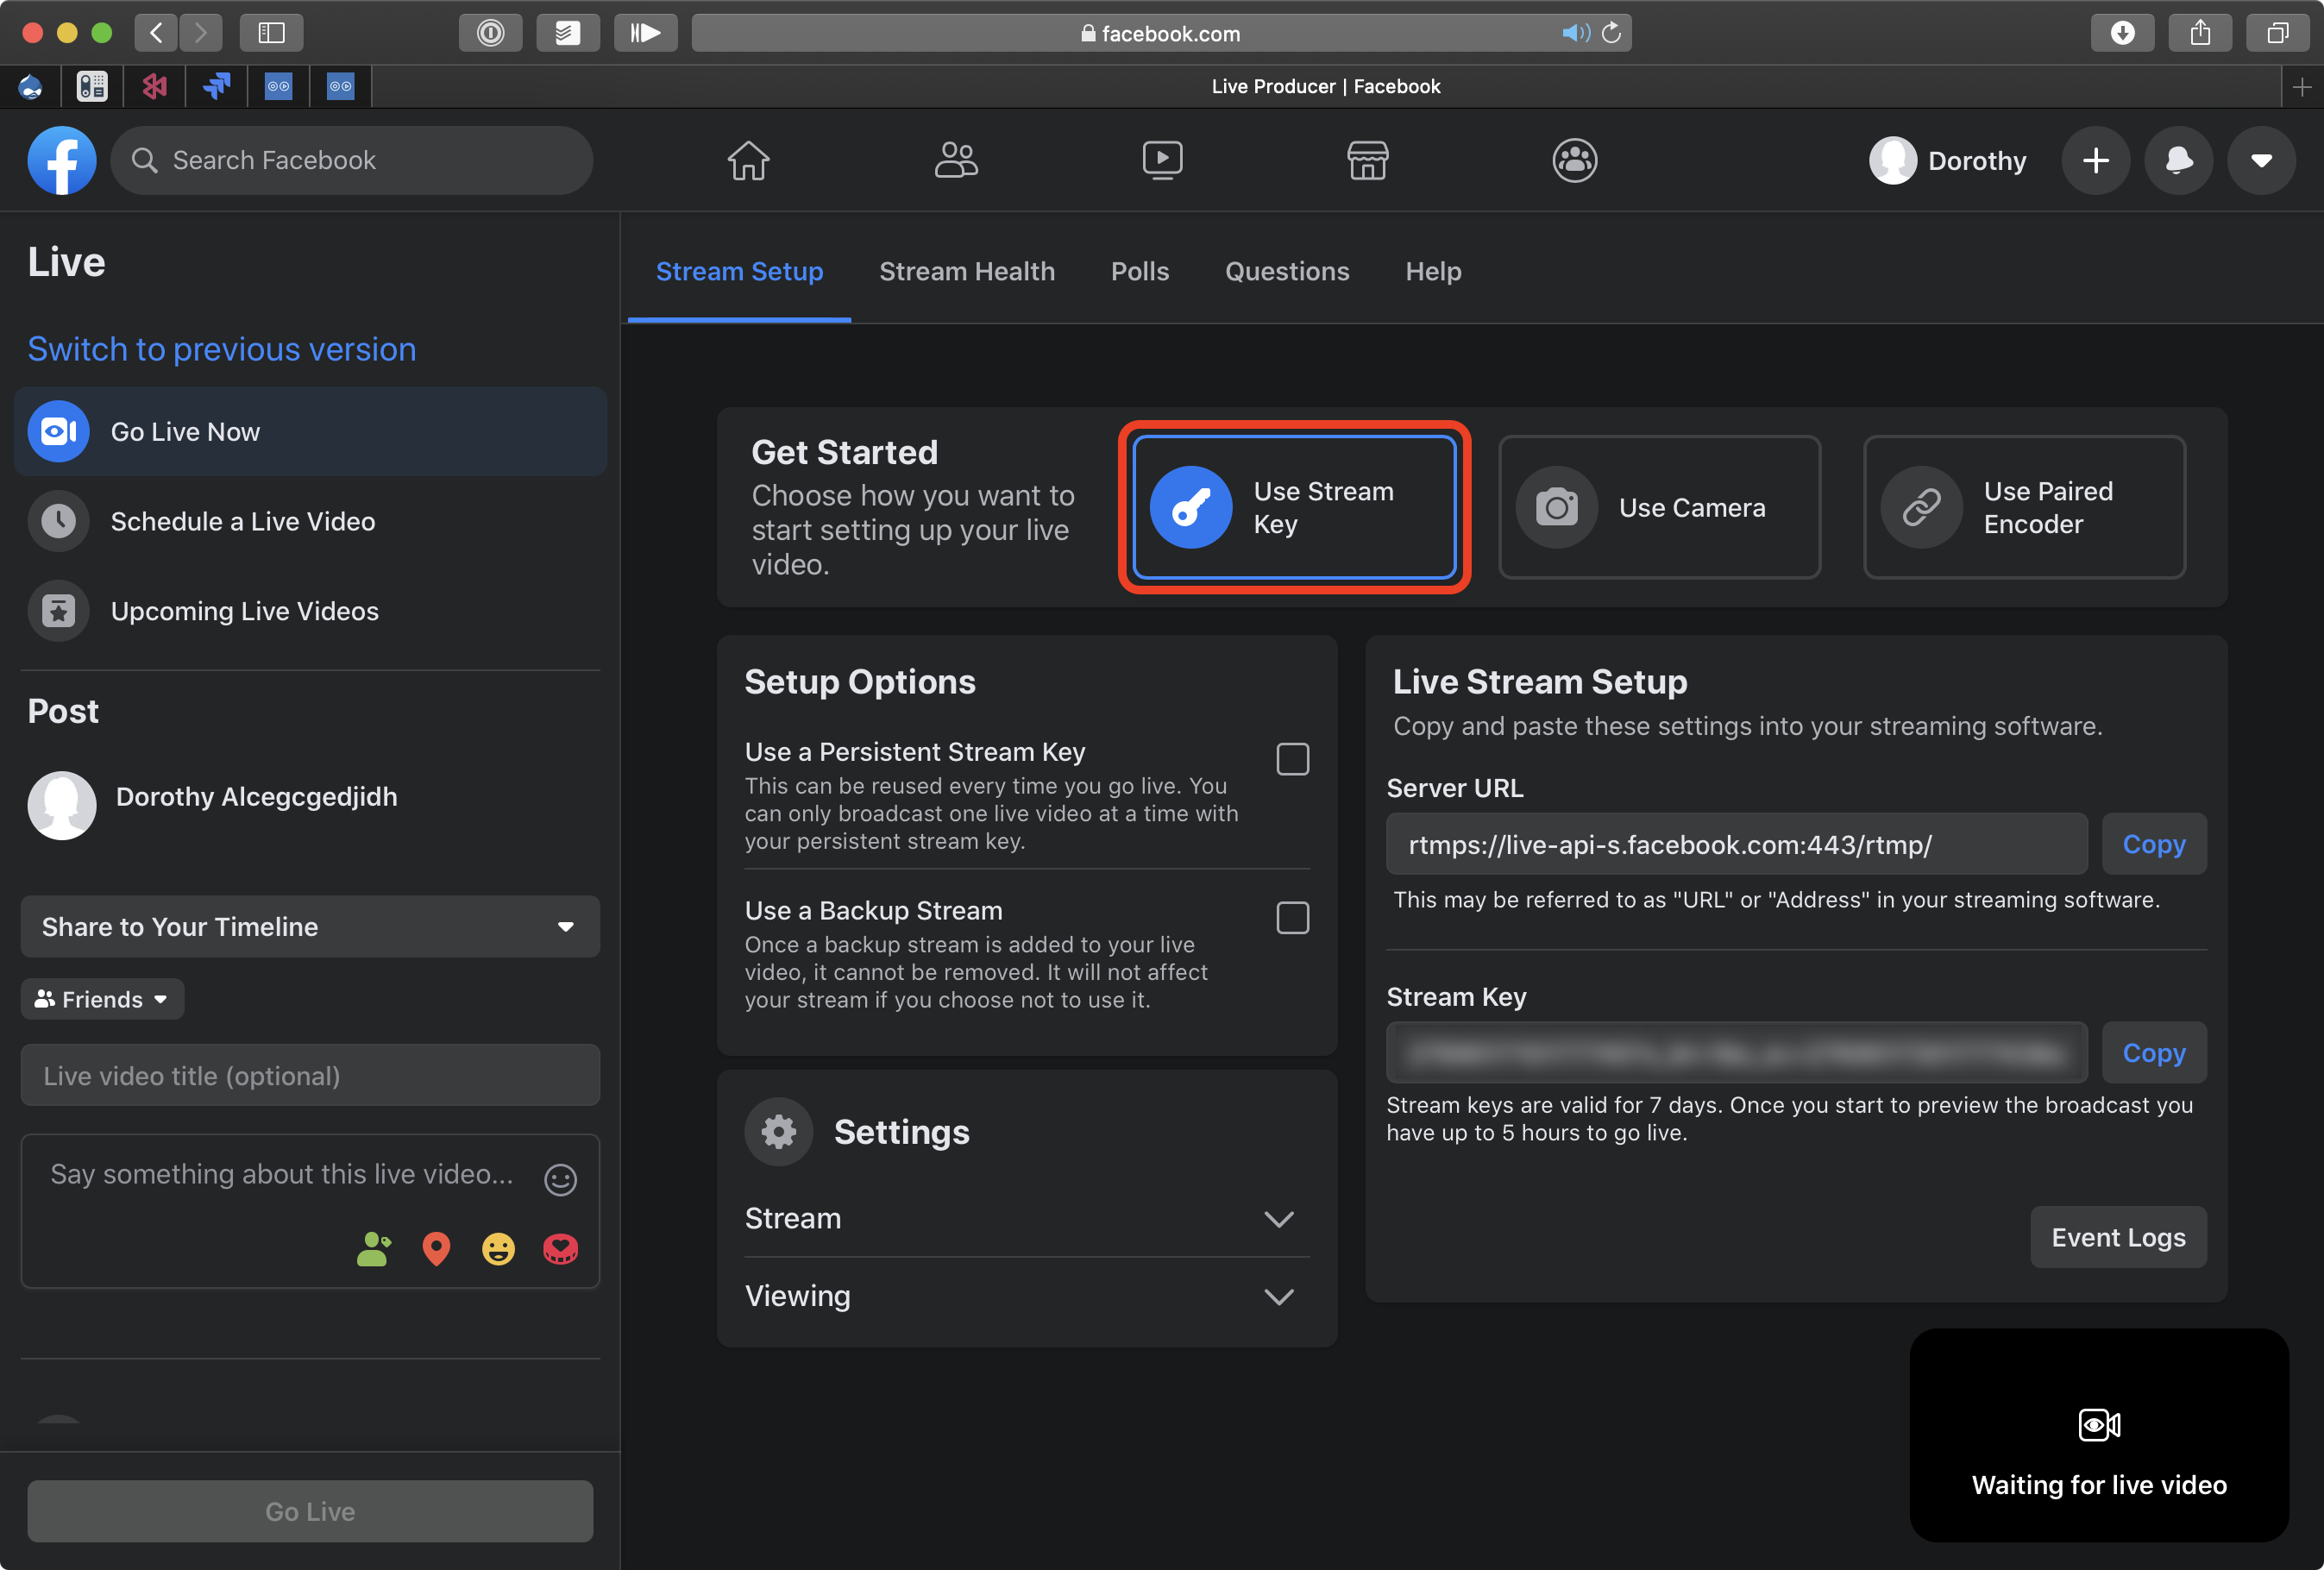
Then on the window that shows up, select the option to "Use Stream Key" (by defauyt "Use Camera" is selected)
And then copy the "Stream Key":
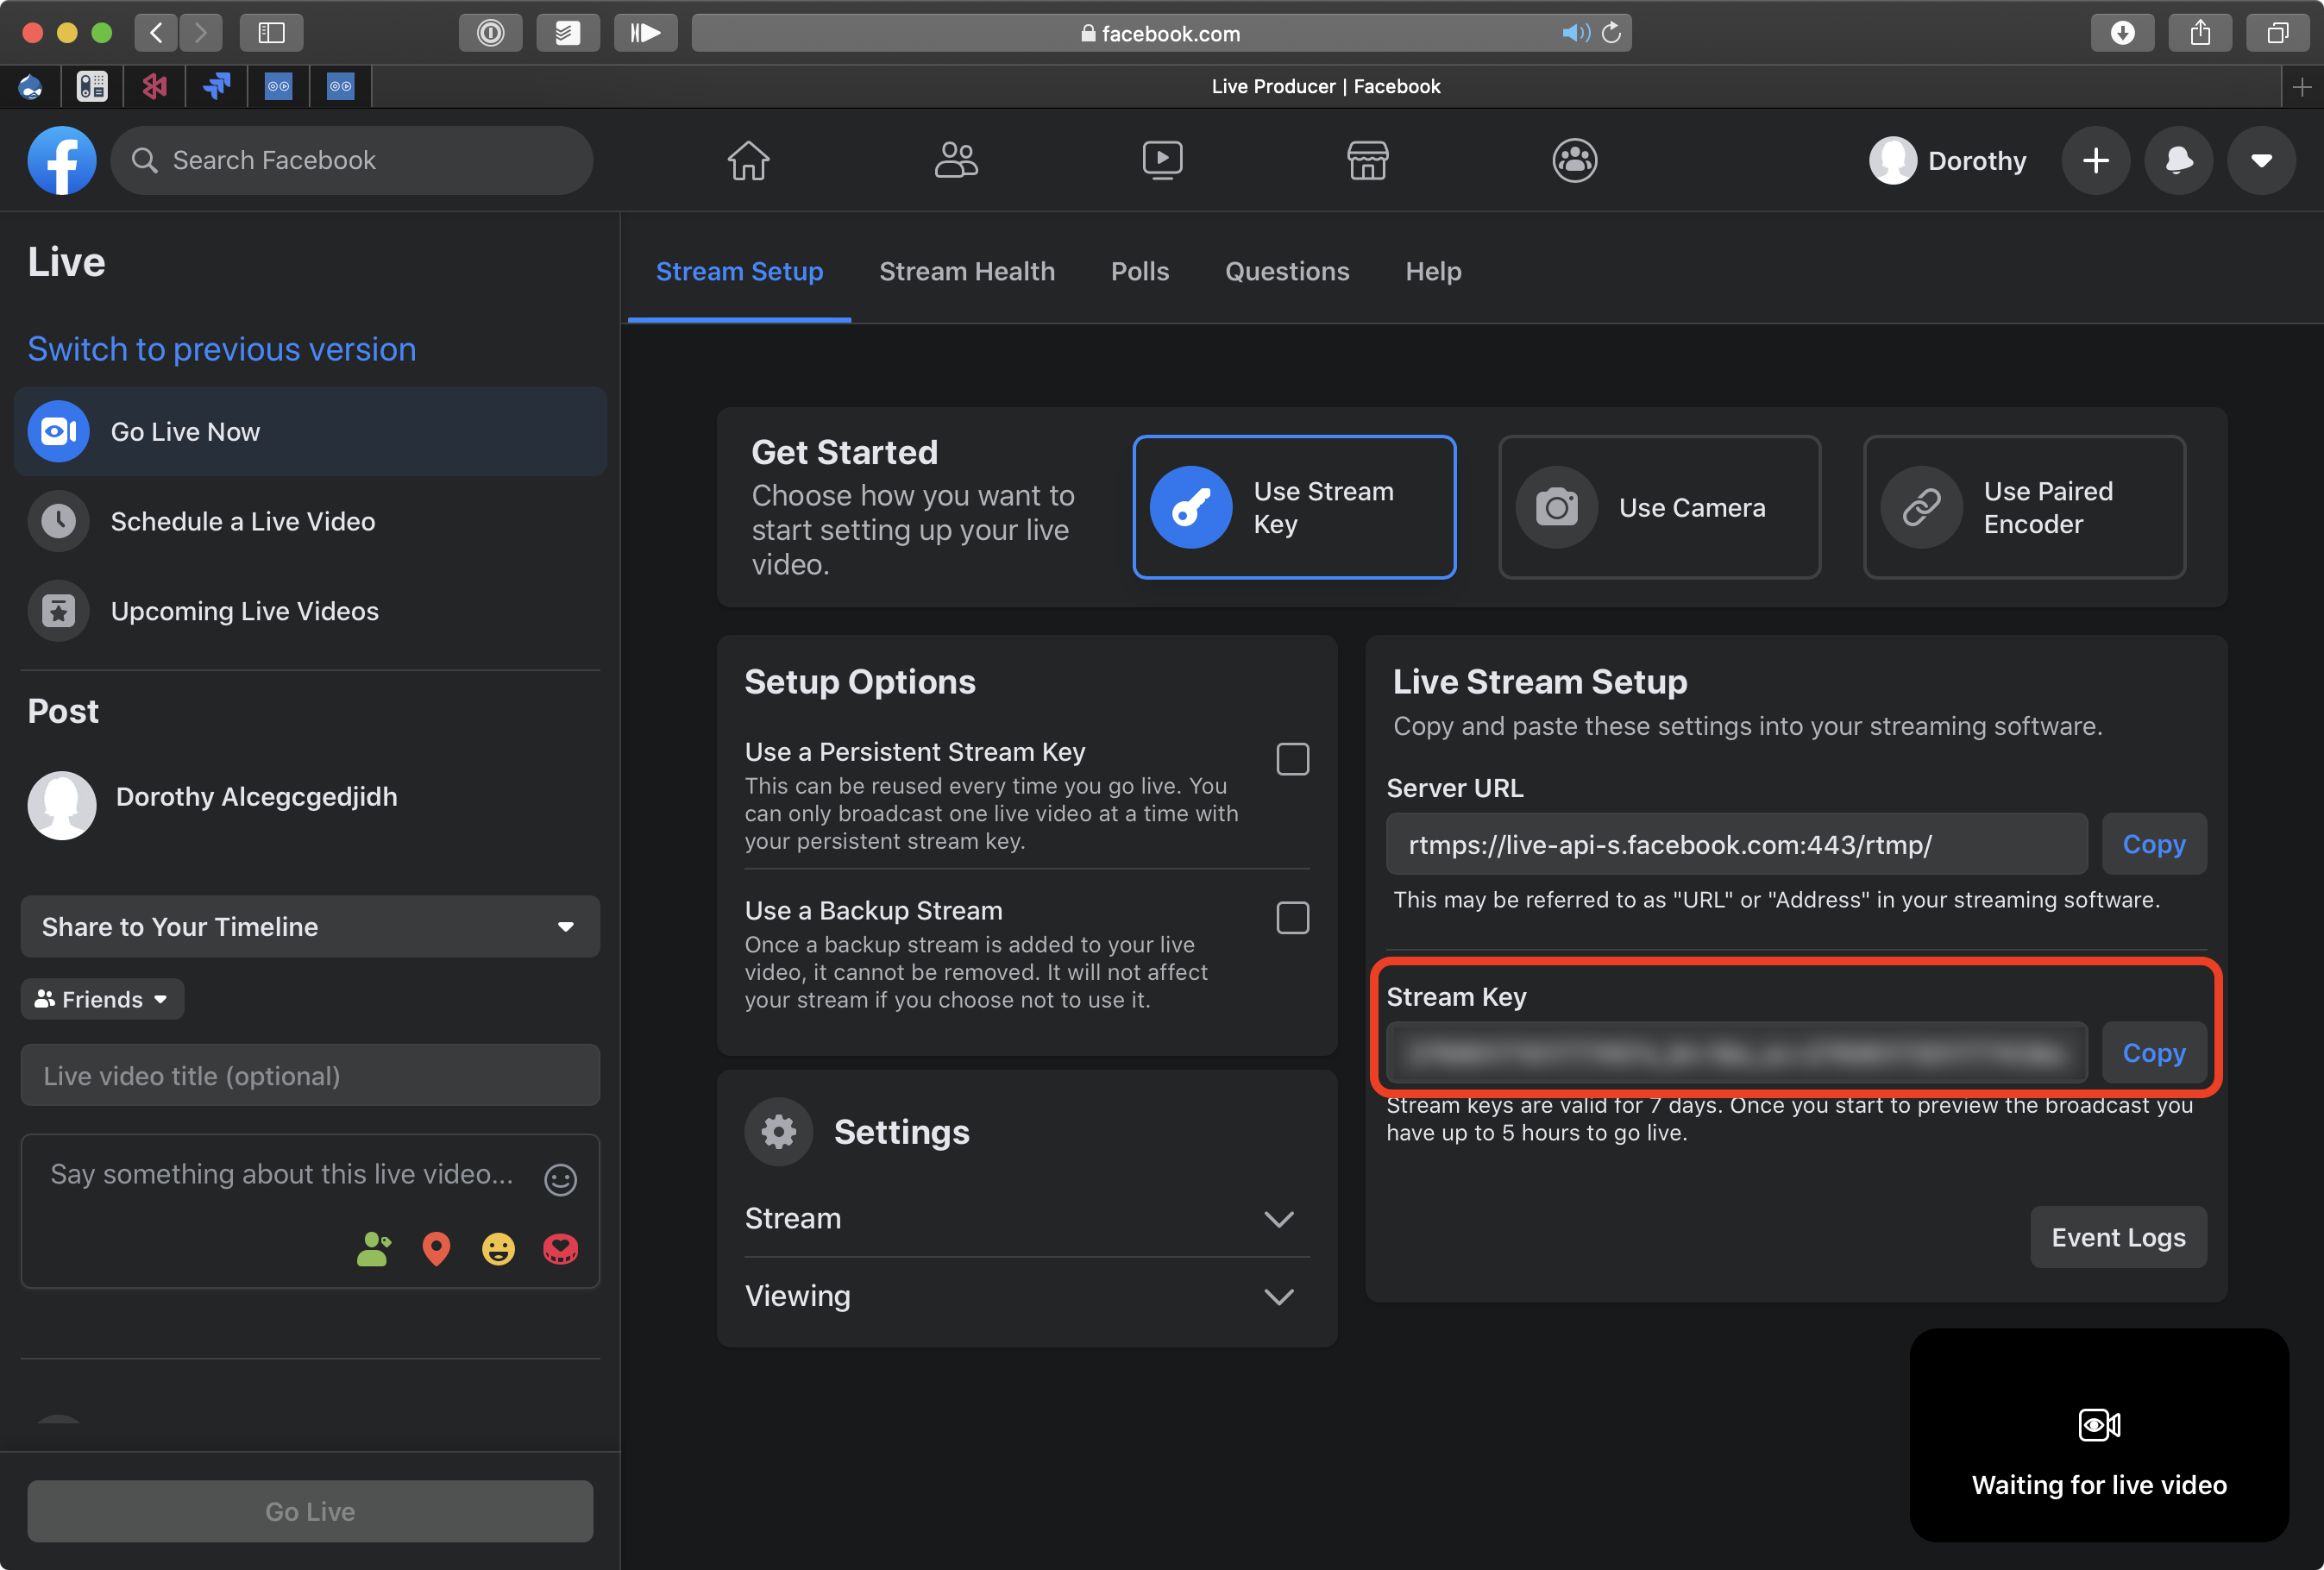
This is the key that you will need to to create your streaming preset. DO NOT SHARE THAT KEY. Indeed, anyone with it will be able to stream to your Facebook page, and you may not like what he gets to stream, so make sure to keep the key private.
A few more options:
- Use a Persistent Stream Key: enable that option if you want to always stream to the same live, and not have to get the new stream key each time.
- Use a Backup Stream: typically you would use another license of MovieRecorder and Streaming Center on another computer and use that other Stream Key to provide a back-up source in case the first one fails.
Create a Preset in Streaming Center
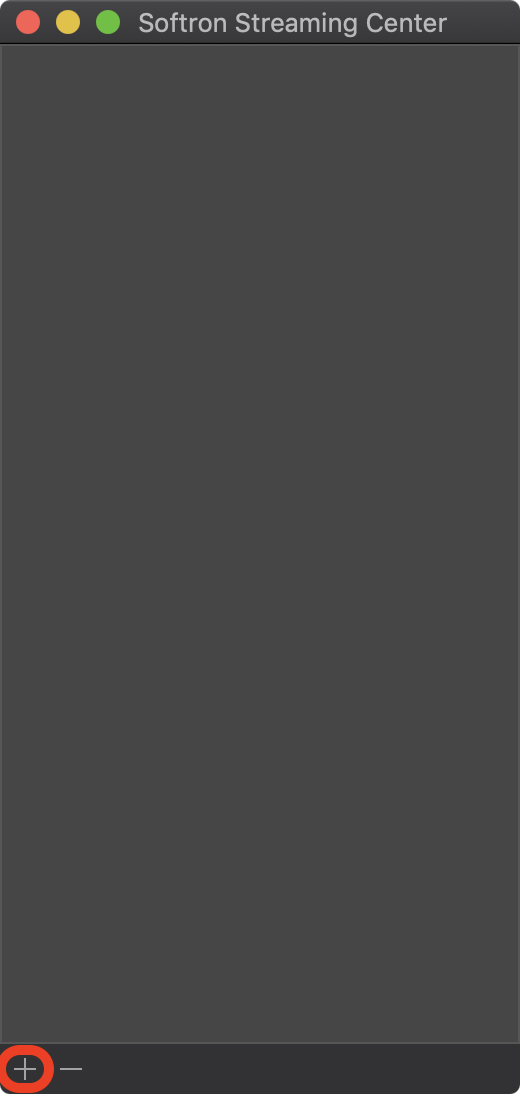
Open the Streaming Center application and create a new preset, either:
- Click on the + icon at the bottom of the window
- Use the Menu "File > New Preset"
- Keyboard shortcut (cmd+N)
- Right-click in the window and select "New Preset"
Setting up your preset
Select the "Custom" pane, and:
- Preset Name: Setup whatever name you want
- Address: livapi-S.facebook.com
- Protocol: RTMPS
- Application: rtmp
- Port: 443
- Stream Key: Use the Stream Key that you have copied from your Facebook page
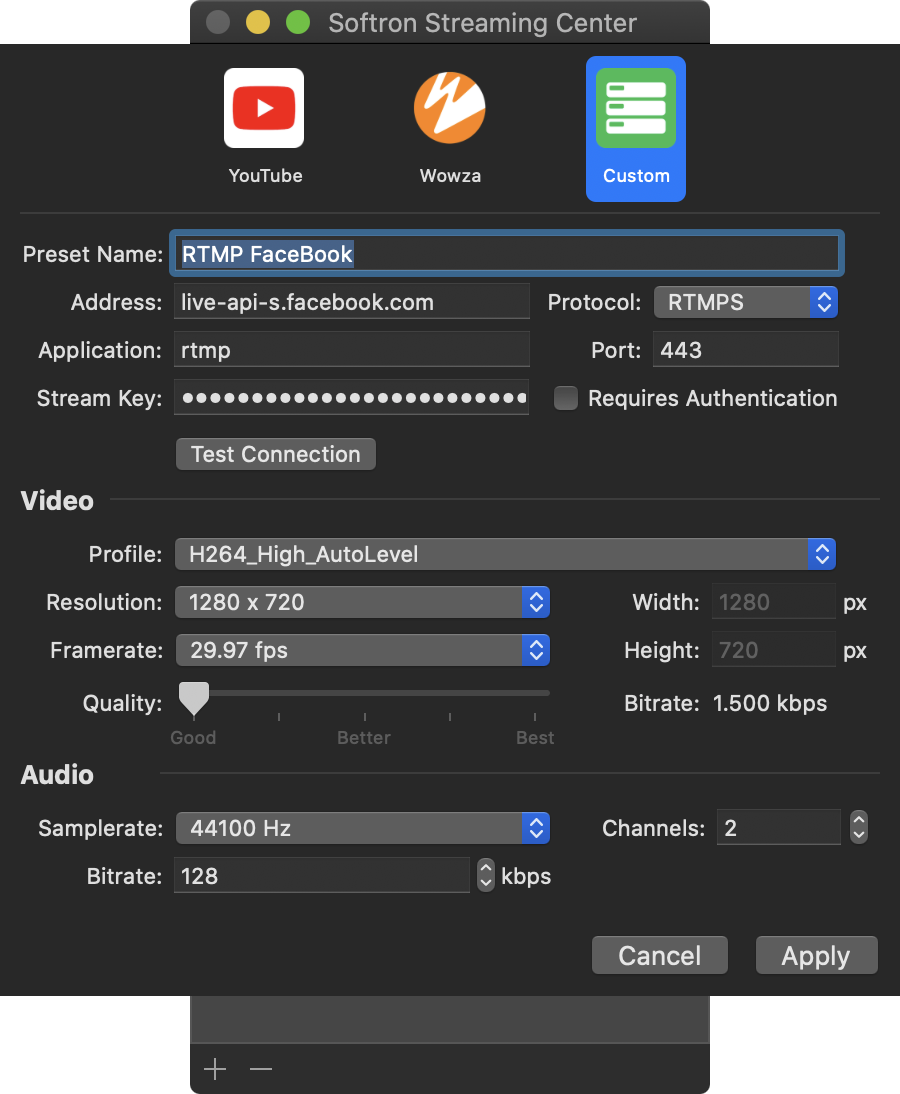
Edit Video and Audio settings
Then you can change the video and audio settings if you need.
Video settings
By default the Video formats are set to "Same as source", which means that the format will be the same as the one that is set, for example, in the MovieRecorder source. Note that if the MovieRecorder source is set to "auto-detect", the incoming format may change during the stream, which is not advised.
So make sure to either set the incoming format in MovieRecorder or choose a format and fps in your Streaming preset. When streaming, we will then resize the source format to match these settings.
Quality
By default the Quality is set to the highest bitrate possible for the selected format. If the format and/or fps are set to "Same as source", you won't be able to see the bitrate used, but if you manually select a format and bitrate, you will see what bitrate will be used:

These bitrates are within YouTube's recommended bitrates. Note that these are variable bitrates.
Audio settings
The audio settings cannot be changed for YouTube streaming as only that format is supported by YouTube.
Customise Video and Audio formats and bitrates
We have limited the settings that could be done here to match what YouTube supports. If you want to modify these values more precisely, you can create an RTMP setting, but then you won't have the direct integration that you enjoy here.
Use your preset in MovieRecorder
That's it, you are now ready to stream! In MovieRecorder, create a new "Streaming Destination":
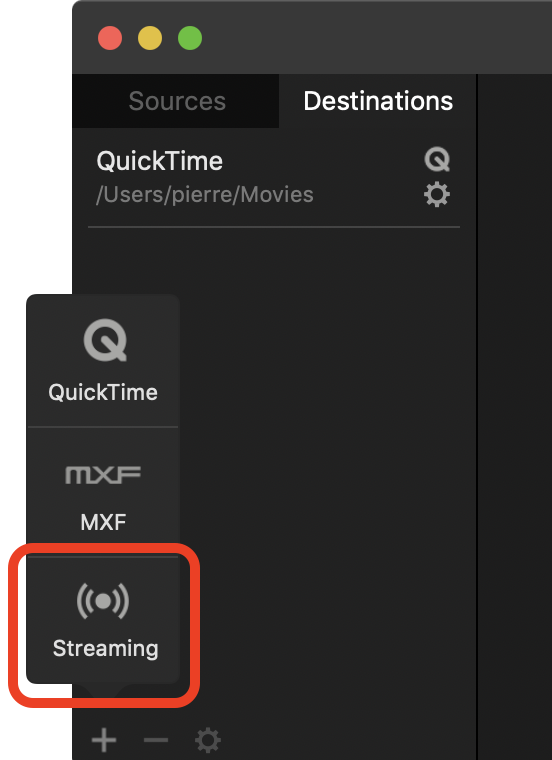
Then click on the "Setup wheel" and select the Streaming Preset that you have just created.
You can also change the name of the destination so it describes a bit better where you are streaming to. Now you are ready to use it as you would with any other destination in MovieRecorder!
Comments
0 comments
Please sign in to leave a comment.