Since MovieRecorder 3.3 it is possible to work with Metadata. This article will give you the basics.
Create a Metadata Set
A Metadata Set is a set of fields and default values for which you can enter values. If you don't understand yet, don't worry, read along and it should become clearer.
Metadata Sets can be configured in the Settings menu of MovieRecorder. By default MovieRecorder comes with one Metadata Set for "QuickTime":
You can see that the Metadata Set "QuickTime" holds various Fields in the table on the right. You can click on each of them to eventually modify it.
To create a new "Metadata Set"
- click on the popup menu at the top
- select "Edit..."
- in the window that pops up,click on the "+" icon at the bottom and eventually name the Metadata Set to your liking.
- click on "Done" to close the window
Once you have created your Metadata Set, you can create new "Fields" for it. For that, just click on the + icon at the bottom of the table:
Once it is created you can select it and edit it to enter:
- Name: the "Title" of your Field. This is what the user will see. For example it can be: "Name of the Show"
- Key: this field must be unique. This is the unique identifier that will be used by the MAM to know what kind of metadata it is. In very short we can say that the Name is what the user will read, while the Key is what the MAM will read.
- Type: there can be 5 types of metadata:
- Text: It is a simple text item
- Multiple Choice: you will define a list of possible values, and the user will be able to choose among these values. That is useful to avoid possible entry errors.
- Number
- Date/Time
- Boolean
- Default Value: You can set a default value or not. This is convenient if for example you want to have a copyright added, and thus you will know what value it should be by default.
Configure a destination to write Metadata
Then you must configure a destination so that it will write Metadata either
- embedded in the QuickTime file
- or as a sidecar file
If you choose a "Sidecar" file MovieRecorder will create an XML file that will correspond to the format required for one of these MAM:
- Axle
- Cantemo Portal
- CatDV
Note that we could support more types of XML, so do not hesitate to contact us if you need an XML that is not yet supported.
You can then choose wether the XML is written:
- in the same folder as the movie
- at a different location
Once all that is set, you can start using and recording with metadata.
Edit Metadata for each Source
At the bottom right of each source, you will see a small "tag" icon. If you click on it, you will be able to select the Metadata Set that you want to use and the values for each field.
You can see at the top that there is a popup menu. Click on it to select the Metadata set that you want to use. You will see that each metadata field will have the default value that you have eventually set. And then if you want to edit one these Metadata Field, you will have to tick the checkbox at the left and then modify the value.
Once you have entered the values, you are ready to start recording.
Can I edit metadata while it is recording?
For Embedded (QuickTime) Metadata
If you record metadata in the QuickTime file, it will depend on the type of file that you use:
- For "None" or "Segmented" Files, the metadata is only written at the beginning of the recording, so all the changes that you do during the recording won't be saved to the file. Only the next recording will have those values.
- For "Classic" Movies:
- If the option "Update Movie Duration when Stopping" is enabled, the Metadata will be updated at the end too when recording stops with the new values
- If the option "Update Movie Duration when Stopping" is disabled, then the metadata won't be updated.
For Sidecar files
You can set when you want the sidecar file to be created:
- When recording starts
- When recording starts and stops
- When recording stops
The advantage of creating the file when the recording stops is that you can still edit metadata while the recording takes place. You should create the sidecar file at the beginning if for example your MAM supports growing files.
Can I enter a range, markers and logs ?
At the time of writing the metadata information is only valid for the whole duration of the file. We do not have ways to log information, enter in/out, duration, etc...
Metadata for Final Cut Pro X
Supported metadata by default
With FCP X, only a limited set of metadata are supported by default (without having to do anything), and here are the supported keys:
- com.apple.quicktime.displayname
- com.apple.quicktime.album
- com.apple.quicktime.artist
- com.apple.quicktime.author
- com.apple.quicktime.copyright
- com.apple.proapps.reel
- com.apple.proapps.scene
- com.apple.proapps.shot
- com.apple.proapps.angle
You can create a metadata set in MovieRecorder yourself if you want, but attached is a keyset file that you can import in the Metadata preferences of MovieRecorder. This will help you get started easily. Just open the MovieRecorder preferences, go to Metadata, click on "Import..." and select the "Final Cut Pro Metadata.keyset" file that you have downloaded.
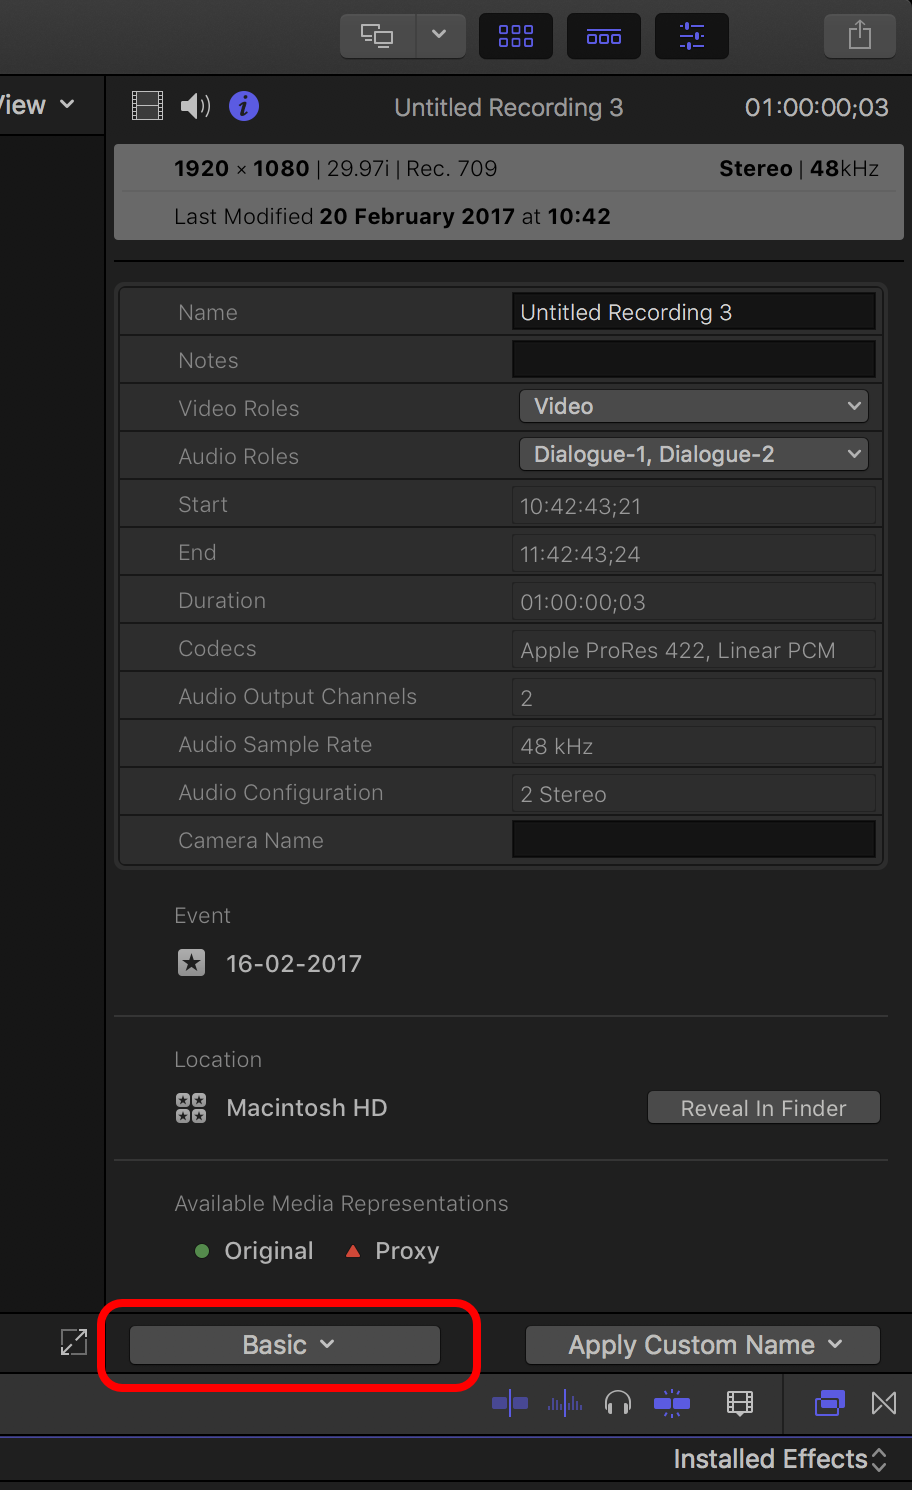
Then in Final Cut Pro, you will have to create a "Metadata View" to view these metadata. For that, in the FCP inspector, click on the button at the bottom of the metadata view:
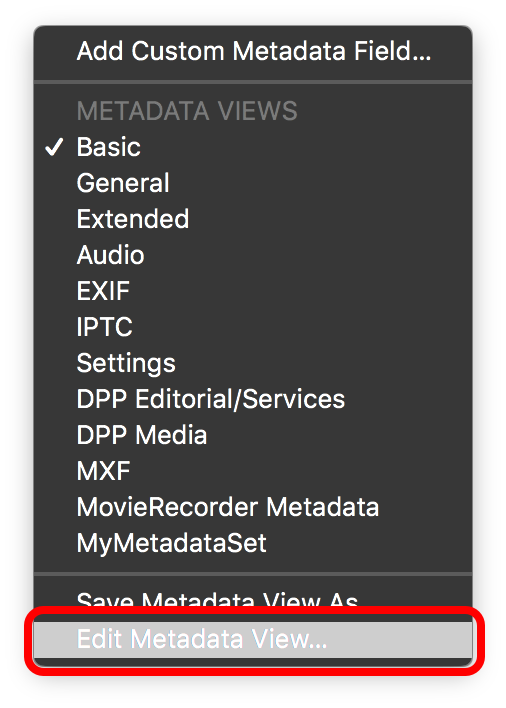
Then select "Edit Metadata View..."
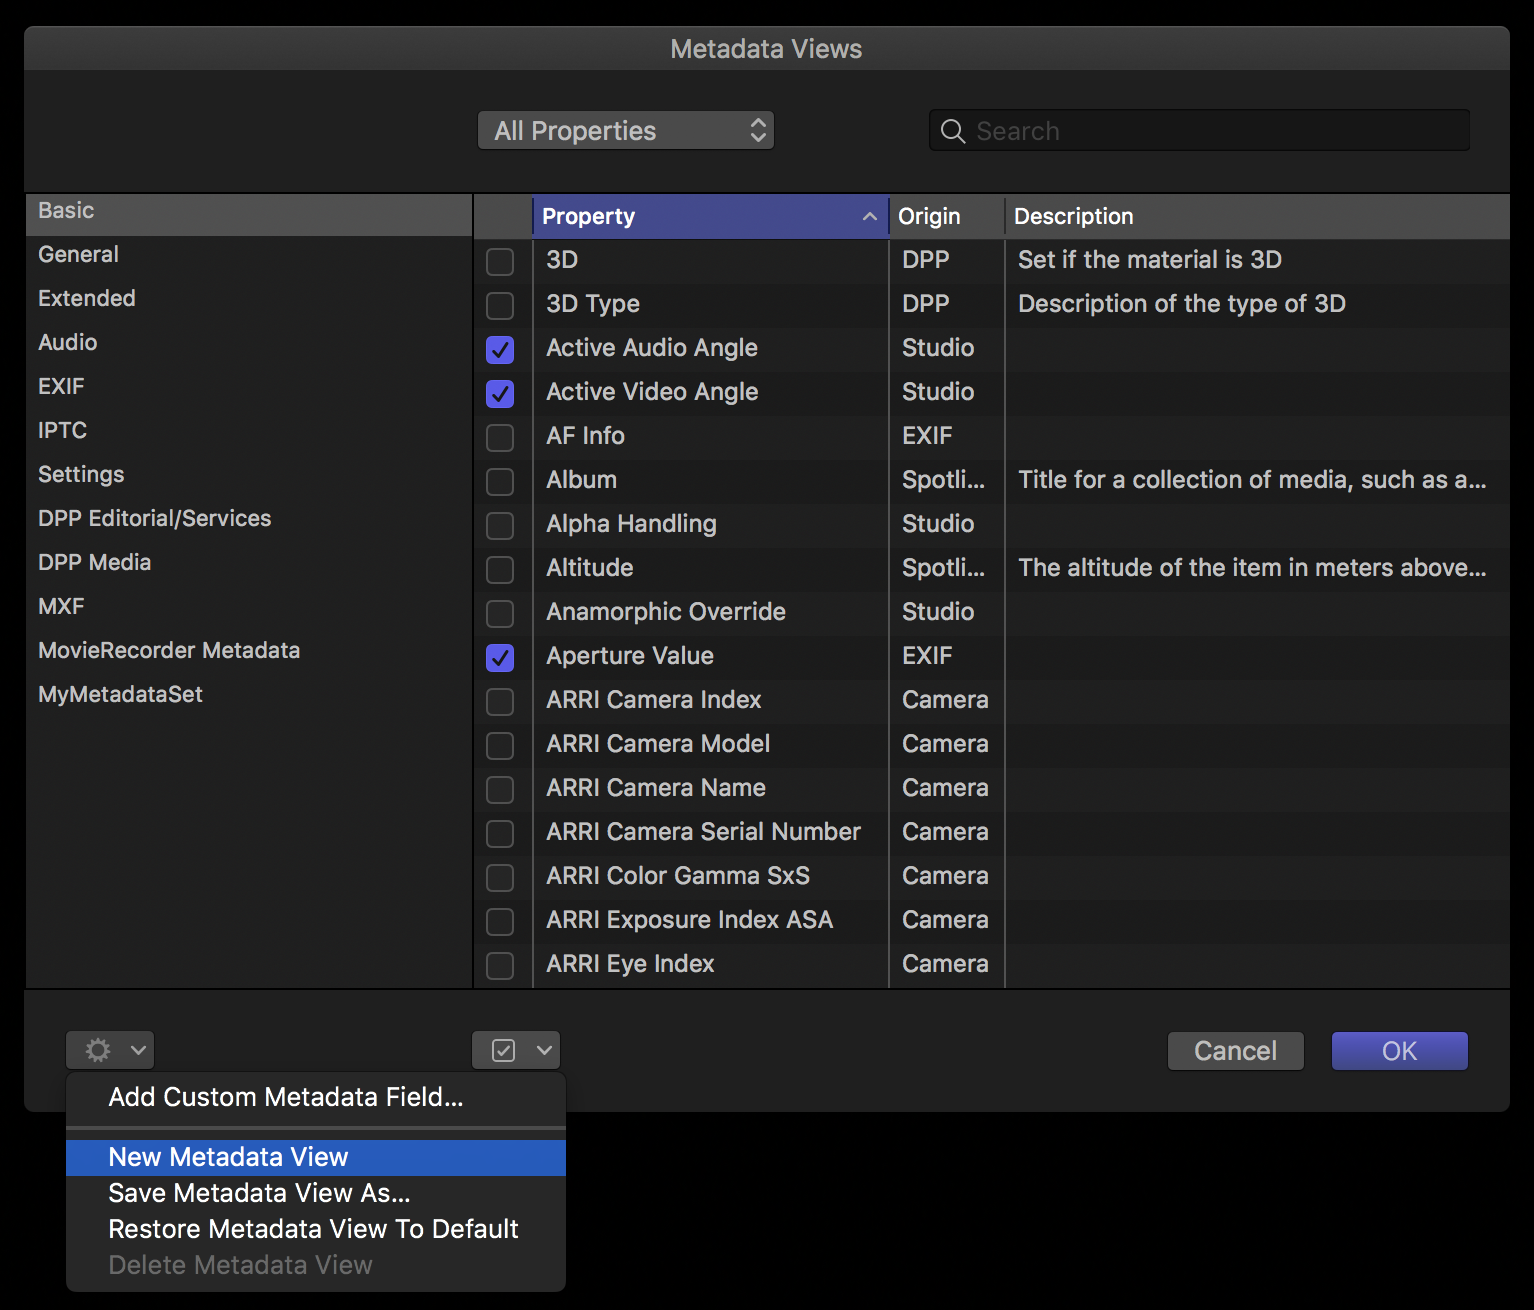
Then in the Metadata create a "New Metadata View..."
Give it a name and then enable all the different checkboxes to correspond to the following screenshot:
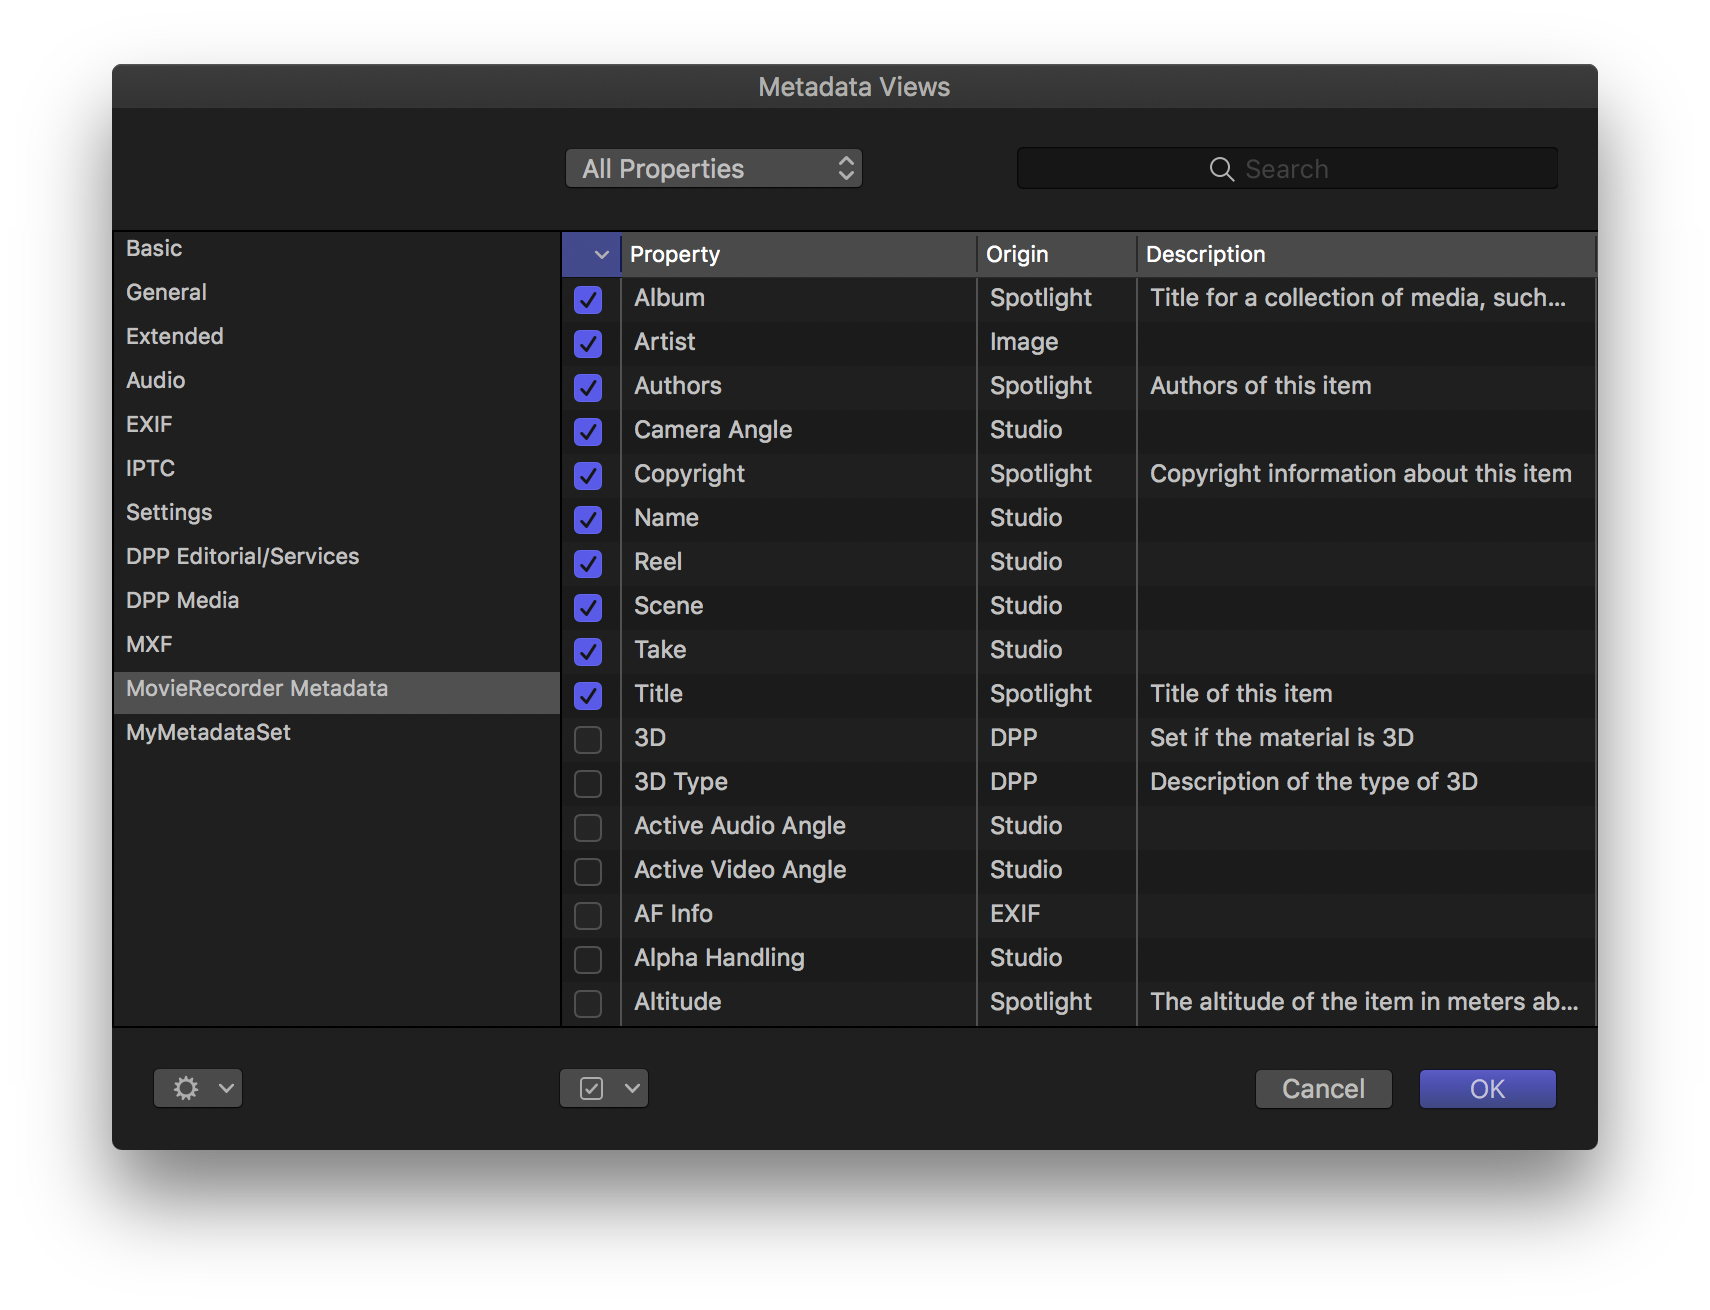
Then click on OK, and make sure that it is selected at the bottom of the FCP inspector. When you select it (and you have recorded a file with MovieRecorder metadata as described above), the inspector should look something like this:
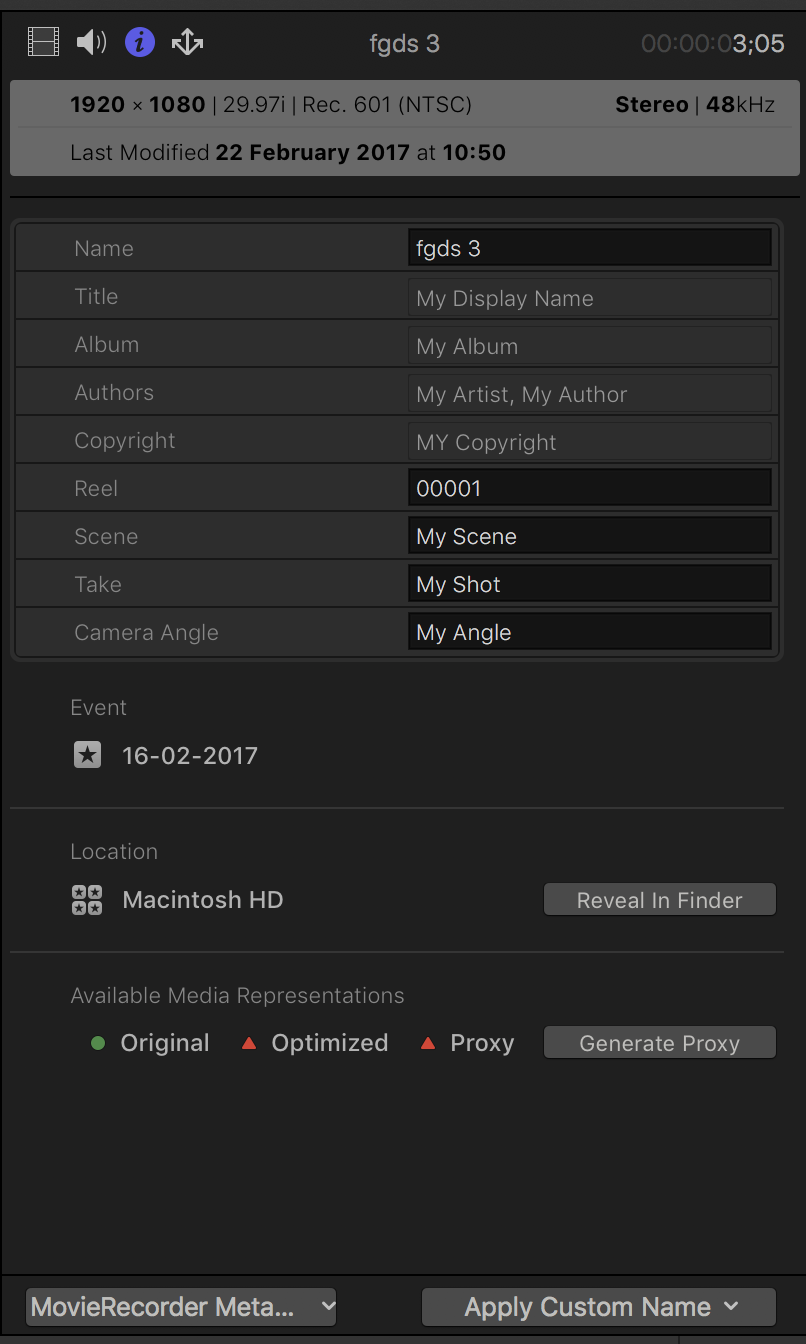
Adding custom metadata to Final Cut Pro
If you want to add more metadata than what is supported by default in Final Cut Pro, you will have to create "Custom Metadata". Here is an article that explains how this works: https://developer.apple.com/library/content/documentation/FinalCutProX/Conceptual/FinalCutProXWorkflowsGuide/WorkingwithCustomMetadata/WorkingwithCustomMetadata.html
Note that we are also attaching a small sample plist file that you could use as a starting point.
Metadata with CatDV
Retrieve CatDV Field indexes
To configure a Metadata Set, you will first need to retrieve from your CatDV database the field index of each field. Indeed the CatDV XML will look like this:
As you can see the fields are mapped using a field index. Check with the CatDV manual or your CatDV representative how to retrieve those filed indexes.
Configure a Metadata Set
Once you have retrieved the field indexes of all fields in CatDV, you can configure your Metadata Set. Indicate the "field index" in the "Key" field of your Metadata Set.
For example like this:
Setup Destination and Values
Once your Metadata Set is created, make sure that on the destinations you use, you have enabled the option to automatically create the Metadata sidecar:
Then on the Viewer, make sure that you have added values to at least one field (metadata files are not created if no value is entered):
That's it, the sidecar file should automatically be created. You can find attached to this article a sample of a CatDV XML for your reference.
Comments
0 comments
Please sign in to leave a comment.