MovieRecorder supports edit-while-ingest with Adobe Premiere Pro (since version CS5.5). Softron is a Adobe Video Technology Partners.
Warnings and limitations
File type and Resolution limitations (MXF or MOV - HD or 4K)
Adobe officially supports edit-while-ingest in Premiere Pro only with:
- MXF files. Formats such as .MOV, .MP4, or .M4V are not officially supported. Although we have seen that some .MOV Classic worked.
- Only a specific set of codecs (AVC-Intra Class 50/100, IMX 30/40/50, XDCAM HD 50/35/25/18). All these codecs are HD only, even though in our tests we saw that 4K codecs such as DNxHR or XAVC worked.
As a result, only MovieRecorder (not MovieRecorder Express) can generate MXF files that qualify for official Adobe support.
Below, we list a few workarounds we have seen successfully used with .MOV files and/or with 4K resolutions, which may also work with MovieRecorder Express. However, since these workflows are not officially supported by Adobe, we cannot guarantee that they will continue to work in future versions. Make sure to run tests with the free demo version before purchasing a license from us.
SMB file storage limitations
We have observed issues when files are read from SMB-based storage, where media does not automatically grow in Adobe Premiere Pro. If you encounter this problem, we recommend using a different type of storage.
Disclaimer
The information below is provided without guarantee. We are not the developers of Adobe Premiere Pro and therefore cannot vouch for its behavior. We can, however, vouch for MovieRecorder’s behavior. If you encounter issues with growing media in Adobe Premiere Pro, we recommend contacting your Adobe representative.
Our files are generated using standard methods and have been working reliably for several years, so there is no inherent reason they should stop working. You are, of course, welcome to contact us and we will do our best to assist. That said, if the issue involves Premiere Pro not recognizing file growth, it is important to consult Adobe as well.
Official Adobe Recommendations
For the most accurate and up-to-date guidance, we strongly recommend consulting Adobe directly. Adobe’s official recommendations can be found in the following article, under the “Support for growing files” section:
https://helpx.adobe.com/premiere-pro/using/supported-file-formats.html
At the time of writing, MXF XDCAM files are recommended for the best and most reliable edit-while-ingest experience. All other workflows should be considered workarounds (and subject to change) rather than officially supported solutions.
Below is a summary of Adobe’s guidance (screenshot from Adobe Help Desk); however, be sure to refer to the link above for the most current information.
Adobe Premiere Pro settings
In the “Media” section of the Adobe Premiere Pro preferences, make sure to:
- Disable the option "Write XMP ID to Files on Import" and "Write clip markers to XMP". If you fail to do so, Adobe Premiere will modify the file that is already being constantly modified by MovieRecorder and this will corrupt the file.
- Enable the option "Automatically Refresh Growing files". And set it to the value that best suits your needs. If you want to be really close to the "Live", you can use something like 10 seconds, but if you want to have less frequent updates (and thus easier on the computer), you can opt for something like 60 seconds.
Supported MovieRecorder Destinations
When using MovieRecorder, you must select one of the following destination types:
- MXF (officially supported - recommended). Adobe recommends to use MXF for growing files workflows, and only support a specific set of codecs for this (see above). But we have seen that more codecs worked (unofficially). Our testing is primarily done with the following codecs: In HD: XDCAM HD422 (recommended), in 4K: XAVC 4K Intra 300 and DNxHR SQ (unofficial support). Note that MXF is supported only in MovieRecorder and is not available in MovieRecorder Express.
- QuickTime "Classic" (unofficial workaround, subject to change, test before use to confirm it still works). All the codecs supported by the QuickTime Classic destination should work, but our testing is primarily done with Apple ProRes LT. This is supported both by MovieRecorder and MovieRecorder Express.
Working with growing files in the Timeline
Adobe Premiere handles Classic QuickTime files differently than Final Cut Pro.
When a Classic QuickTime file is imported into Adobe Premiere, the application displays only the duration that has been recorded so far. Even though MovieRecorder sets a predefined duration for Classic files, Adobe Premiere ignores this value and instead shows the current recorded duration only. As recording continues and the file grows, the visible duration in Premiere updates every few seconds, depending on the refresh interval set in Preferences.
If you want the clip to appear in Premiere with its full intended duration in the timeline, the following two workarounds are available.
⚠️ Important Note
The methods described below rely on unsupported behaviors in Adobe Premiere. They are essentially “tricks” and are not officially supported by Adobe, so functionality may be limited and results cannot be guaranteed. If you require a fully supported solution, we recommend contacting Adobe directly and requesting official support for this workflow.
If you notice any issues or missing steps, please let us know 😉
Workaround 1: Create an "Offline File"
Follow these steps:
- In the Project panel, click the Create icon in the bottom-right corner.
- Select Create Offline File…
- Set the format of the Offline File to match the format you will use in MovieRecorder.
- Set the duration of the Offline File to the desired total duration.
- Create a new sequence.
- Important: Add the Offline File to the sequence before proceeding to the next step. The clip will appear offline (in red).
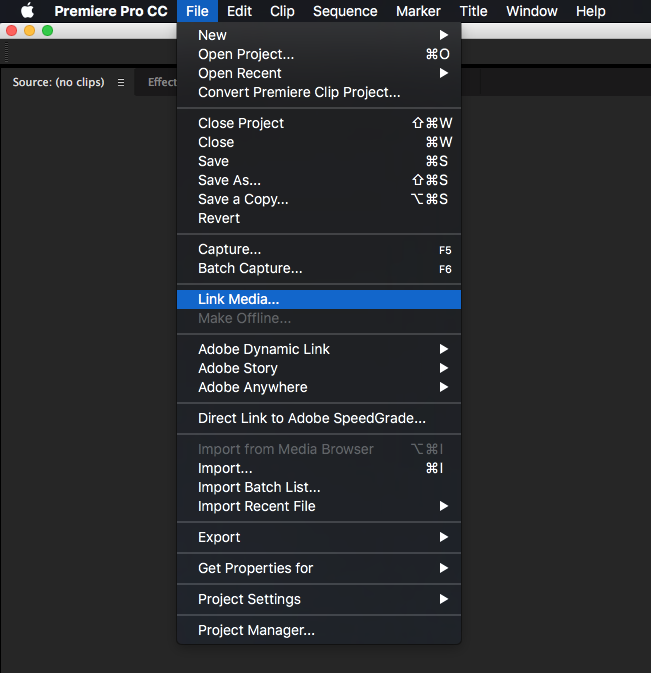
- Go to File > Link Media… and link the growing QuickTime file.
After linking, the sequence will display:
- Actual footage where media is available
- Danger bars (cross-hatches) for the remaining, unrecorded portion

You can see these steps demonstrated in this video: https://youtu.be/OZbTyFnH4ZQ
Performance tip: For better performance, disable Automatic peak file generation in Premiere’s preferences.
Workaround 2: Create an XML
Adobe provides an alternative workaround using XML, although it is more complex.
If you create an FCP XML that references the growing QuickTime file inside a sequence with a predefined duration, and then import that XML into Adobe Premiere, the resulting clip will appear with its full duration in the imported sequence.
Premiere will show:
- Actual footage where available
- Danger bars (cross-hatches) for the remaining duration
To generate the XML:
1. Import a file with the desired duration into Premiere.
2. Add it to a sequence.
3. Export the sequence as an FCP XML.
4. Open the XML file in a text editor.
5. Replace the fields that define the file name and file path so they point to the growing .mov file.
Adobe, the Adobe logo, Adobe Premiere, and Creative Cloud are either registered trademarks or trademarks of Adobe in the United States and/or other countries.
Comments
0 comments
Please sign in to leave a comment.