With MovieStreamer HLS, you have different ways to stream:
- use your Mac as a server (this requires enabling Web Sharing and you have to have a fixed public IP)
- use an external server (you need to upload to the server using FTP)
- use Amazon S3
What is Amazon S3 ?
Amazon is well known for its online store where you can purchase almost anything. Amazon also offers many more services that are Web and server related. The "S3" of Amazon S3 stands for "Scalable Storage Service". It is storage for the Internet which is part of the "Amazon Web Services".
Amazon describes its "Amazon Web Services" as offering "a complete set of infrastructure and application services that enable you to run virtually everything in the cloud: from enterprise applications and big data projects to social games and mobile apps".
What's nice about Amazon S3 ?
- It offers a Free Tier to allow you to test and setup for free. You will start paying only after you use it for a while.
- You only pay for what you use and there are no monthly fees for most services. If you have no viewers, you will have very limited costs.
- You are not limited by the bandwidth of your server, you rely on the Amazon infrastructure.
- It is easy to setup.
- No maintenance, nor backup to worry about - Amazon handles everything.
We will see below how to quickly setup an account with the Amazon Web Services, create a "bucket" in the Amazon S3 section, and start streaming in no time.
Prerequisite
Note that to setup the Amazon Web Services (AWS) account, you will be asked for:
- a valid Credit Card (because if you go over the a Free Tier, you will have to pay for what you use)
- a phone (because Amazon will place an automated call to you to validate your identity.)
- your VAT number if you creating the account for a company and you are in a country that collects Value Added Taxes
Once you start streaming with MovieStreamer HLS, you will also need the upload bandwidth as you will start uploading video. (The bandwidth needed will depend on the "Output Formats" chosen in MovieStreamer HLS.).
Create an Amazon Web Services (AWS) Account
- Go to this page: http://aws.amazon.com/free/
- And click on the button "Create a Free Account"
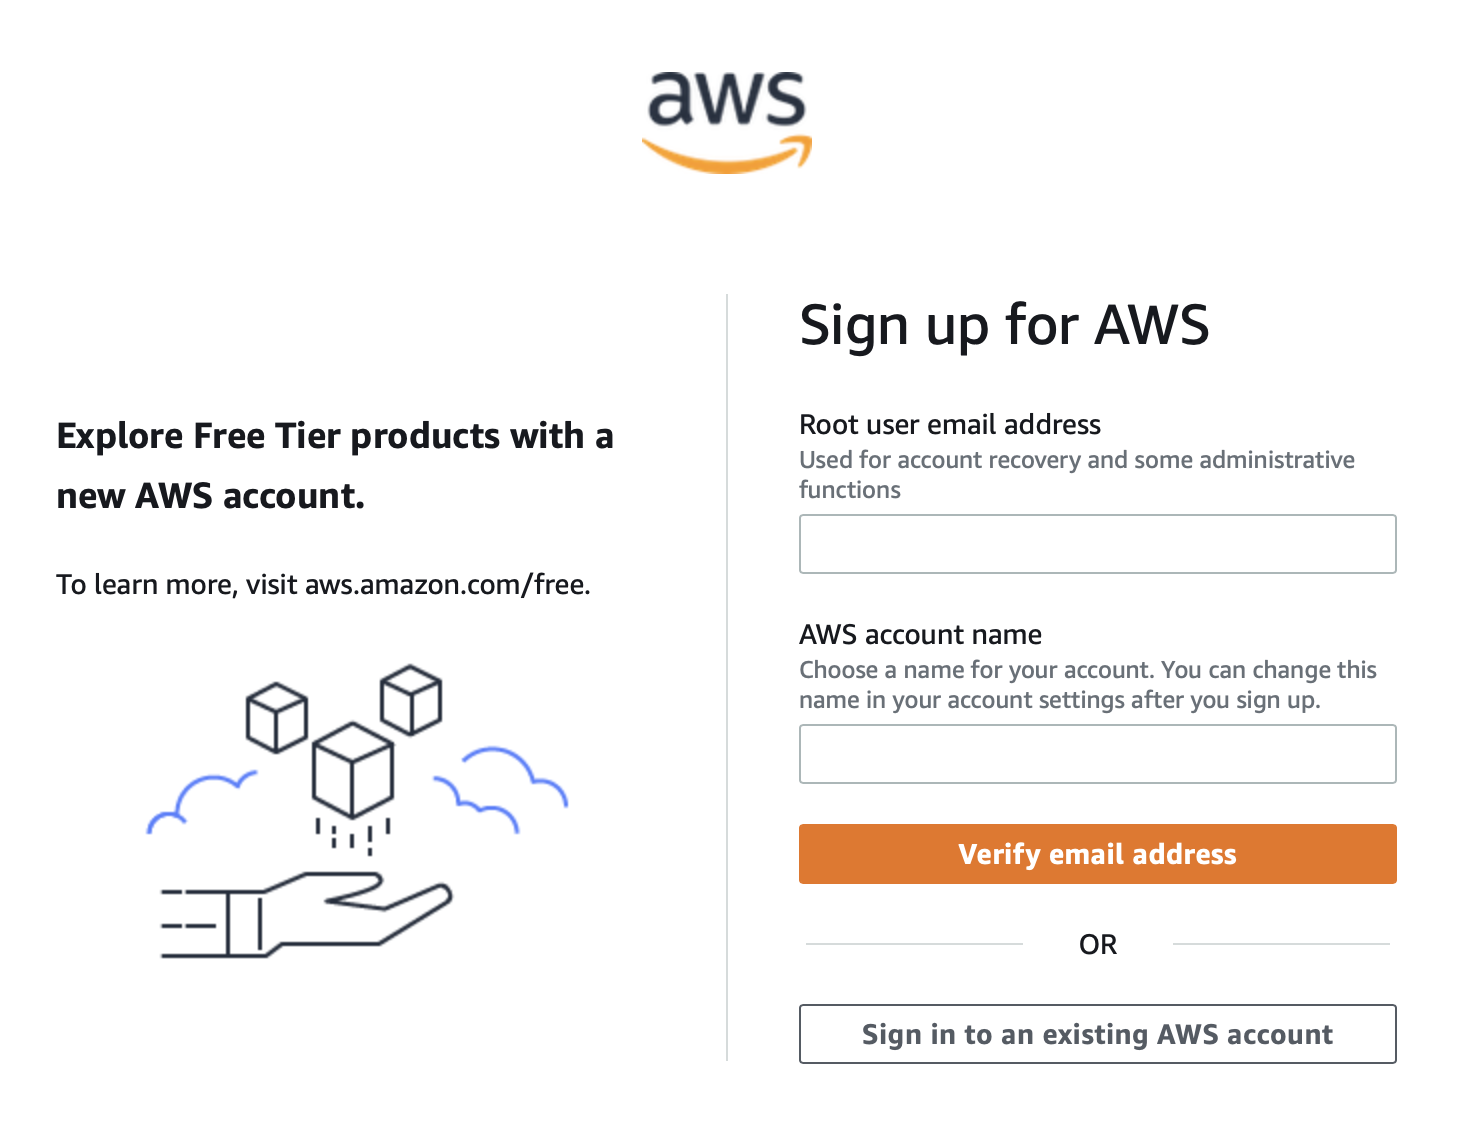
- Enter your email address, and a AWS account name, then click on "Verify email address":
- Then follow the different steps to verify your email, enter your contact details and credit card info, choose a support plan (if it's just for testing, take the free plan of course),...
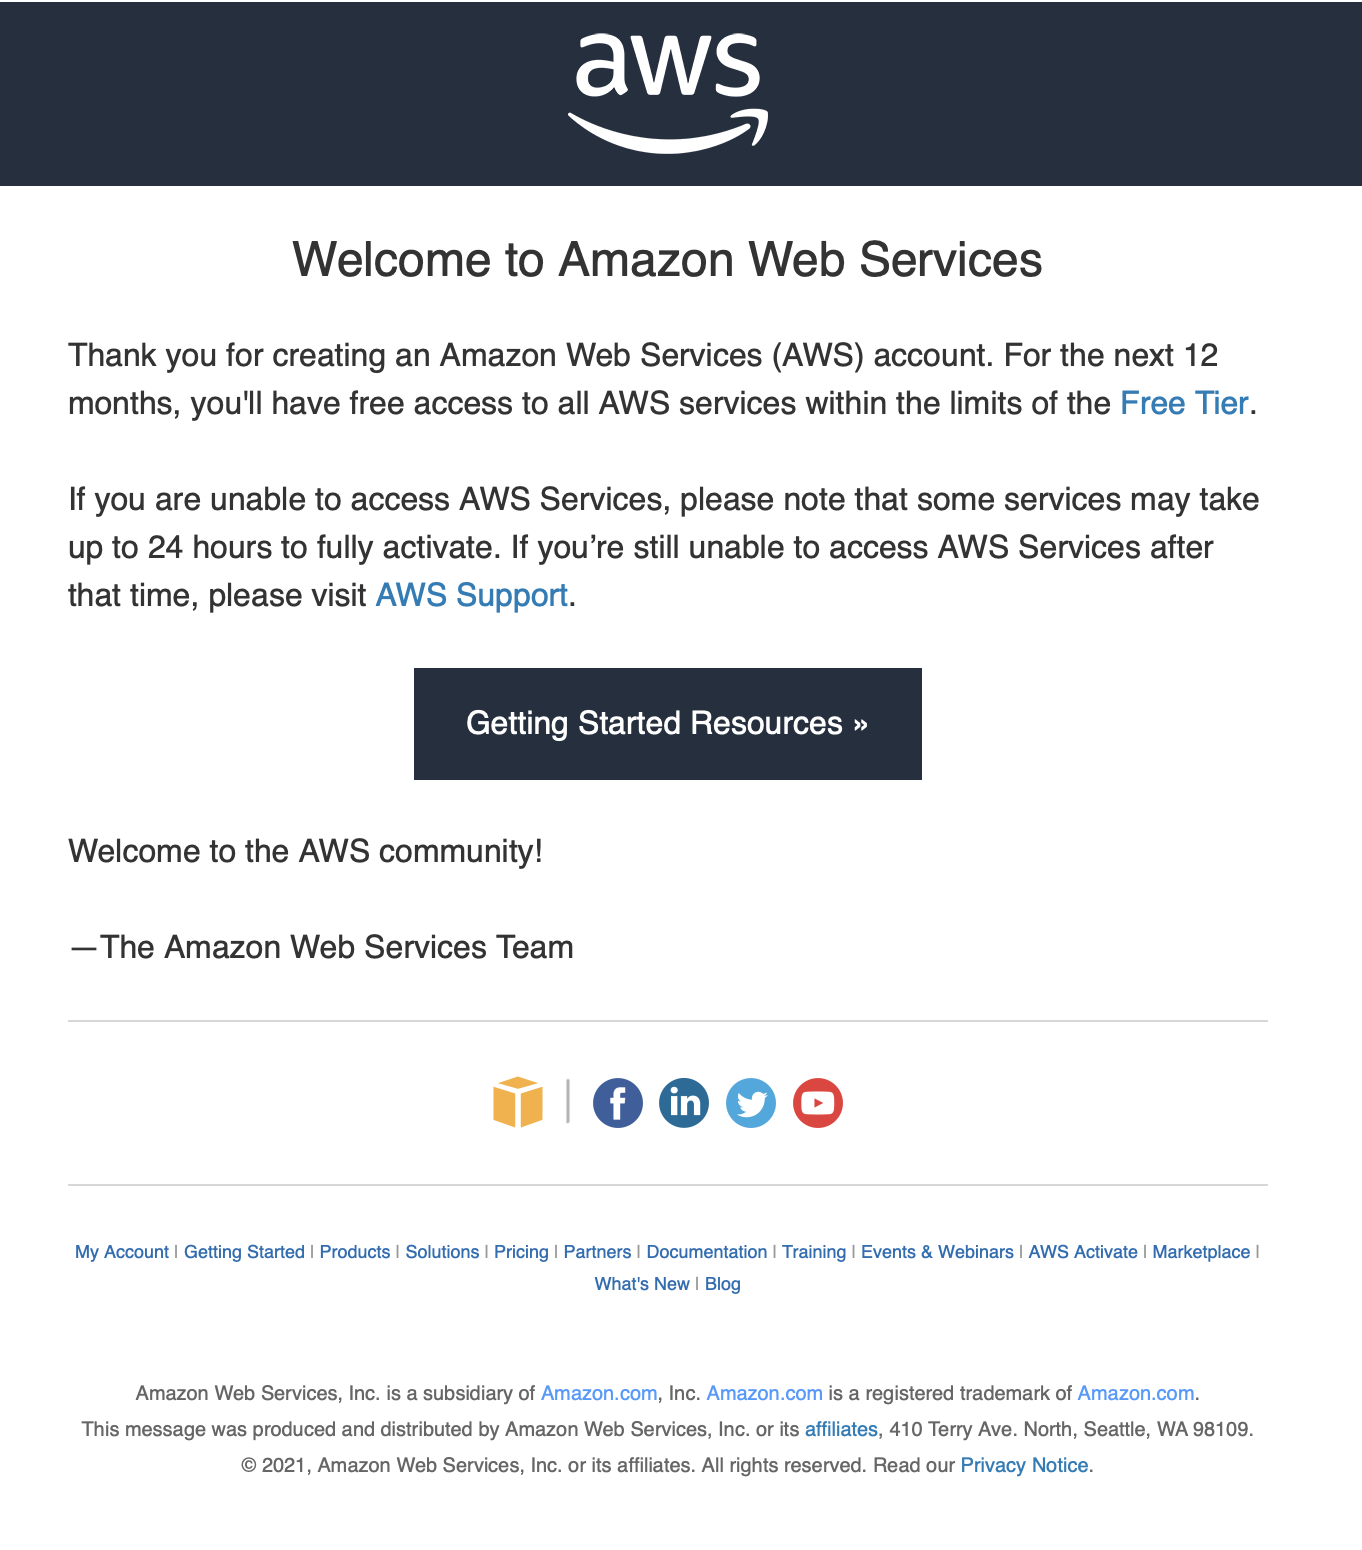
- Wait until you receive your confirmation email which will look like this:
Go to the AWS Management Console
The Amazon Web Services (AWS) Management Console is where you configure all the Amazon services. It is where you will setup all the services that you need to use. This however is not where you will manage your account information, billing, etc...
- Once you have received your validation email, go to the url: https://aws.amazon.com/console/
- Click on "Sign In" on the top right
- Make sure to sign in as a root user:
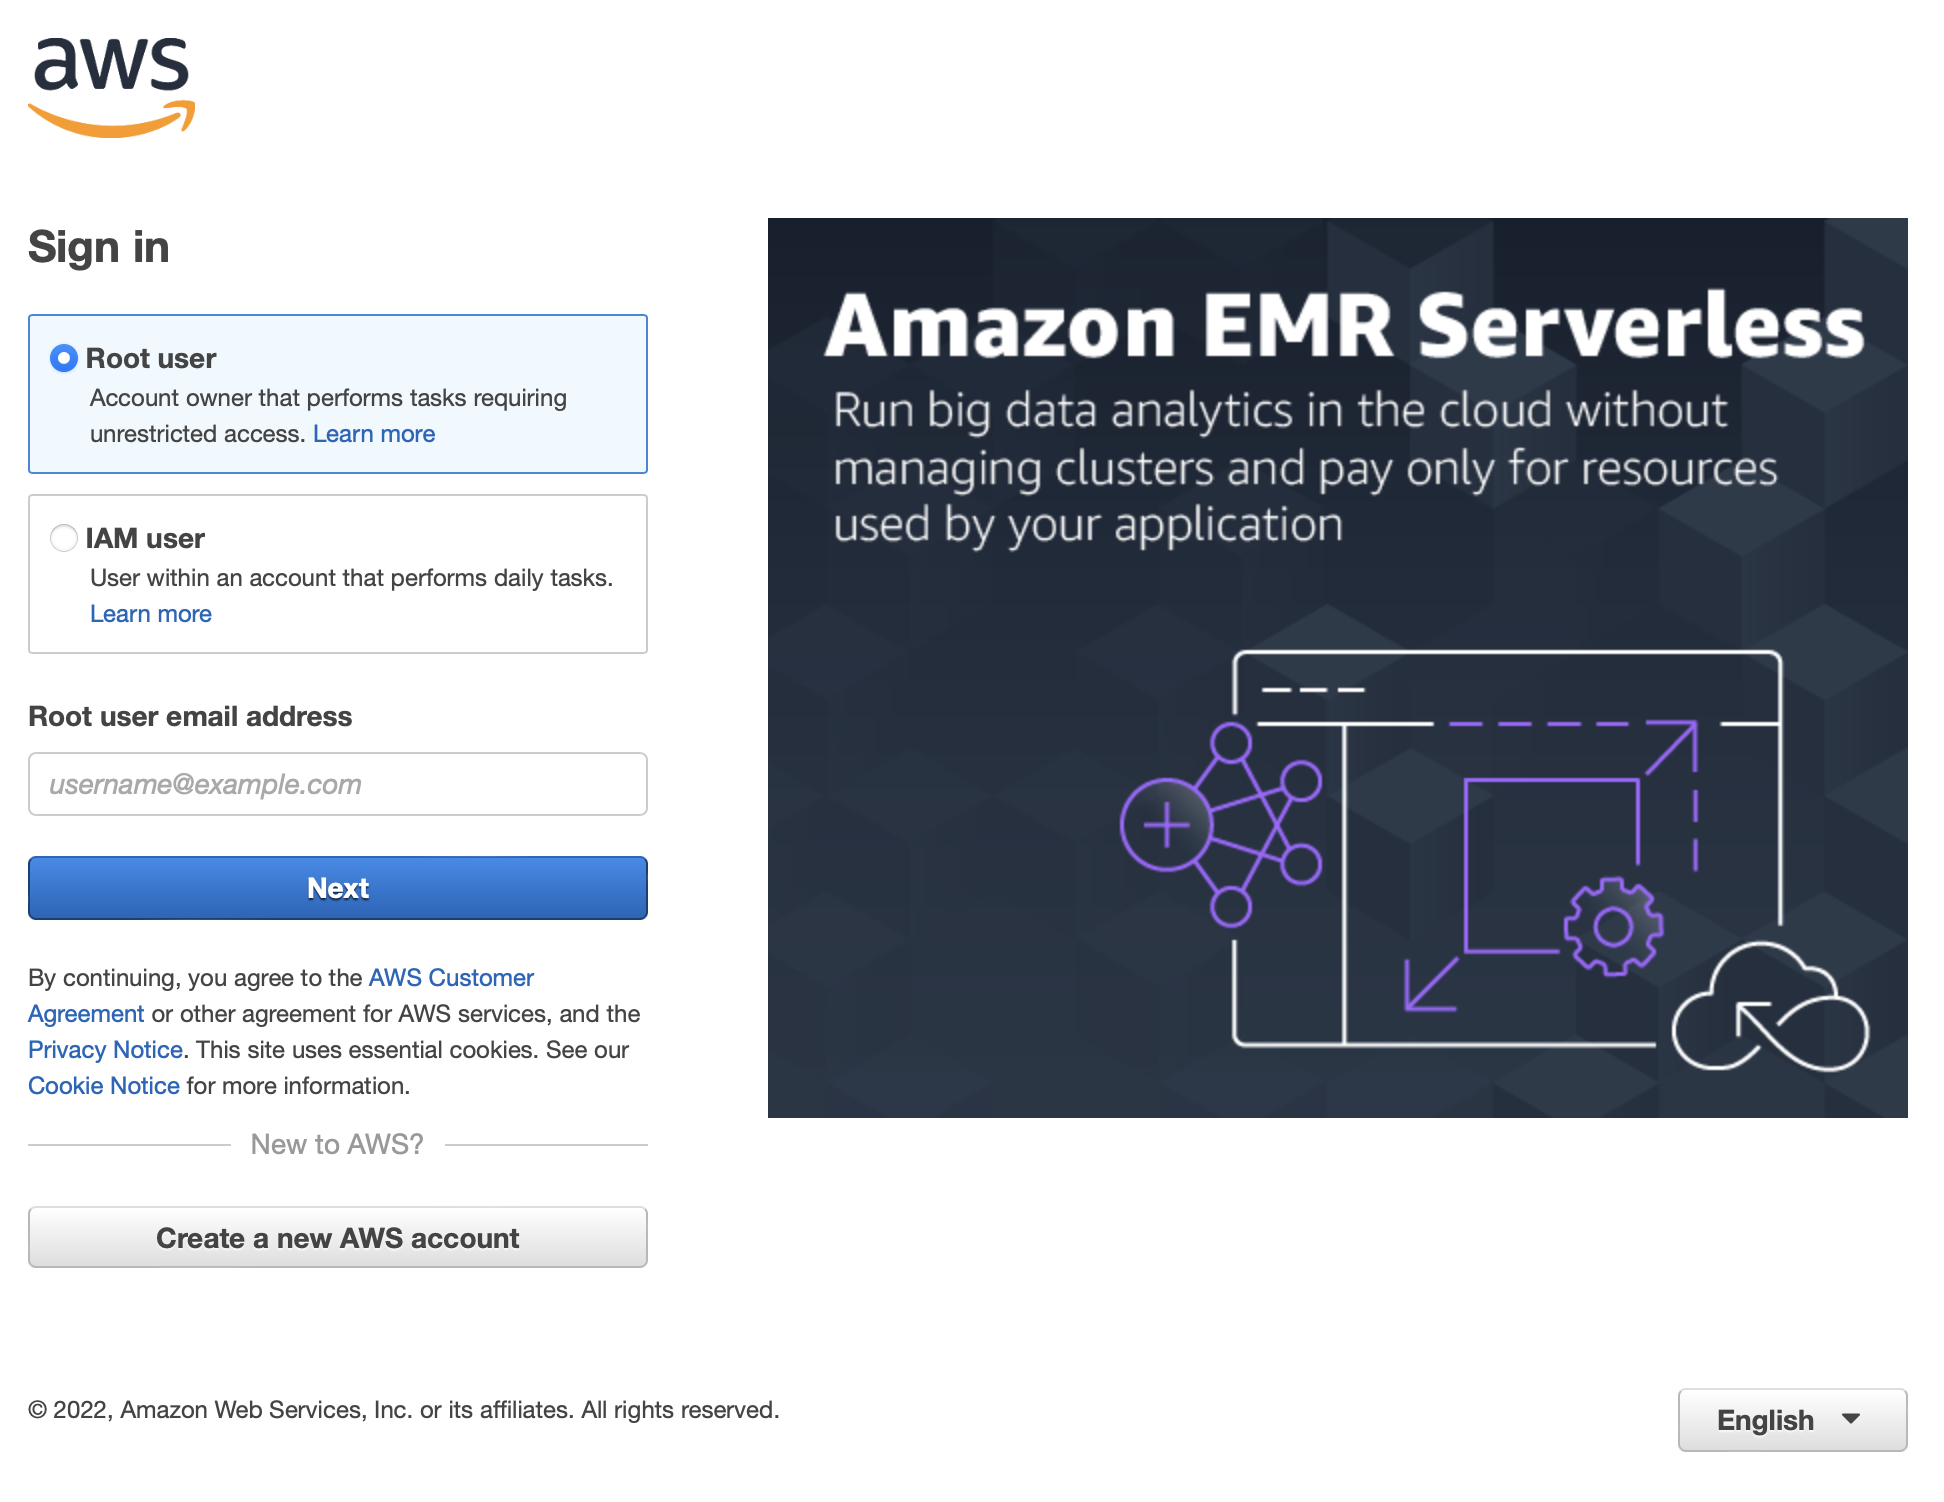
- Now you will be asked the email and password that you used when you created your account. Click on "Sign in".
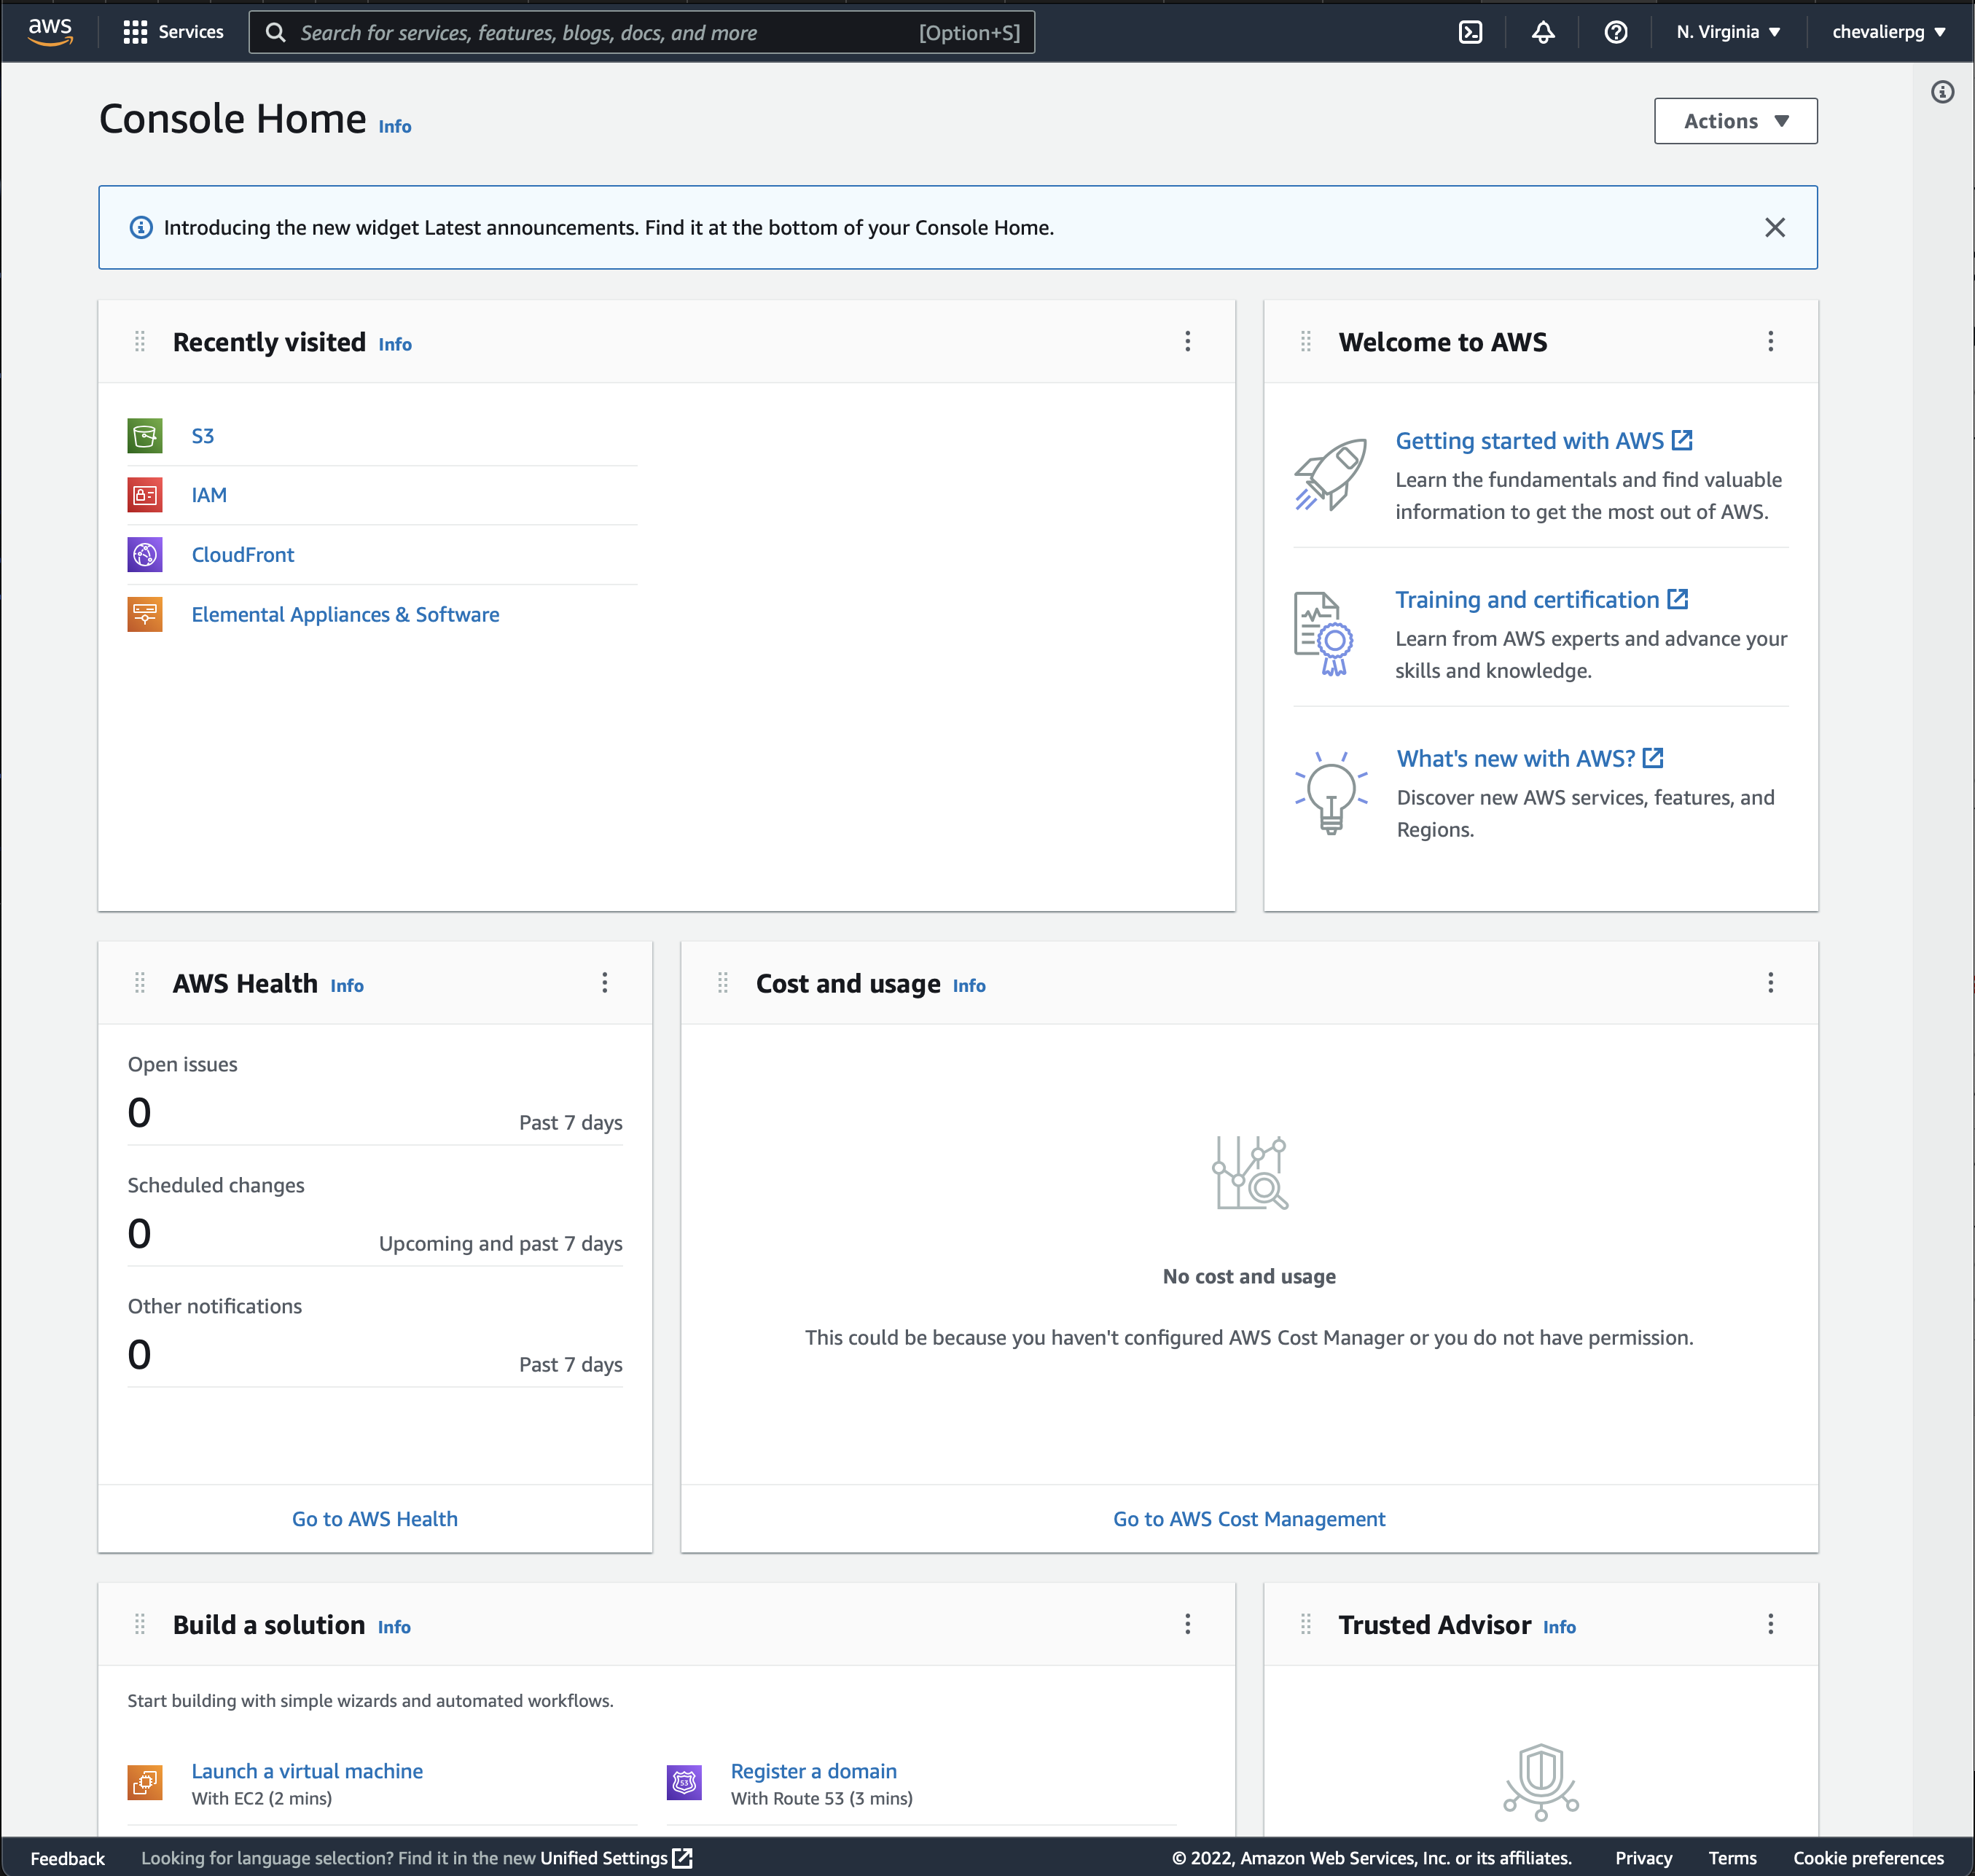
- You will now land on the AWS Management Console page:
Create a bucket in Amazon S3
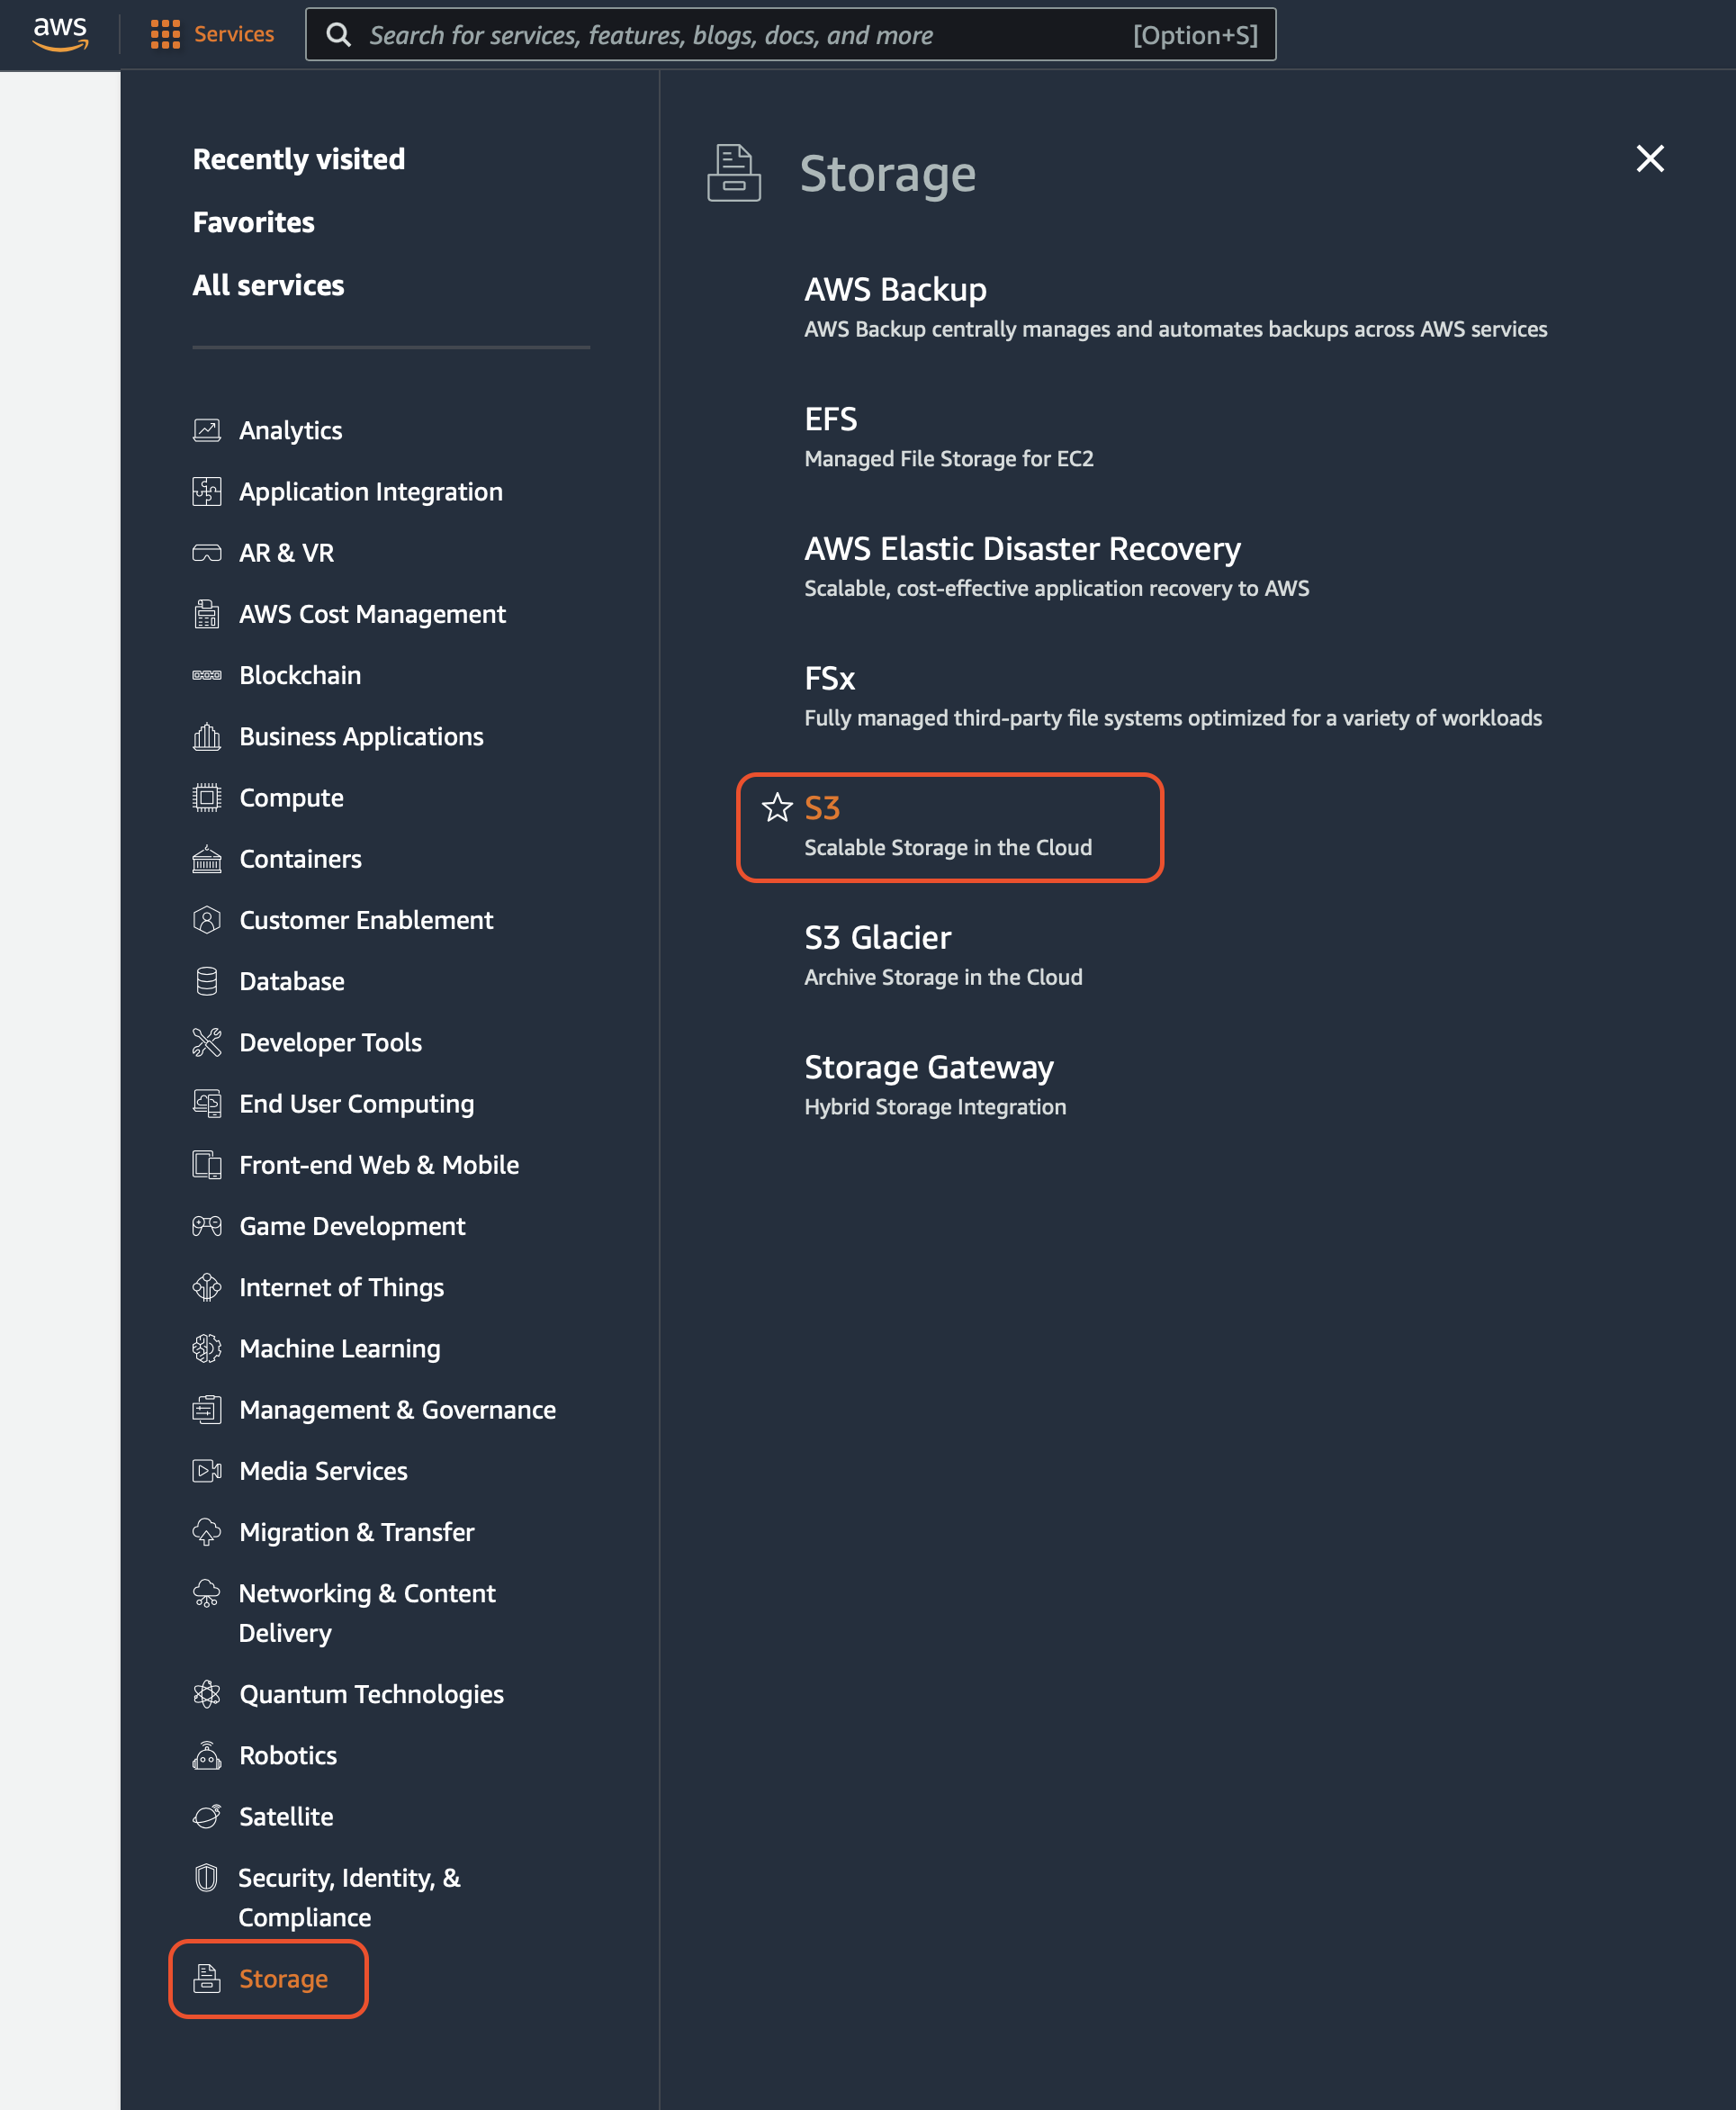
- On the AWS Management Console page, click on the "Services" button located at the top left of the page.

- Select "Storage > S3":
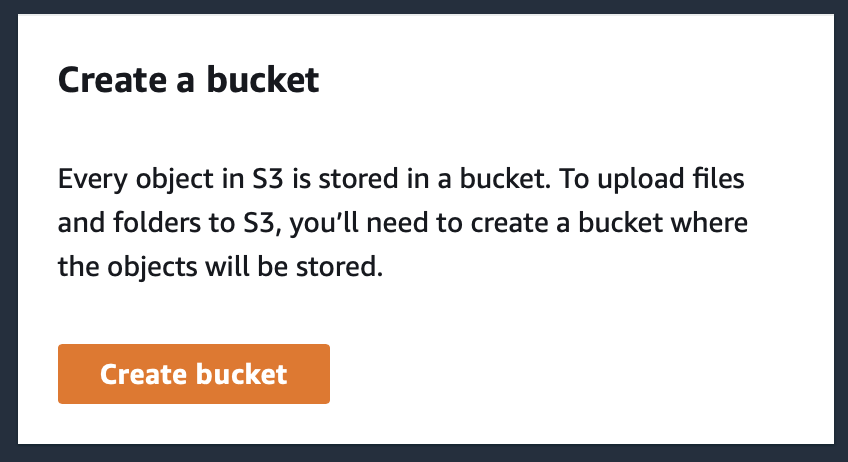
- Since you have not yet done anything, you will land on a welcome page explaining the basics about Amazon S3. The important thing to understand here is that you will need to create a "Bucket". A bucket is kind of a virtual folder that resides on some of the Amazon servers. When you create a "bucket", you can think of it as if you are creating a "folder" in your S3 storage.
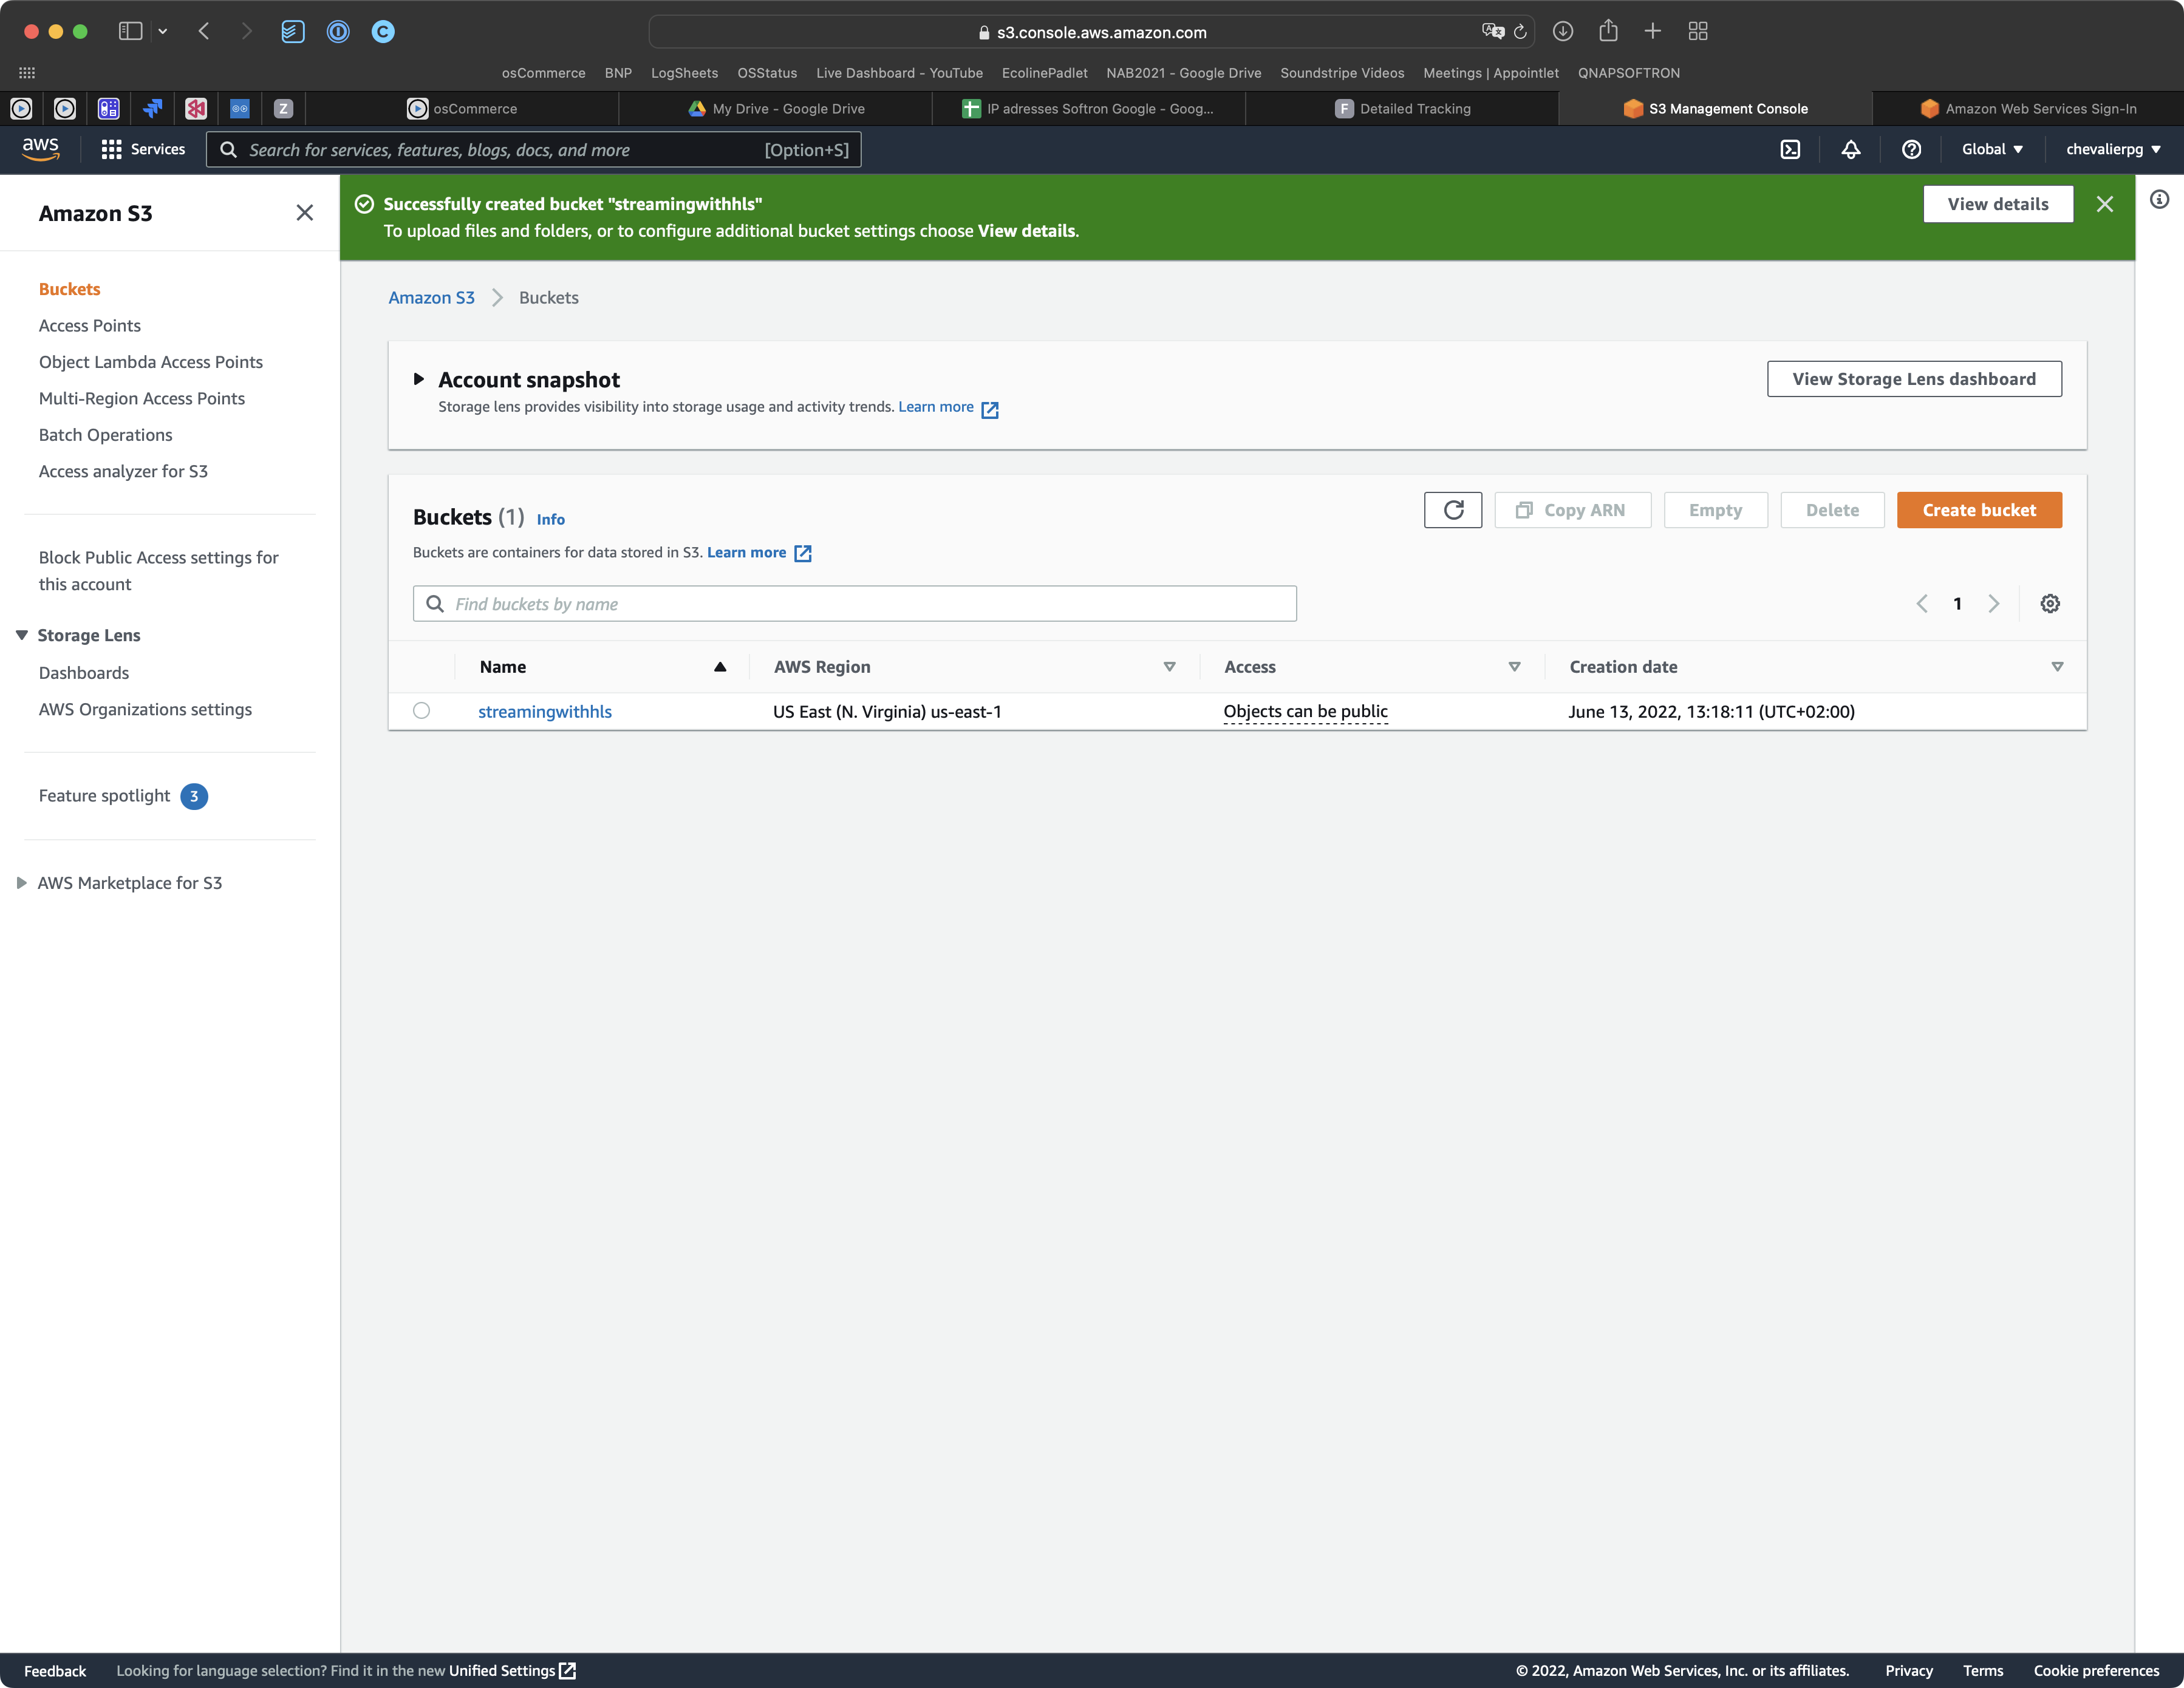
- Click on "Create Bucket"
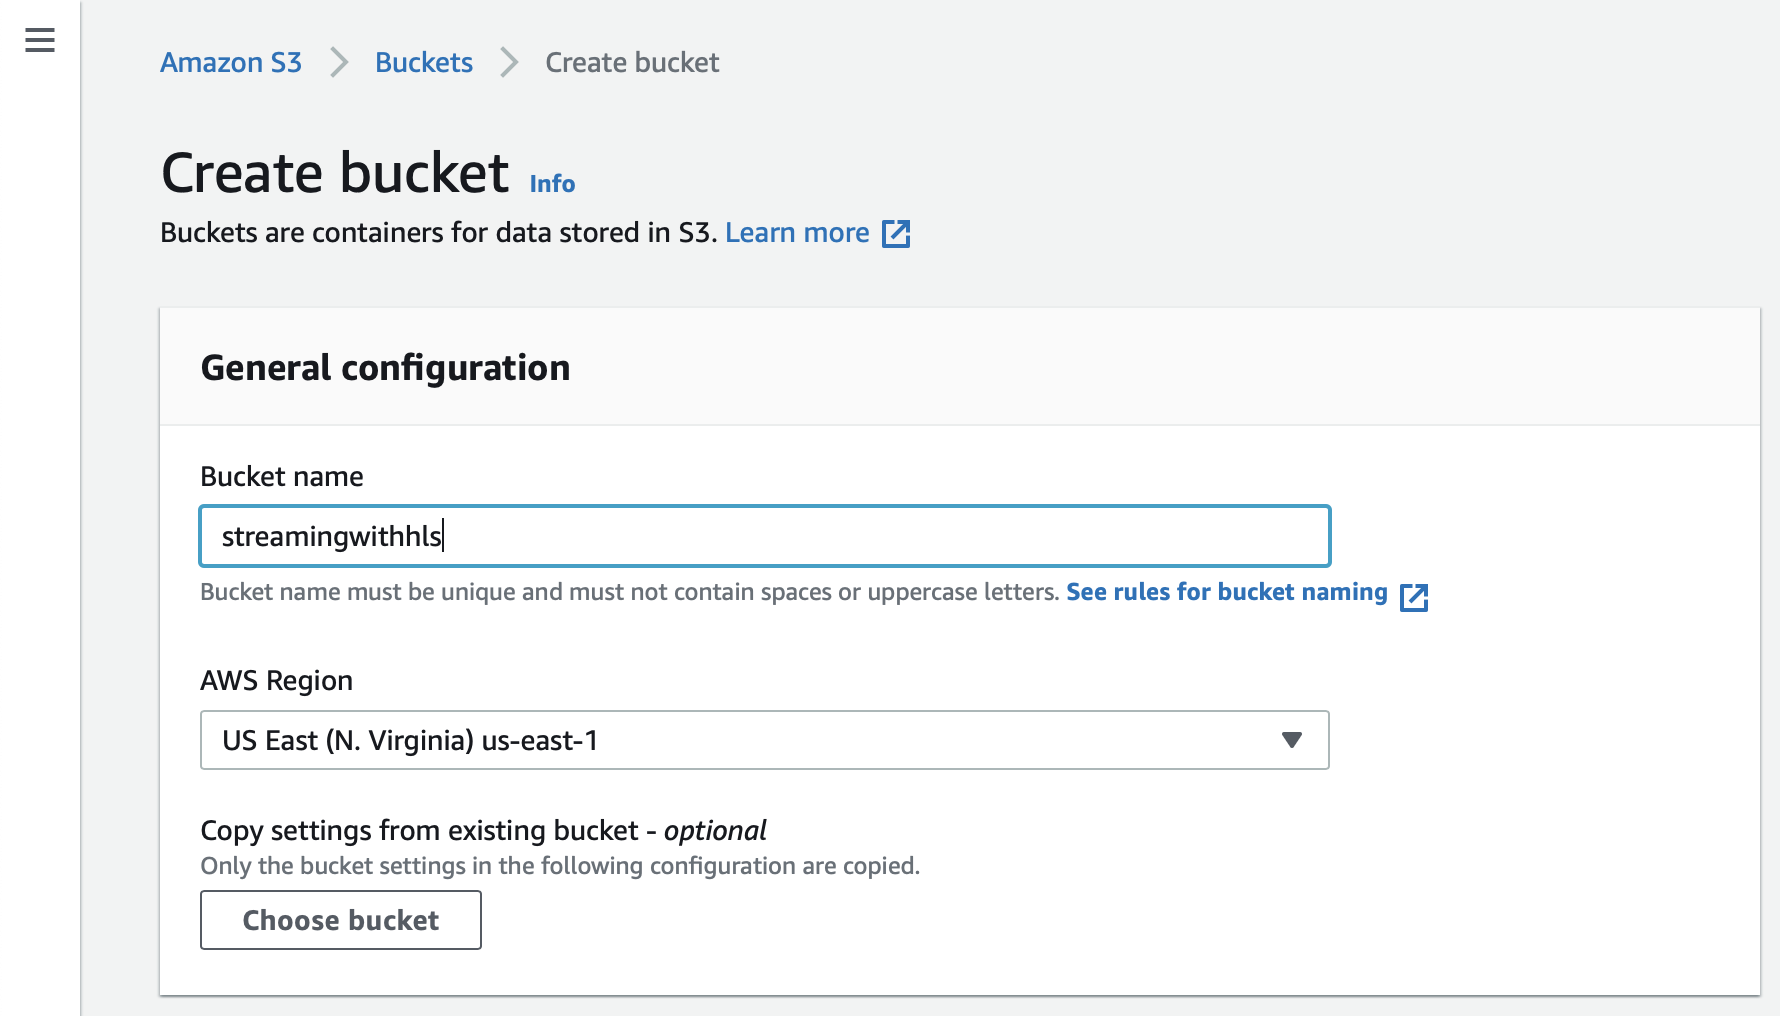
- On the next page, decide a name to call your "Bucket" and a region where the "Bucket" will be stored:
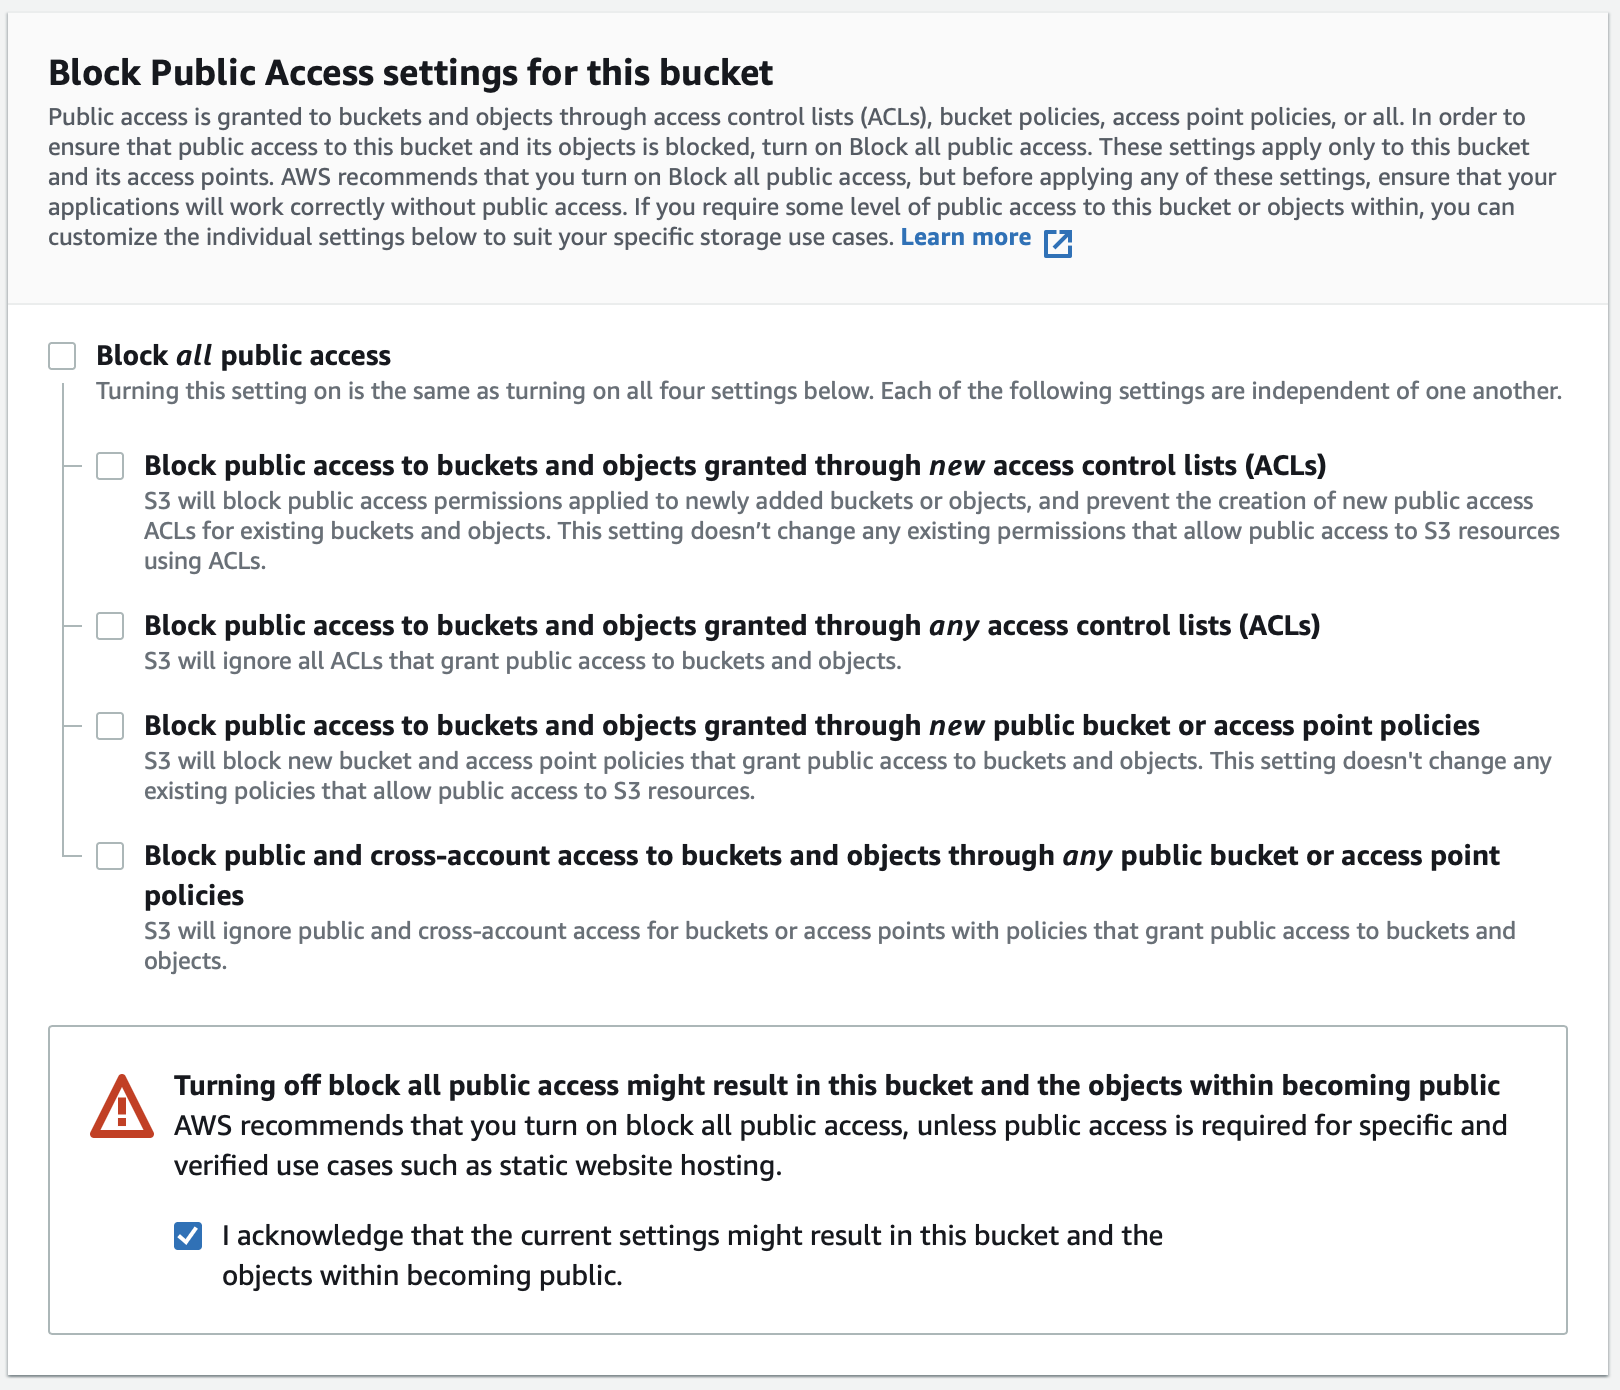
- Then a little bit lower on the same page, allow public access by disabling the "Block all public access" option:
- You can just leave all other options as they are by default, but make sure to double-check with your IT admin if needed.
- Click on "Create"
- Your bucket has now been created with its default settings.
IMPORTANT NOTE:
The Amazon S3 service is a storage service for which you decide in which region of the world it will be stored. It will never leave this region (it may be important for some legal/privacy issues), but it also could also mean that if you locate your bucket in the US, people accessing the data from another region of the world will have a slower access to it as the data may have to cross the globe.
You can create multiple "Buckets" each in one different location. But MovieStreamer HLS only allows you to stream to one "bucket" at a time.
If you want to have the best and quickest service for everywhere around the world, you should use Amazon"s Content Delivery Network (CDN) service called "CloutFront". This will ensure that your data is distributed among multiple servers around the world. This lowers the transfer required for all users around the world. We will provide more information about this in another article.
Enable website hosting
On the window that shows up once your bucket is created,
- Click on the bucket name that you have just created.
- Select the "Properties" section:

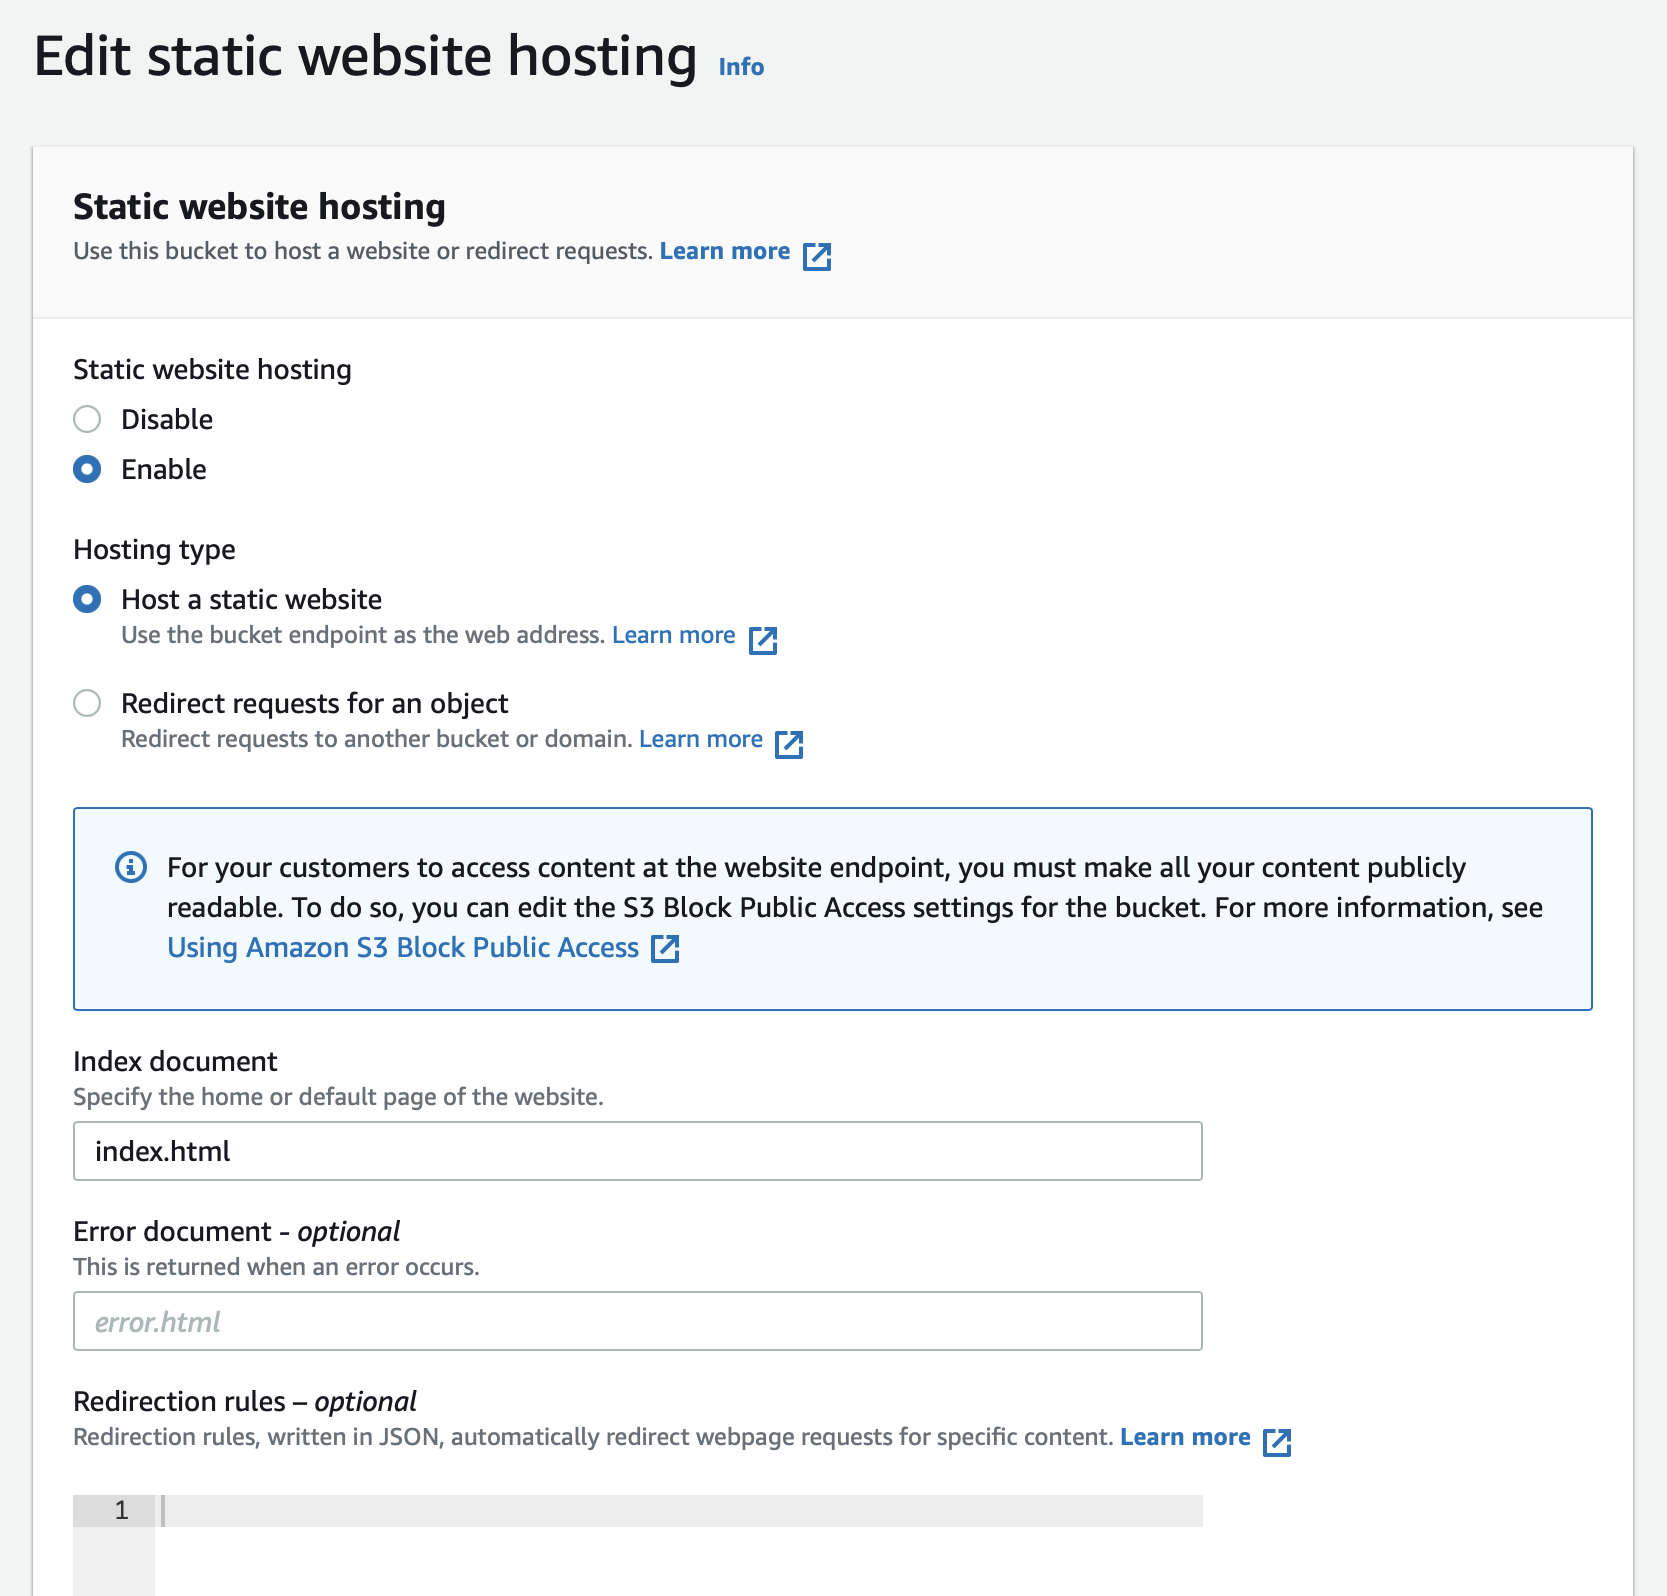
- At the bottom of the page, there is a "Static website hosting" section, click on the "Edit" button

- On the page that shows up, click on "Enable" for the Static website hosting option, and choose "Host a static website", and specify the index document to be "index.html":
- Click on "Save"
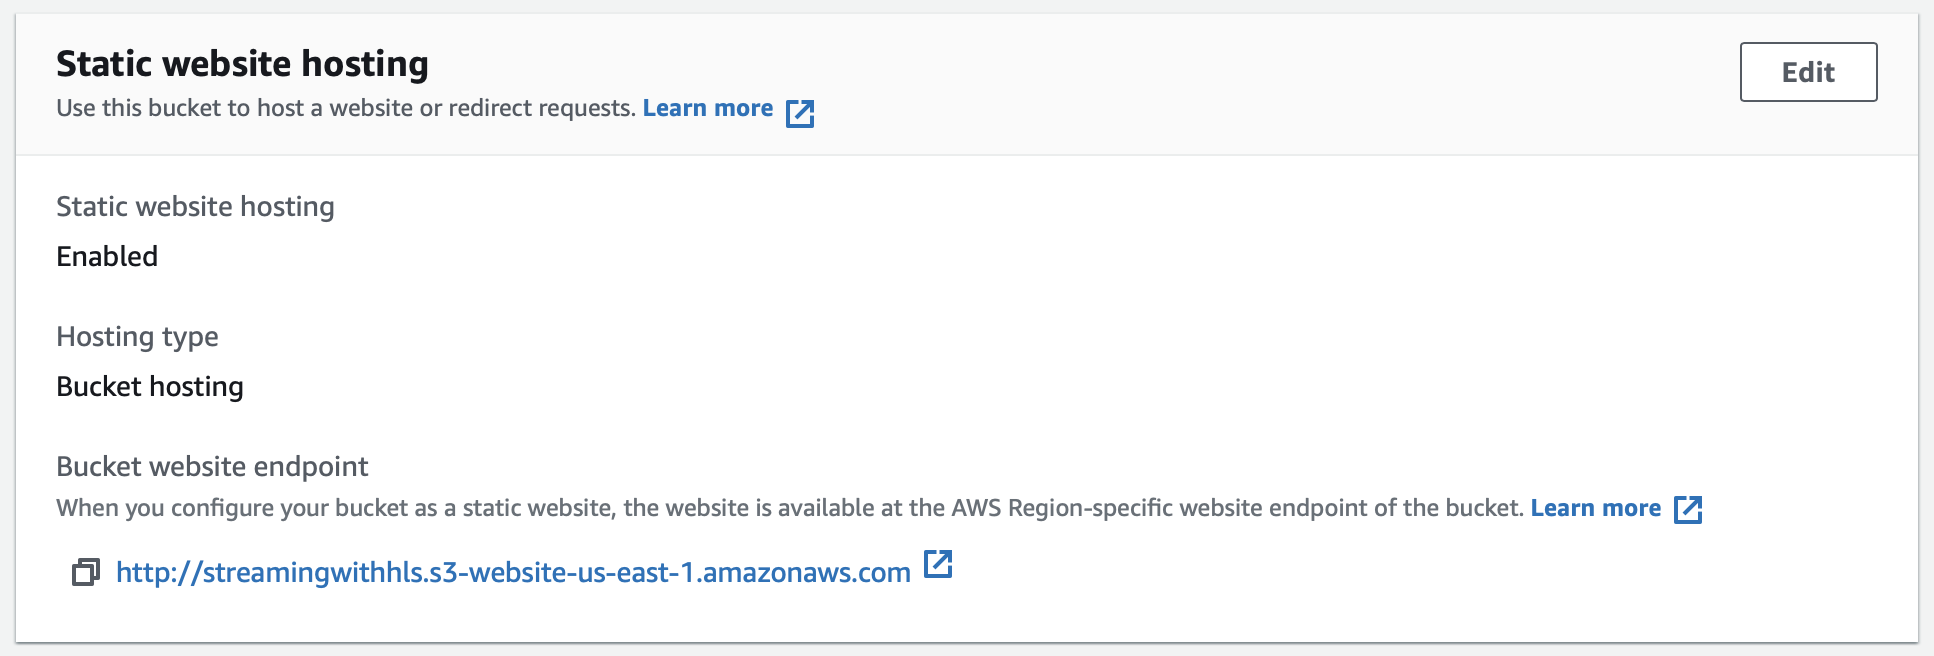
- Go back to the bottom of the properties page you will now see that the static website hosting is enabled. Make sure to write down the "Bucket website endpoint", this will be the url you will tap in your browser to access the stream.
IMPORTANT: Make sure to write down the url address so you can access your data, it is located here:
Change the bucket policy
- Select the "Permissions" section of your bucket settings

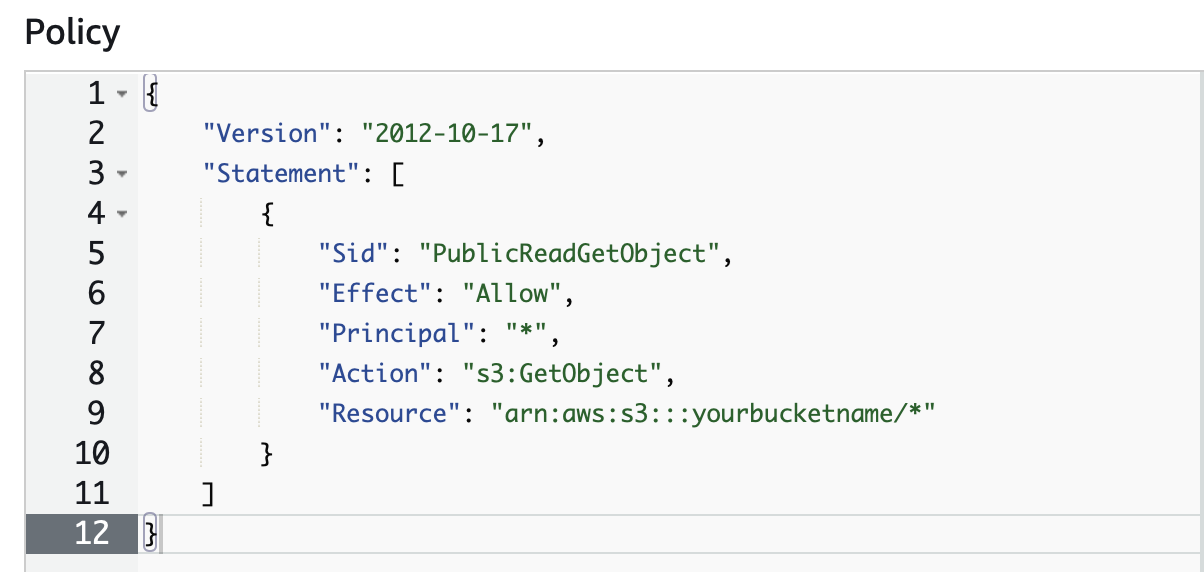
- in the "Bucket policy" section, click on the "Edit" button and enter something like this (make sure to replace "yourbucketname" but the name of your bucket):
- click on save
That's it, your bucket is ready to receive files.
Retrieve your Security Credentials
Now that you have everything setup, and before going to MovieStreamer HLS, you will nedd to retrieve your Security Credentials from your Amazon Web Services account. You will need to enter these into MovieStreamer HLS in order to upload:
- the Access Key ID
- the Secret Access Key
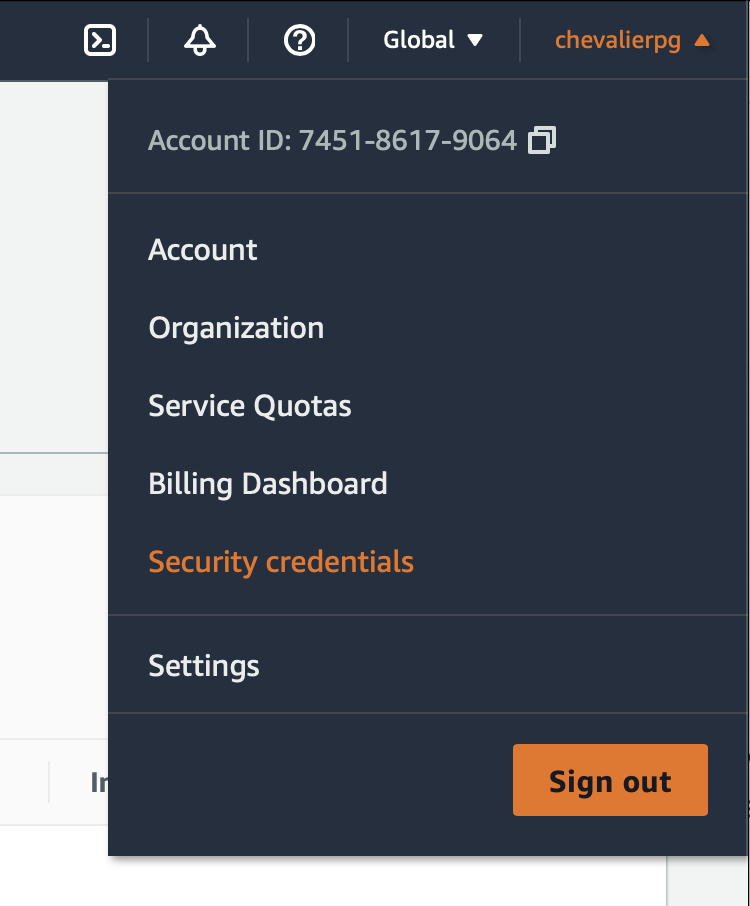
To get this information, click on the name of your account on the top right of the AWS Management Console window and click on "Security Credentials".
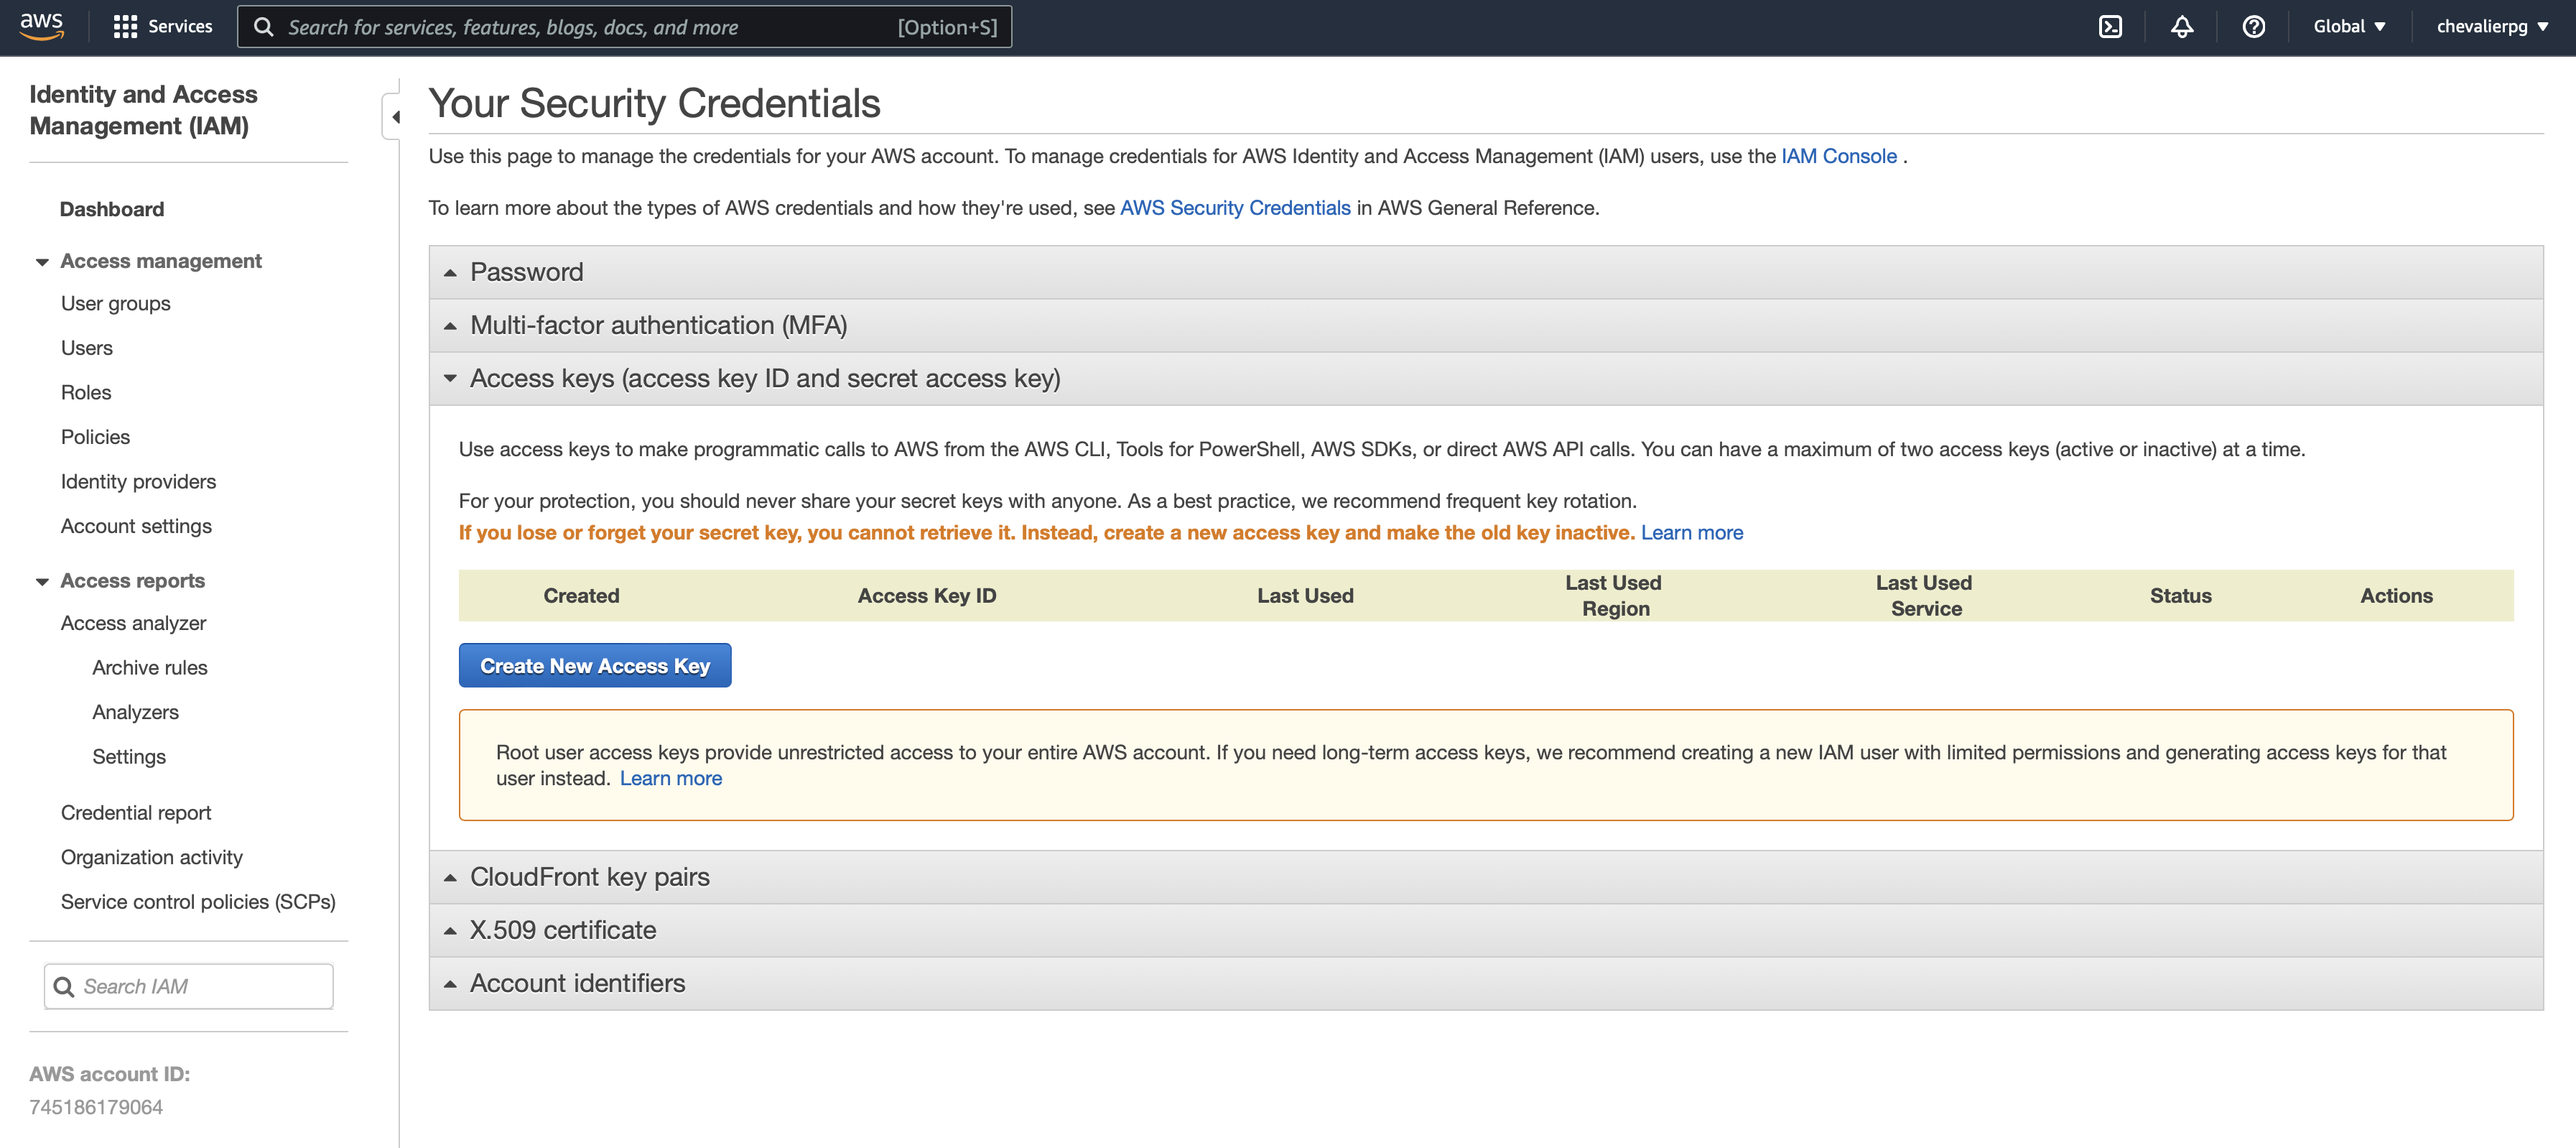
On the page that opens, in the "Access Credentials" section, click on "Create a new Access Key", if you don't already have one.
A window will show up:

You can click on "Show Access Key", and write down the "Access Key ID" and the "Secret Access Key". You can also download a file with the info. Note that the Secret Access Key will be shown only at that moment, so make sure to write it down!
Configure MovieStreamer HLS
Now that Amazon S3 is fully configured and you have your credentials, open MovieStreamer HLS, make sure that the video and audio sources are properly configured, then click on the settings button next to the "Amazon S3" destination and enter the different values required.

- Bucket = the name of the bucket you created in Amazon S3
- Access Key ID
- Secret Access Key
- Remote Path: in your "Bucket", just as in any storage, you can create folders and subfolders. If you want MovieStreamer to stream to a subfolder, just indicate its path here. (Take note as well to add that subfolder name to the end of the URL so that it can be accessed.)
Start Streaming
In MovieStreamer HLS, make sure to select the proper Output formats (ones that your internet connection will be able to upload to the S3 storage!). Then click on the button to start streaming and check on the "endpoint" URL that you've written down earlier. In our example, the url was:
http://streamingwithhls.s3-website-us-east-1.amazonaws.com/index.html
Your URL should be something like the one above. As MovieStreamer HLS automatically creates the index.html page, and everything else you require, you should be able to see your stream.
Note that if now you go in your AWS Management Console, and check the content of your bucket (just click on it), you will see the files generated by MovieStreamer HLS.
Add a "Content Delivery Network" (CDN), using Amazon Cloud Front
When you create a bucket in Amazon S3, you have to choose its location. It is a physical location where your data will be stored. Let's say you have chosen to store your data in the US. All the viewers that are close to where the data is stored will see the video with a good connection, but
- if you have viewers that want to watch from a different country
- if you have a lot of simultaneous viewers
Then you may want to use Amazon Cloudfront: http://aws.amazon.com/cloudfront/
How much will it cost?
Amazon is a pay per use type of service, so the more you will store videos and have viawers, the more you will pay. You can easily calculate your monthly fees using the calculator provided here: http://calculator.s3.amazonaws.com/calc5.html
Comments
0 comments
Please sign in to leave a comment.