About Multiple Outputs
In OnTheAir Studio, each playlist can be assigned to one output (a single output). So one computer is capable of outputting to multiple outputs, provided you create multiple playlists. To select an output just click on the menu on the top left of a playlist:

Note that:
- if 2 playlists use the same output, starting one playlist will stop the other.
- but if one Playlist and one Preset use the same output, playing something on the Preset document will NOT stop the playback on the playlist. Presets are there to kind of "overlay" sound on top of your playlist, play jingles, etc... Sounds played in a Preset window are added to the sounds played in a playlist.
You can create as many playlists as you want on one computer. The limit about the number of output channels you can do will mainly depend on the processor of your computer. Also if you are streaming out, it will depend on your internet upload speed. We advise you to check with a free demo version that is available on our website to check what is possible to do.
Creating Outputs
When you go to the OnTheAir Studio preferences, in the "Outputs" section, you can create new outputs and rename them in the "Configured Outputs" column:
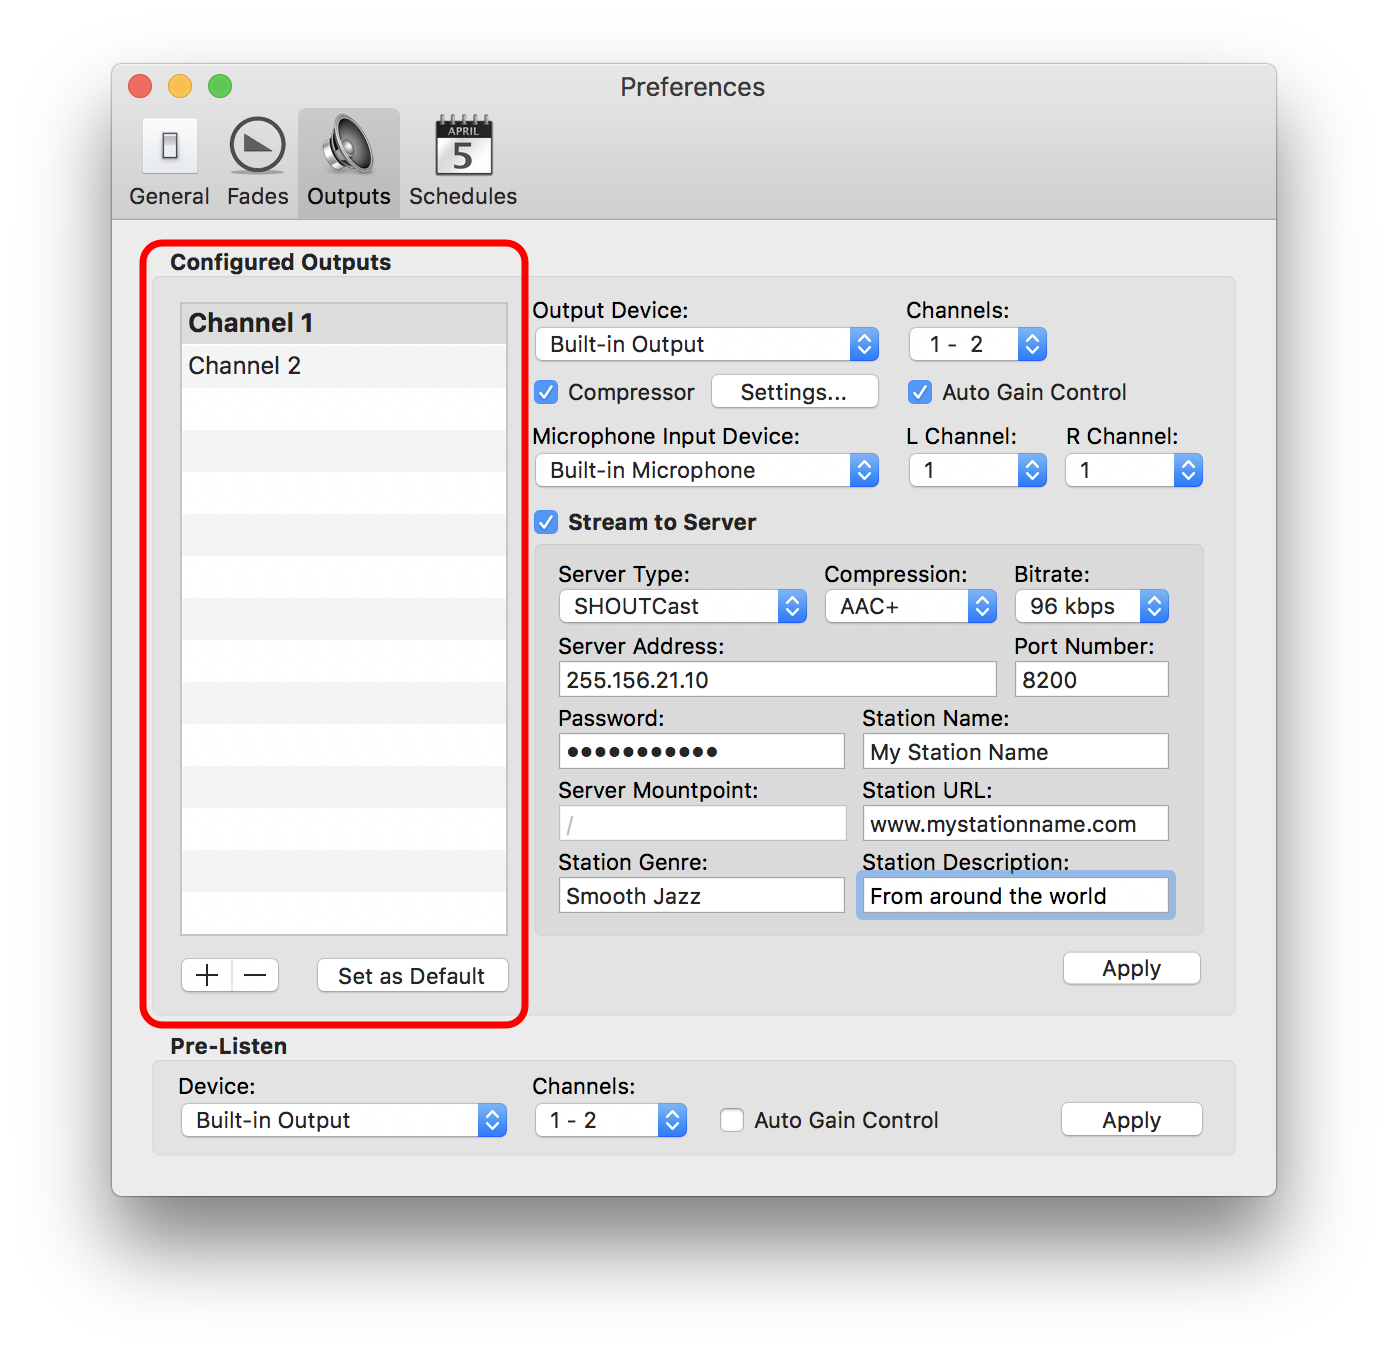
Just click on the + icon at the bottom to create new outputs, and click on their name to rename them. A "Default" output is the output that is used by default when creating new playlists or preset documents.
Output Device
The next thing you want to do is to set to which audio output the audio will be routed. Even if you are streaming your radio channel, it may still be useful to listen to what you play directly on your Mac.
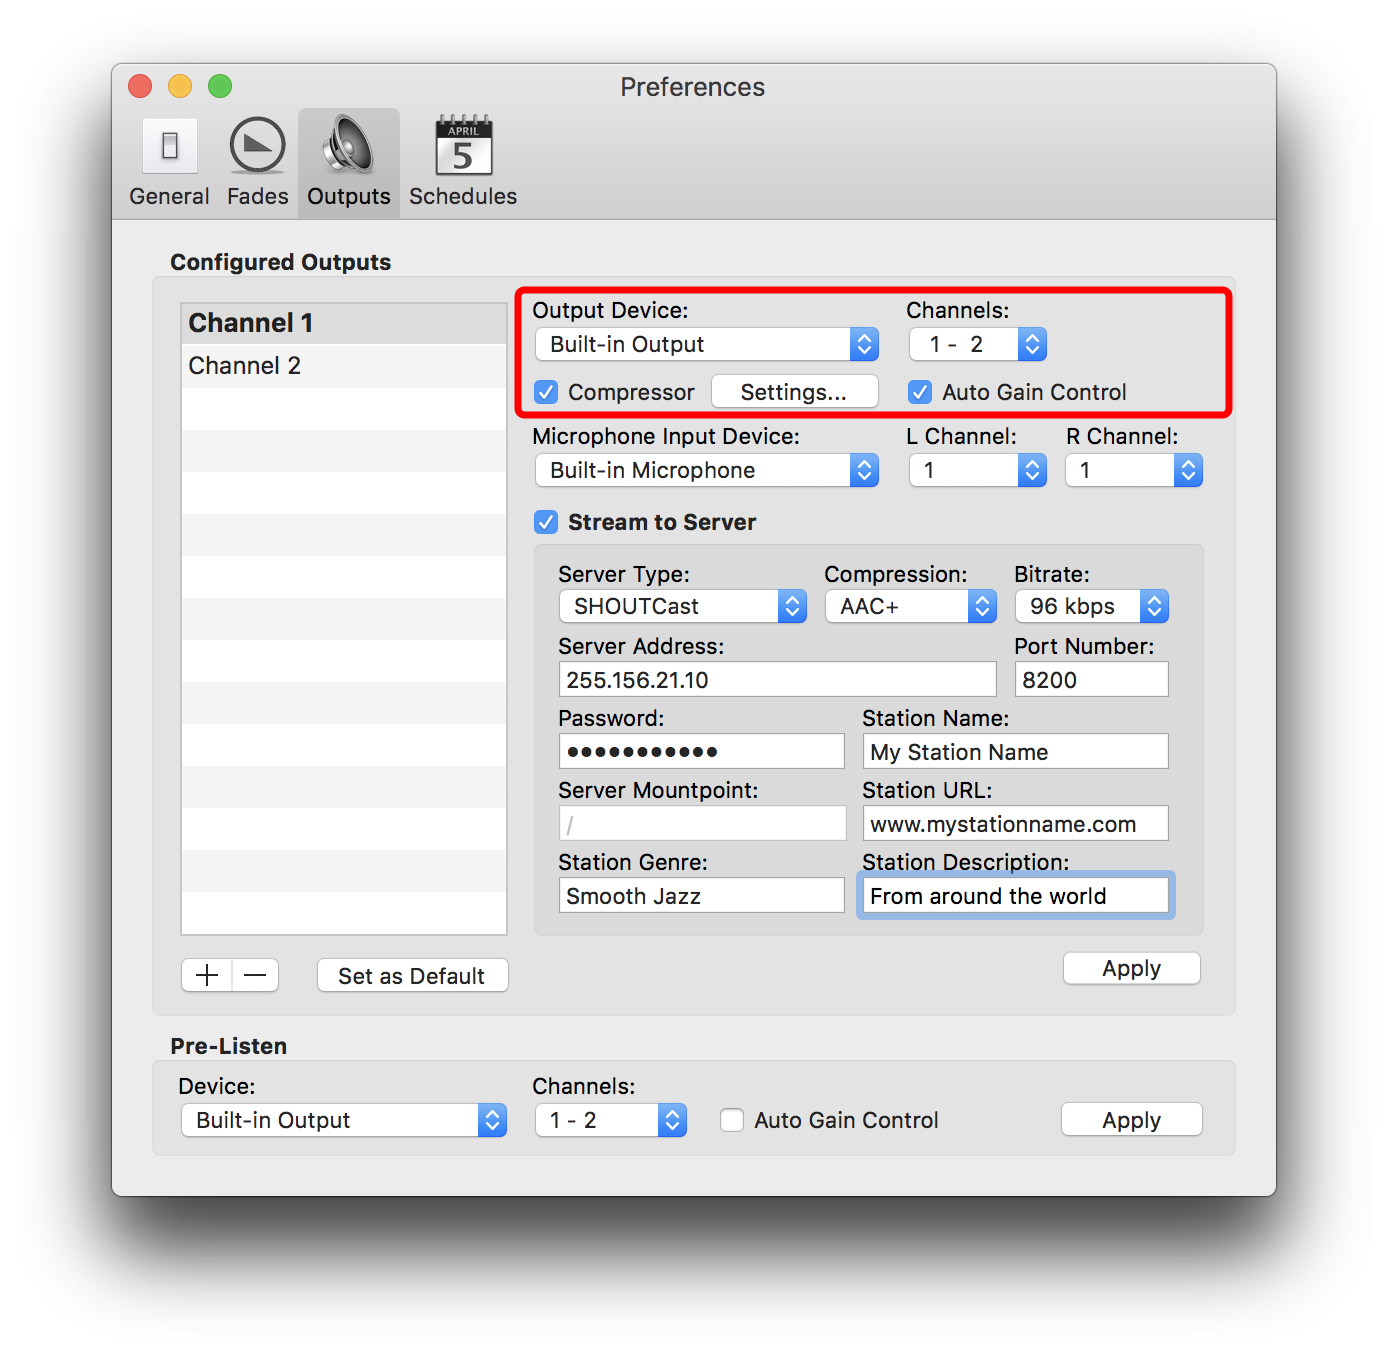
You can configure:
- Output Device: you will see all the available audio outputs on your Mac. This is the same ones that are available for your Mac.
- Channels: set the output channels to be used on the device. So you could have one "radio station" going to "Channels 1 - 2" of a device, and another radio station on "Channels 3 - 4" of the same device.
- Compressor: you can set a compressor for your output to have the best quality
Pre-Listen
In the OnTheAir Studio playlists, you can "pre-listen" to your audio tracks. To pre-listen to the track, click on the small triangle at the bottom left of the track cell:
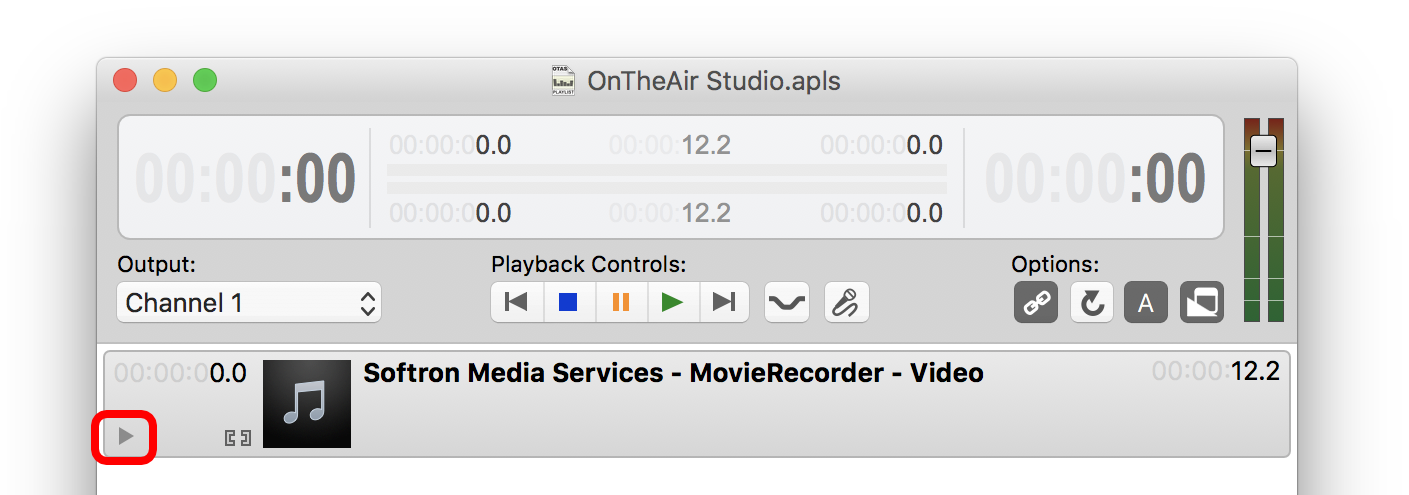
This should open a waveform preview.
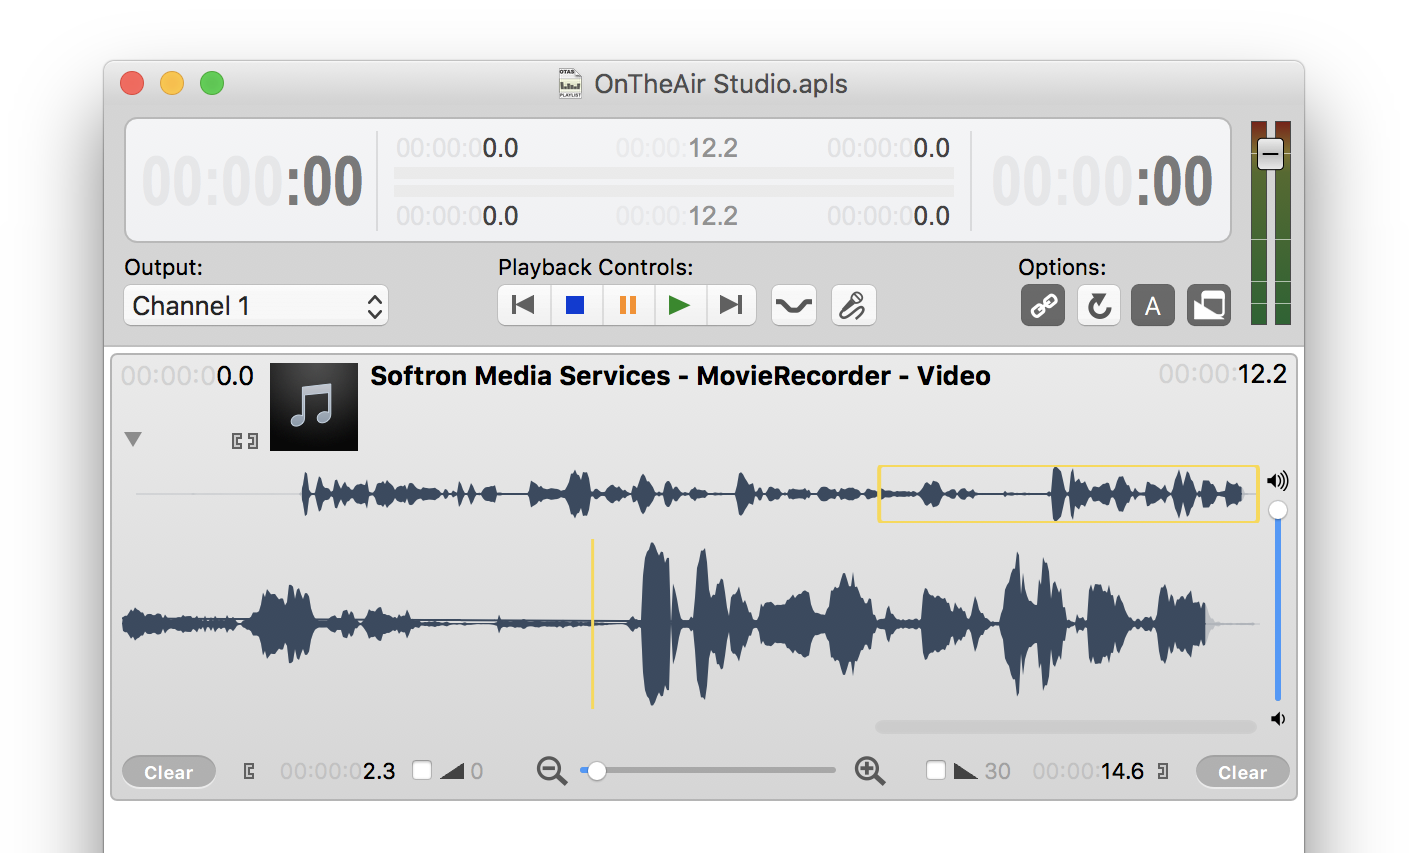
Click and hold anywhere in the large waveform area to start listening from that position. Hold the click for as long sas you want to listen.
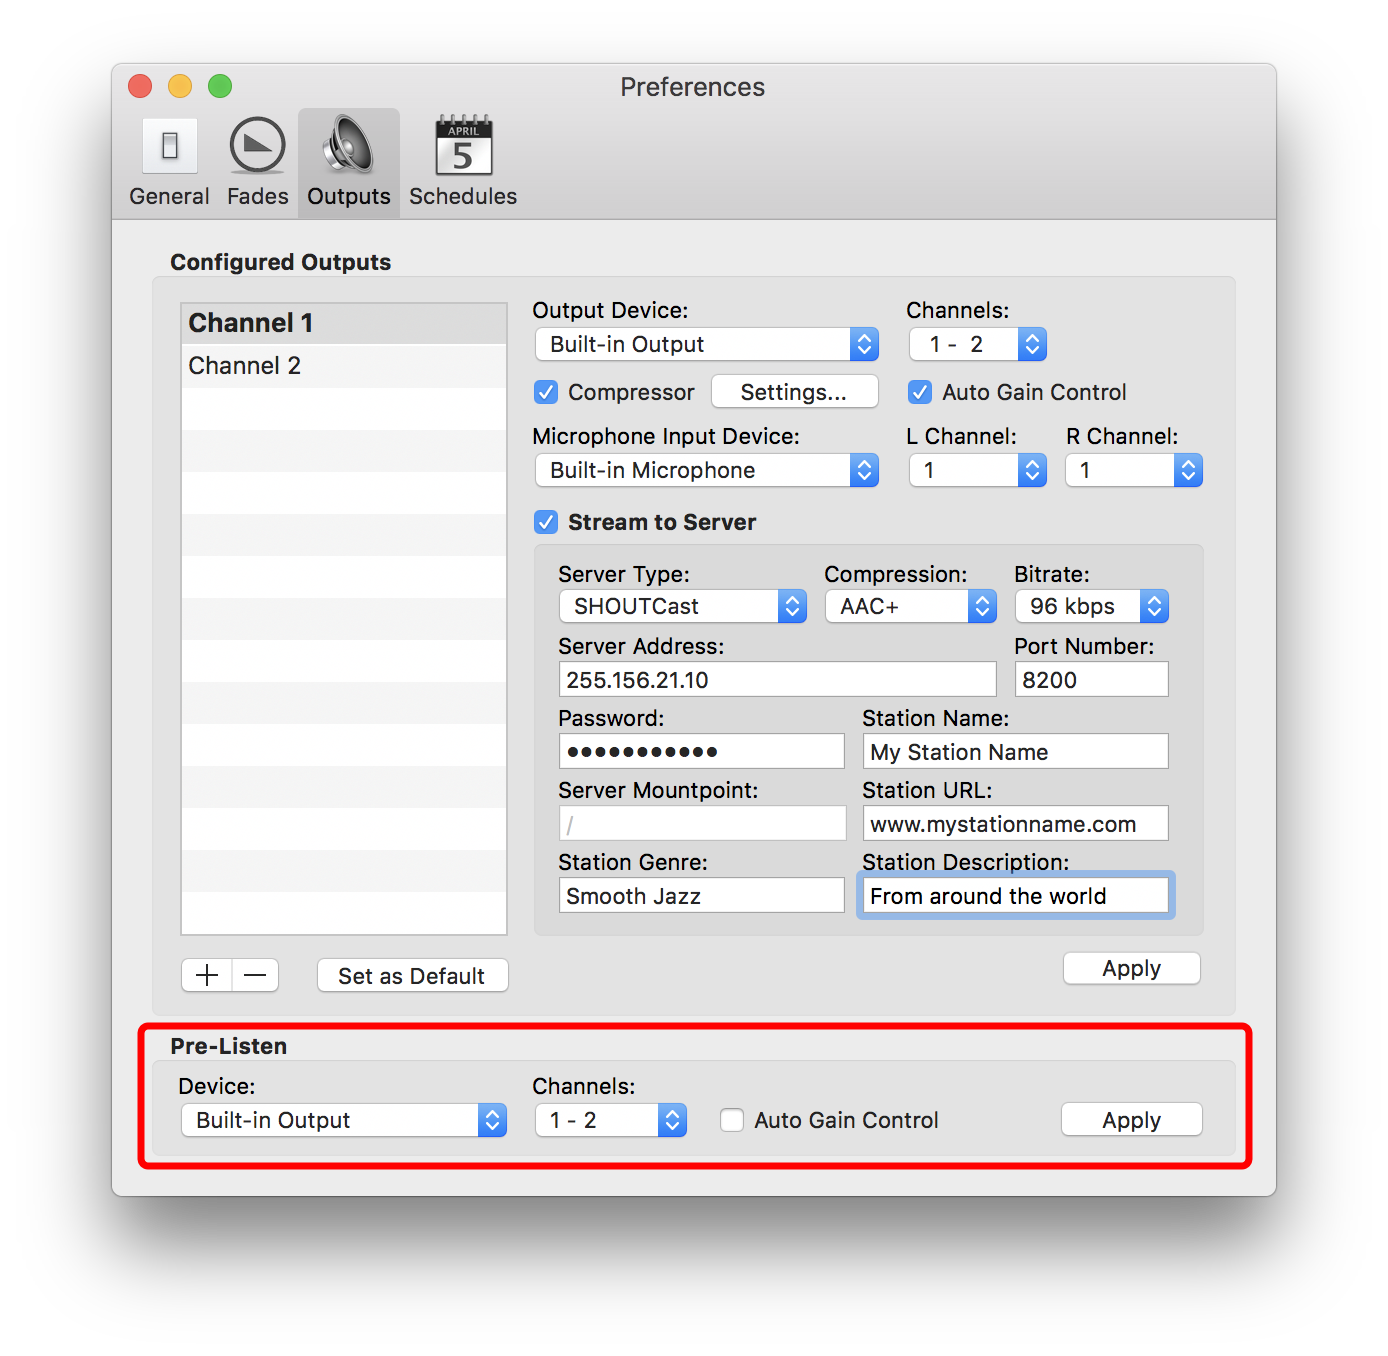
The audio that you will hear should be routed to a different output than your main output, otherwise you will hear that audio in your station output.
This is configured in the "Pre-Listen" preference:
Microphone
Of course there is no radio station without nice live comments. Configure the input to be used for your microphone here. You can use any available input on your Mac:
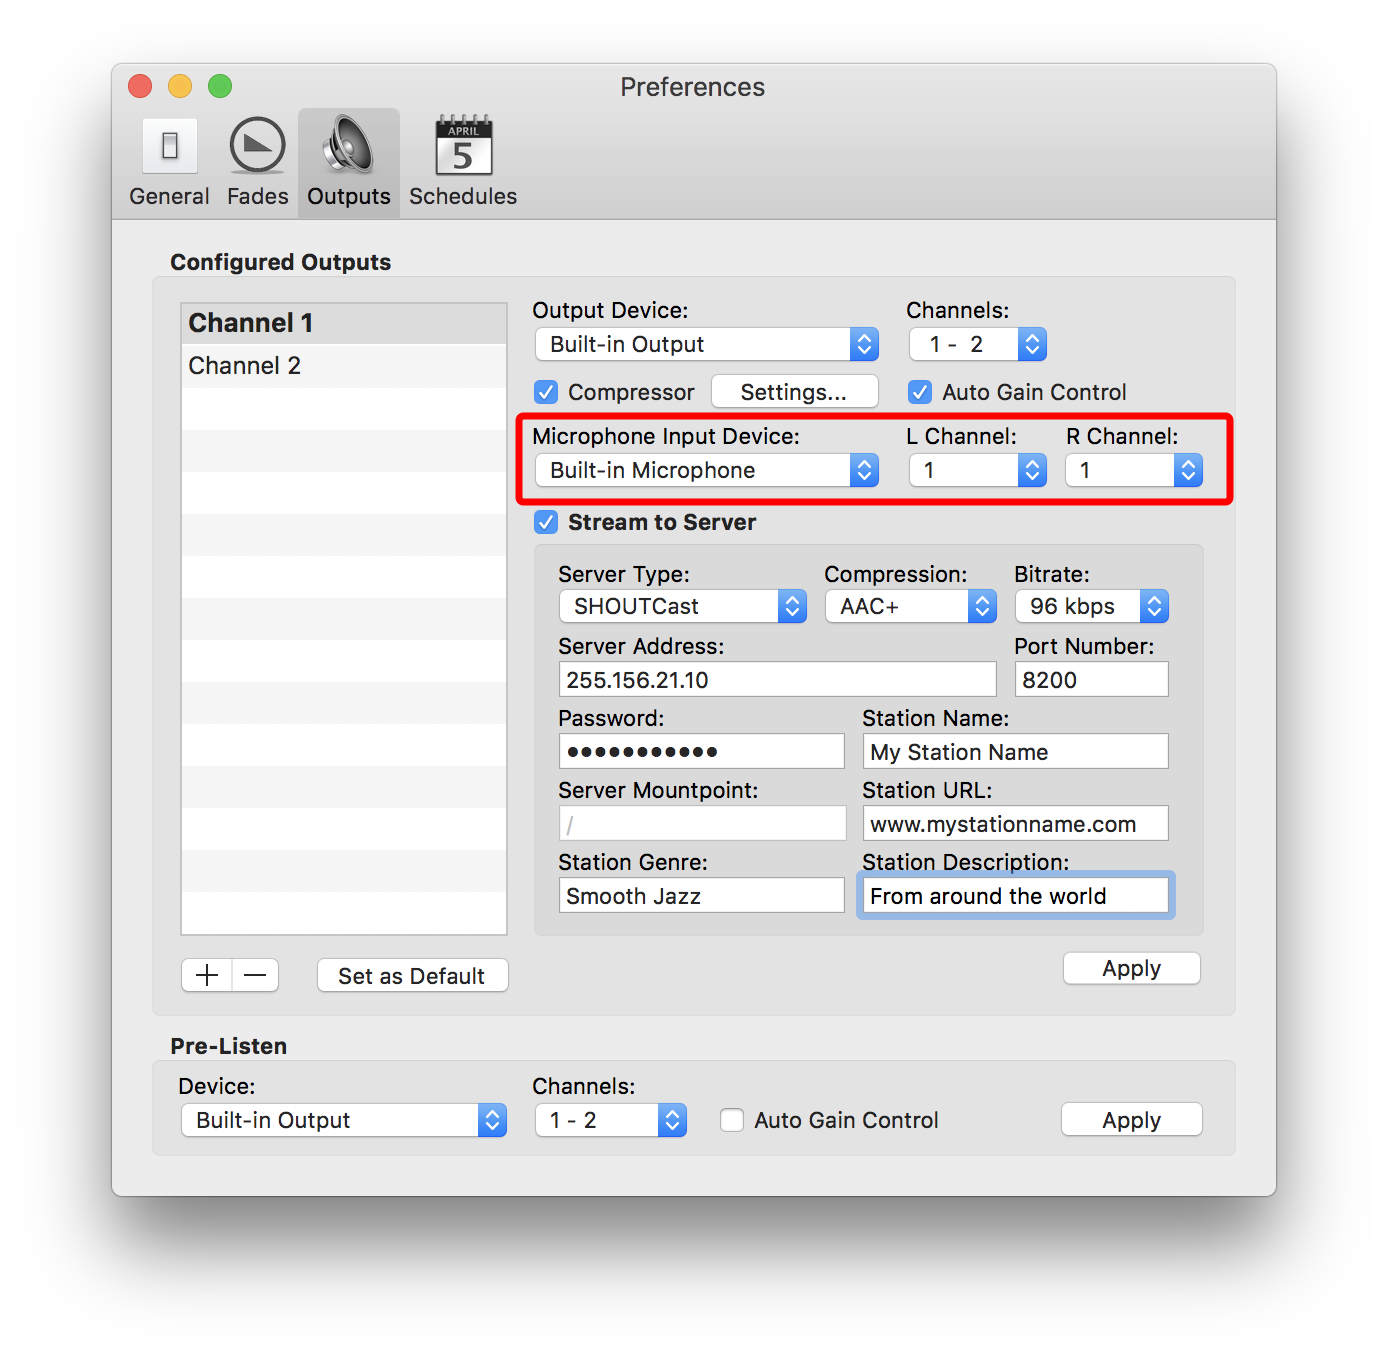
Then when you want to place a live comment, from the playlist click on the "microphone" button at the top center of the playlist:

When you speak you usually want the music to be lower. For that, just click on the "Ducking" icon:

The ducking level can be configured in the preferences > Fades.
Streaming
With OnTheAir Studio, you can stream using SHOUTcast or Icecast servers.
- SHOUTcast is the easiest one to use as it is basically a subscription that you pay for streaming your radio. SHOUTcast is just a directory (like Google), so you need to use a server that is compatible with the SHOUTcast or Icecast protocols. We have made most of our tests with a company called "Wavestreaming" and we found their services to be reliable and not too expensive. Generally, they will charge according to the maximum number of listeners you want to allow
- Icecast is an application that you have to install on a server and your own server will do the streaming. There will be no subscription but you will have to do the server yourself, host it on a computer, etc...
SHOUTcast
Order a "SHOUTcast" package according to your needs from a company like wavestreaming.com or anyone else who provides this service. It is important to select a package for SHOUTcast compatibility. If you need assistance with this, let me know.
Once you have your credentials to login to the server, email them to me and I'll explain how to configure OnTheAir Studio to stream directly to the server. They'll also tell you how your listeners will be able to listen to your station.
You can enter all that in the OnTheAir Studio Outputs preferences:
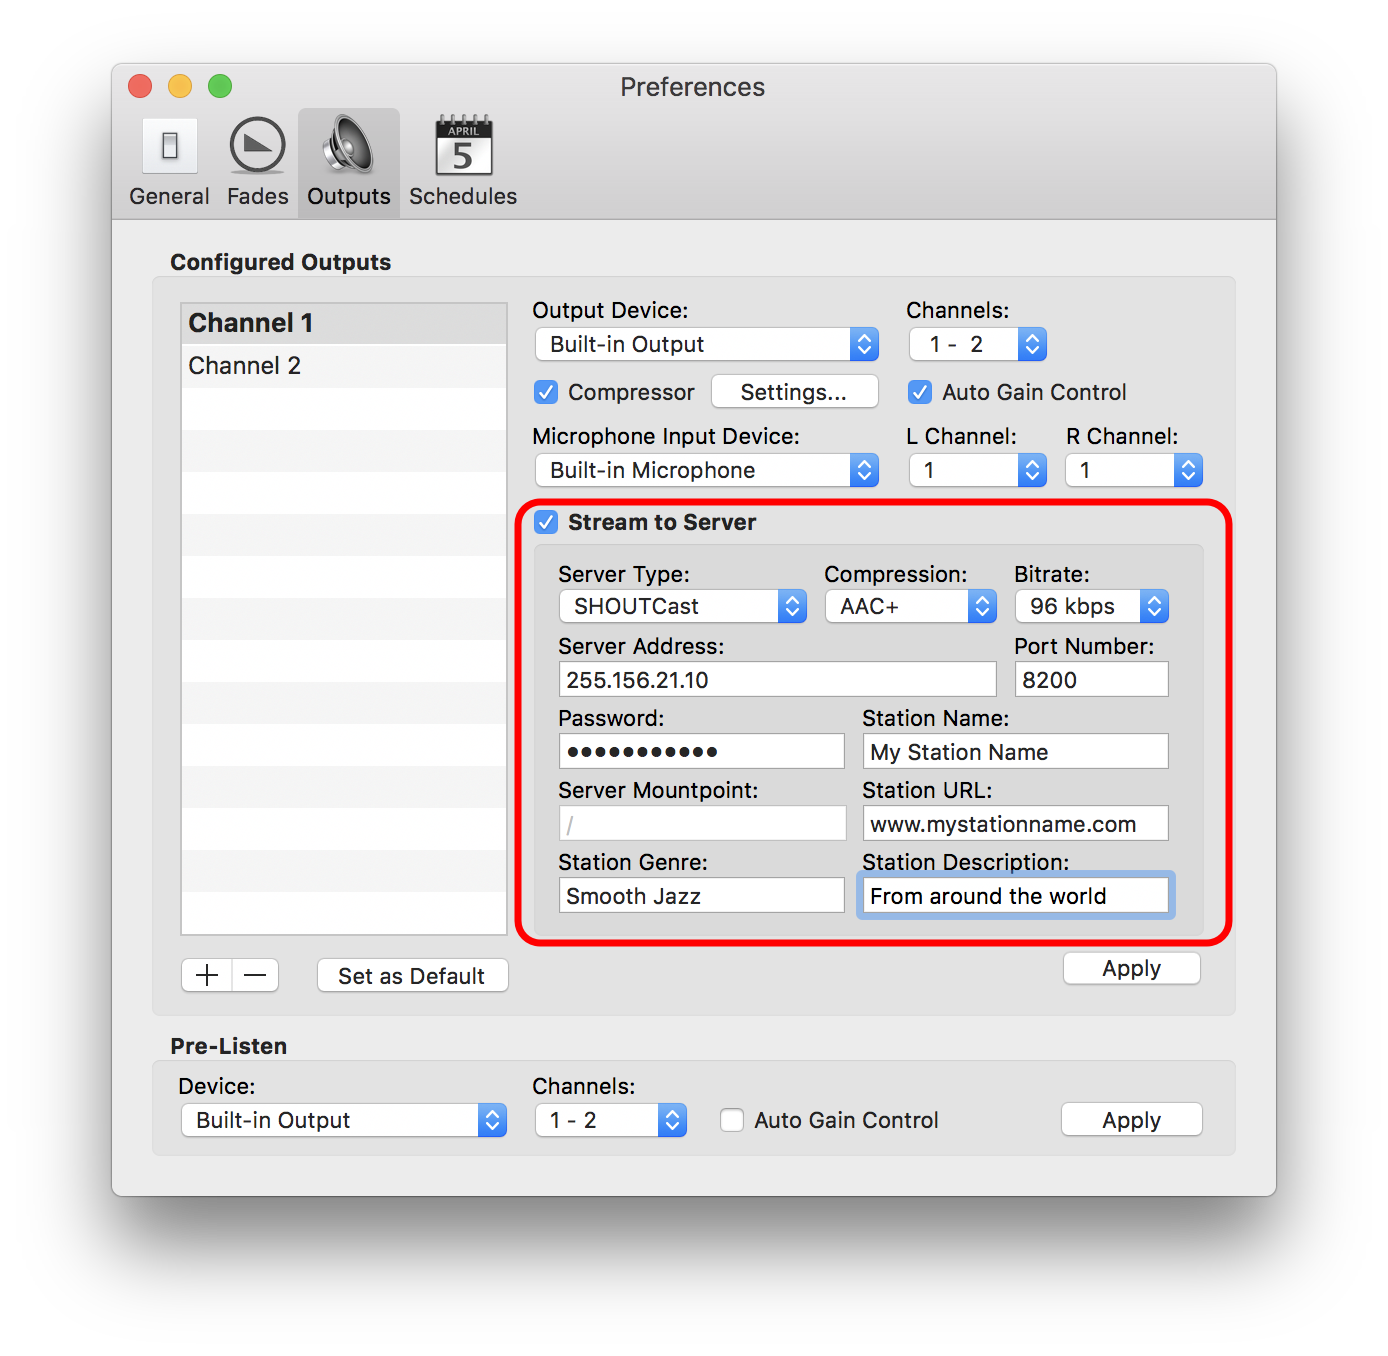
Here is what you will enter, for all types of servers:
- Server Type: choose between SHOUTcast or Icecast
- Compression and Bitrate: choose between AAC+ and MP3, as well as the bitrate. Check with your server what it can support. As some servers have limitations in terms of codec and bitrate supported.
- Server Address, port number and password: are information that should have been sent to you by email when you subscribed to a SHOUTcast service
- Server Mountpoint: is only for Icecast servers
- Station URL: is the URL where your listeners can listen to your radio
- Station Genre and Description: this will help listeners find you as this will be listed in the SHOUTcast directory
Don't forget to click on "Apply" when done. Once it is configured, everything you play in OnTheAir Studio will be streamed to your SHOUTcast station.
Icecast
Streaming with Icecast requires more knowledge than with SHOUTcast. Indeed, you will have to configure and setup an Icecast server yourself. There is a lot of information available on the Icecast website.
Once your server is properly configured, then in OnTheAir Studio, the setup will be roughly the same. The only difference here compared to SHOUTcast is that you will also have to set a "Server Mountpoint", which is the folder where your stream will be stored on your server.
Comments
0 comments
Please sign in to leave a comment.